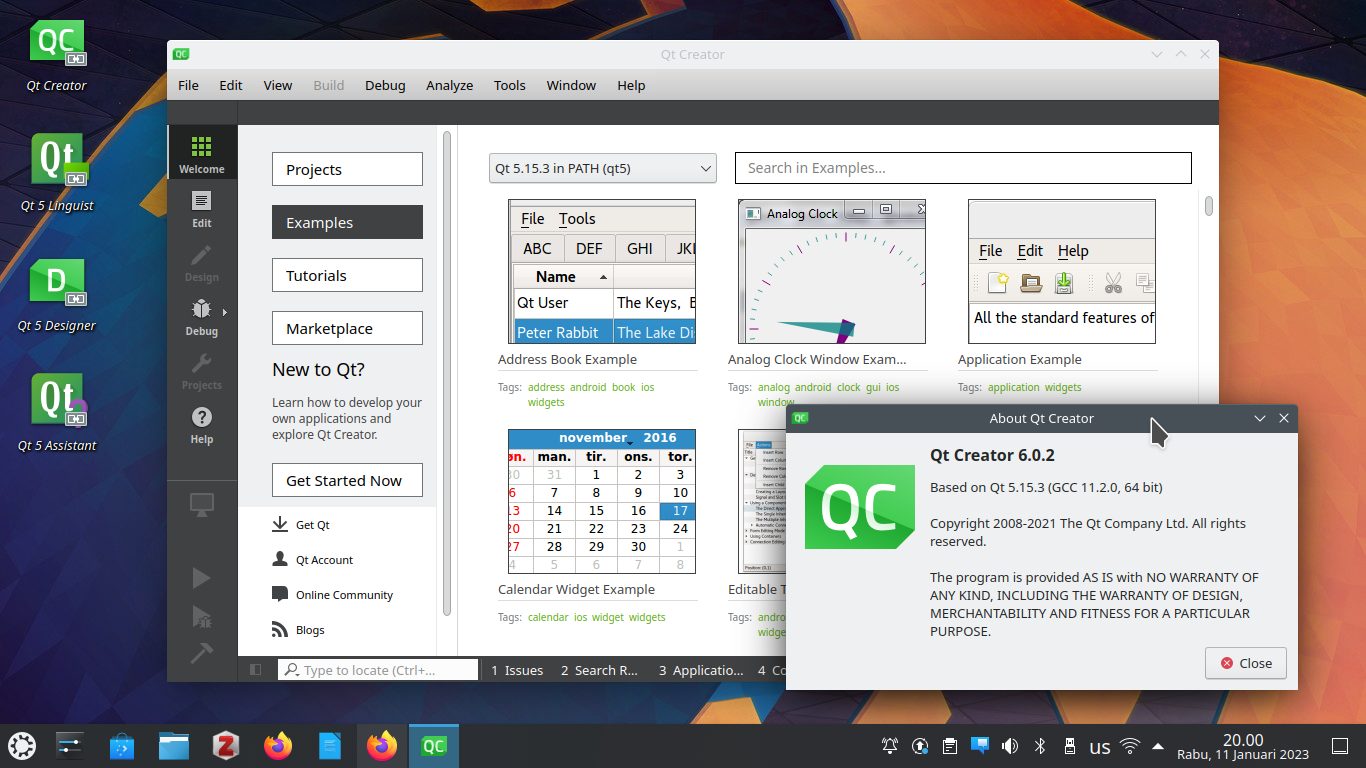
Qt Software Development Kit is a free software licensed, world-class grade full-featured programming framework and tools to create cross-platform graphical user interface applications in C++ language. Examples of great software built using Qt include Kubuntu, KDE, and Telegram. This tutorial will help you install Qt SDK on Ubuntu and Kubuntu 22.04 LTS Jammy Jellyfish. With this, you can start developing applications with a lot of code examples, drag and drop techniques, accompanied with complete the famous Qt's documentation & tutorials. Now let's setup!
Subscribe to UbuntuBuzz Telegram Channel to get article updates.
The Goal
Our goal is to have required Qt SDK framework and software in our computer. When opening the start menu, finding Qt 5 should show you that Qt Creator and other programs are all available. Also, this means that the compiler GNU G++ is installed although not visible there.
Setup Compiler
Firstly, install the required C++ compiler named GNU g++.
$ sudo apt-get install g++
Setup Qt SDK
Secondly, install the rest of Qt Software Development Kit.
$ sudo apt-get install qtbase5-dev qt5-qmake qtcreator qtbase5-examples qtbase5-doc-html
- qtbase5-dev package contains the header development files used for building Qt 5 applications.
- qt5-qmake package contains the Qt 5 qmake, a tool that helps simplify the build process for development project across different platforms.
- qtcreator package contains integrated development environment (IDE) for Qt. It features Rapid Application Development (RAD) that allows developers to built graphical user interface quickly by drag and drop.
- qtbase5-examples package contains Qt base 5 examples.
- qtbase5-doc-html package contains the HTML documentation for the Qt 5 base libraries.
Check Your Installation
1) Find and run Qt Creator from your start menu. You should see Qt Creator running on your screen.
2) Type and run $ g++ --version on your Terminal. You should see your computer answers with messages like the following.
master@master:~$ g++ --version
g++ (Ubuntu 11.3.0-1ubuntu1~22.04) 11.3.0
Copyright (C) 2021 Free Software Foundation, Inc.
This is free software; see the source for copying conditions.  There is NO warranty; not even for MERCHANTABILITY or FITNESS FOR A PARTICULAR PURPOSE.

master@master:~$
Check Other Qt SDK Applications:
Qt Assistant, the tool for viewing on-line documentation in Qt help file format.
Qt Linguist, the tool for adding translations to Qt applications.
Create a Sample Program
To check whether your Qt SDK installation is correct, the obvious way is to try to create a sample program then built and run it. We pick Image Viewer Example here.
1. Run Qt Creator.
2. Open Examples. You will see a lot of examples offered.
3. Select Image Viewer Example.
4. A dialog will as you Copy project to writable location? and answer with Copy Project and open into a directory you see fit.
5. A project configuration 'Configure Project' and a documentation window 'Image Viewer Example' of this program will show. You can close the documentation and click Configure Project button on Qt Creator window.
6. Program is displayed and ready to edit.
7. Switch the build option to "Release" instead of "Debug" to the left panel if didn't.
8. Click Run (green play button) to the left.
9. Program will be compiled by the computer and immediately run. You can observe it creates a new window with menubar of File, Edit, View, and Help.
10. For this example program, you can go to File > Open > pick a picture > it views the picture. If you can follow until this step, it means everything is OK and you can start coding.
Create New Project
To create a new program, you create a new project in Qt Creator.
1. Run Qt Creator.
2. File > New File or Project > New dialog will show.
3. Select Qt Widgets Application.
4. Select project location in a directory you wish and name it as you see fit.
5. Select built system qmake.
6. Continue to accept program files with .cpp .h and .ui extensions.
7. Continue to determine a language translation choice (optional).
8. Continue to select kit or simply accept the default one "Desktop Kit".
9. Continue to select project management / version control (optional).
10. Finish.
11. A new C++ Qt project will show and is ready to edit.
To develop using the UI designer (also called RAD), double click the mainwindow.ui under your project directory or click Design to the left panel.
This article is licensed under CC BY-SA 3.0.
Originally posted here: https://ift.tt/ePvAMh6


![[block]](https://blogger.googleusercontent.com/img/a/AVvXsEhqwtwKOqToFfTXuKKCf_usr3ZGCN7rLPI7YIO0gztuaKqYRTzTvgijecYBhIRpO_GYemx3mXmwZTBAjfvfgRu2ze_ALfVjkfvM9JkAYDY-CRFQuU2gg0fdMtHDBjMiRoScYBYSzq-_E7jSCJ9Wnpy7m0PkZuqgCxG4bBk2j1qtQN-NinJLta2xKqiohQ=w400-h339)


0 comments:
Post a Comment