Xbox consoles are fantastic for kids, but making sure they stay safe online should always be the number one priority.
Jump to:
- Updating the console
- Microsoft Accounts
- Xbox Profile
- Privacy settings
- Create a Gamertag
- Xbox Family Settings mobile app
- Further information
Thankfully, Microsoft and Xbox provide some incredible tools to help control and monitor your kid's experiences on Xbox Live, which can be a little chaotic at times.
Here are some tips and tricks for getting the most out of Xbox for parents and those of us buying consoles for younger relatives! Do note, most of these restrictions will carry across to Windows 10 PCs as well when connected to the child's Microsoft account.
Related: How to clean Xbox controllers properly
Consider updating it before gifting it
First thing's first, you'll need to update that Xbox One! Providing the child in question won't mind, I highly advise anyone buying Xbox consoles this year to carefully remove it from the box and connect it to your home internet, following the instructions bundled in the box.
The Xbox One has been continuously updated since launch, and the unit you receive might not be fully up to date. The patches can be gigabytes in size, and give your new console tons of extra features, but it can take a long time to update and install, especially if you're on a slower connection.
To make sure the day isn't spoiled by long update times, consider setting it up early, then re-boxing it after the updates are complete.
Set up Microsoft Accounts for you and the lucky kid(s)
To ensure you're ready to go on Xbox Live, make sure you create a Microsoft Account for you and your child. If you have an Xbox 360 account, an Outlook.com account, or a Hotmail.com account, you already have a Microsoft Account ready to go. Follow the steps below for a guide on how to set-up a new child under your Microsoft Account.
- Navigate to the Microsoft Account Family Center using this link.
- Sign in using your Microsoft Account that you intend to use on your Xbox.
-
Select Add a Child and sign in using their email address. Note: You can create a Microsoft Account for your child at this link.
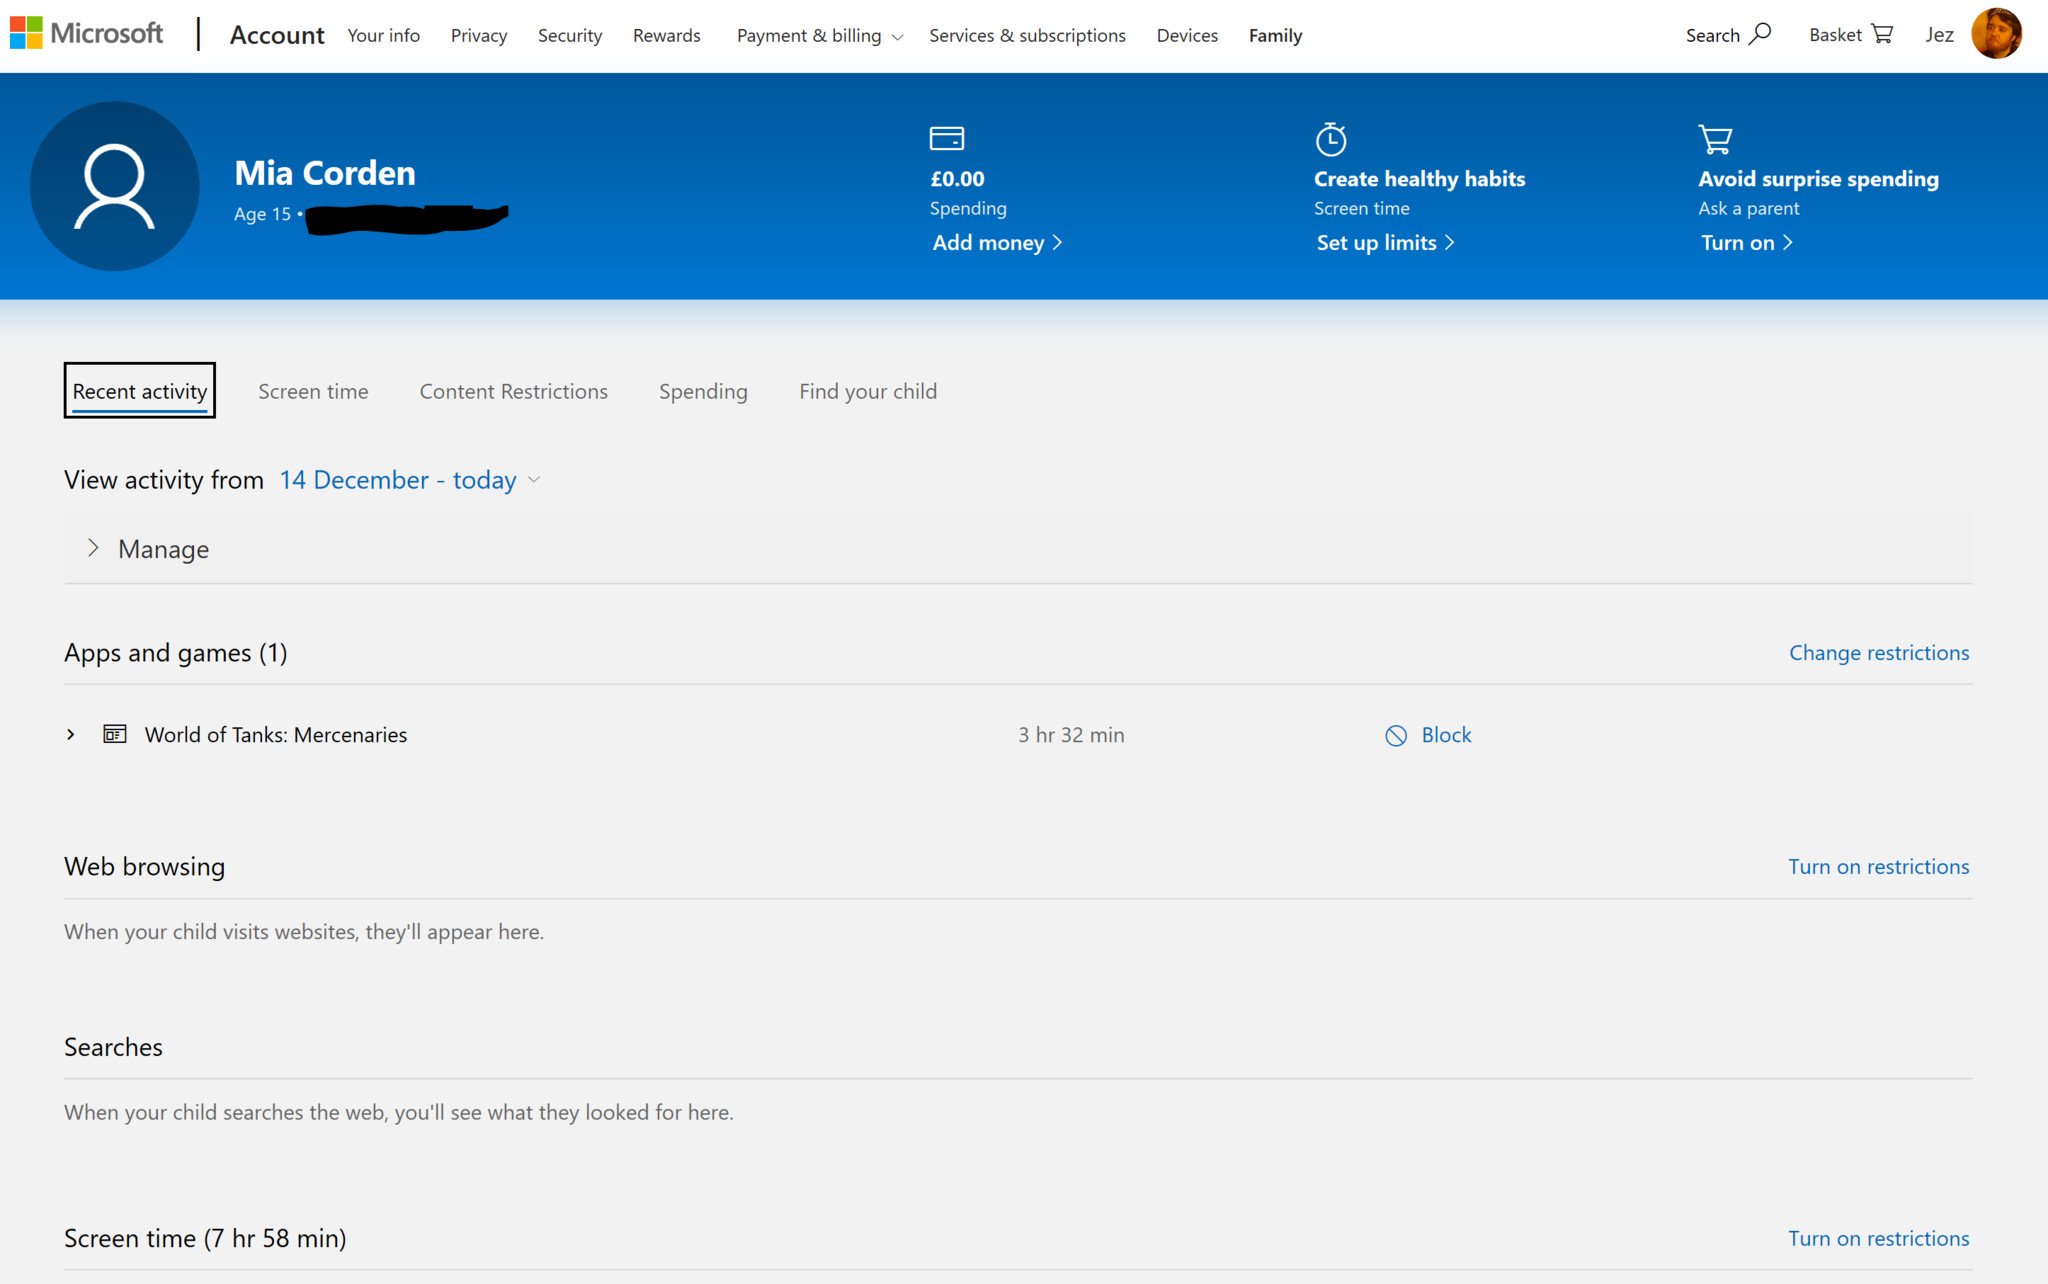
- Once added, you can now customize their experience across the Windows 10 device family. From here, you can select the child and place various restrictions to tailor their experience on Xbox and Windows 10.
- Select Activity Reporting to be sent emails detailing how your child uses their Xbox and other Windows 10 devices.
- Select Web Browsing to blanket block all adult websites in Microsoft Edge, or go even further and allow only specific websites to work.
- Select Apps, Games & Media to tailor what age-rated content to which your child has access.
- Select Screen Time to schedule and limit the amount of time your child can spend with their devices.
- Select Purchase & Spending to add credit to your child's account so that they can spend it on approved content on Windows 10 and Xbox.
- Select Find Your Child to track the location of a Windows 10 Mobile device connected to their account.
Set up an Xbox Profile for your child
Before we can customize your child's experience on Xbox Live's social features, you will need to sign in to your new Xbox console as the parent.
When booting up your console for the first time, it will prompt you for your email and password, create a Gamertag for you, and you'll be ready to go. In case you didn't know, Gamertags are your username on Xbox Live. You can use this username to share an anonymized identity online, which is ideal for youngsters on the network. To get your child signed into your new Xbox console, follow these steps.
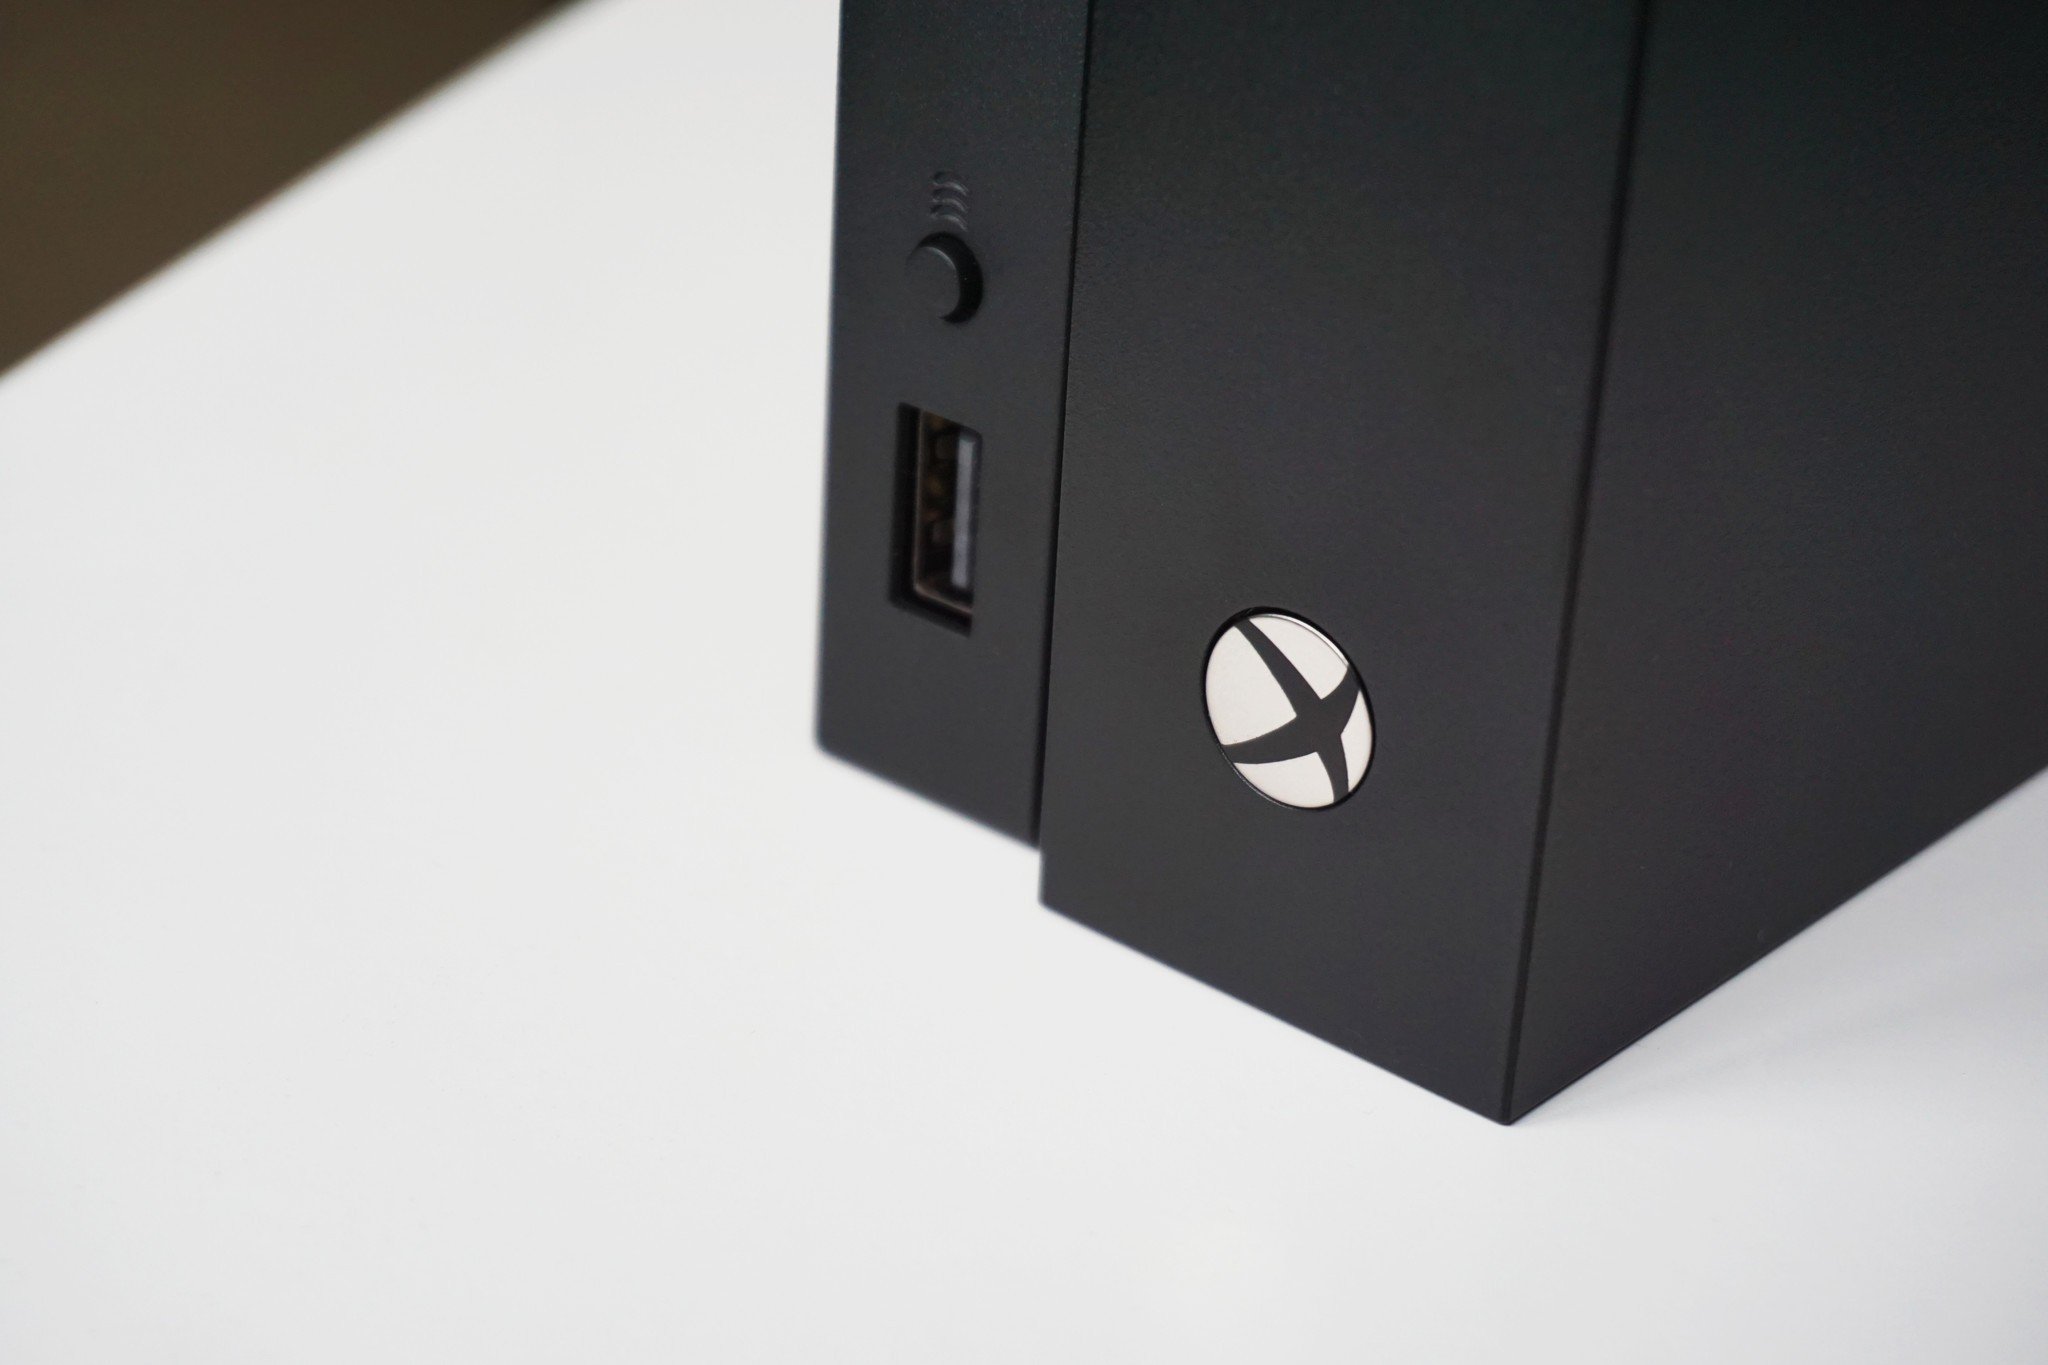
- Press the Xbox button at the top-center of your controller to open the Guide menu.
-
Navigate with the right bumper across to the cogwheel icon.
-
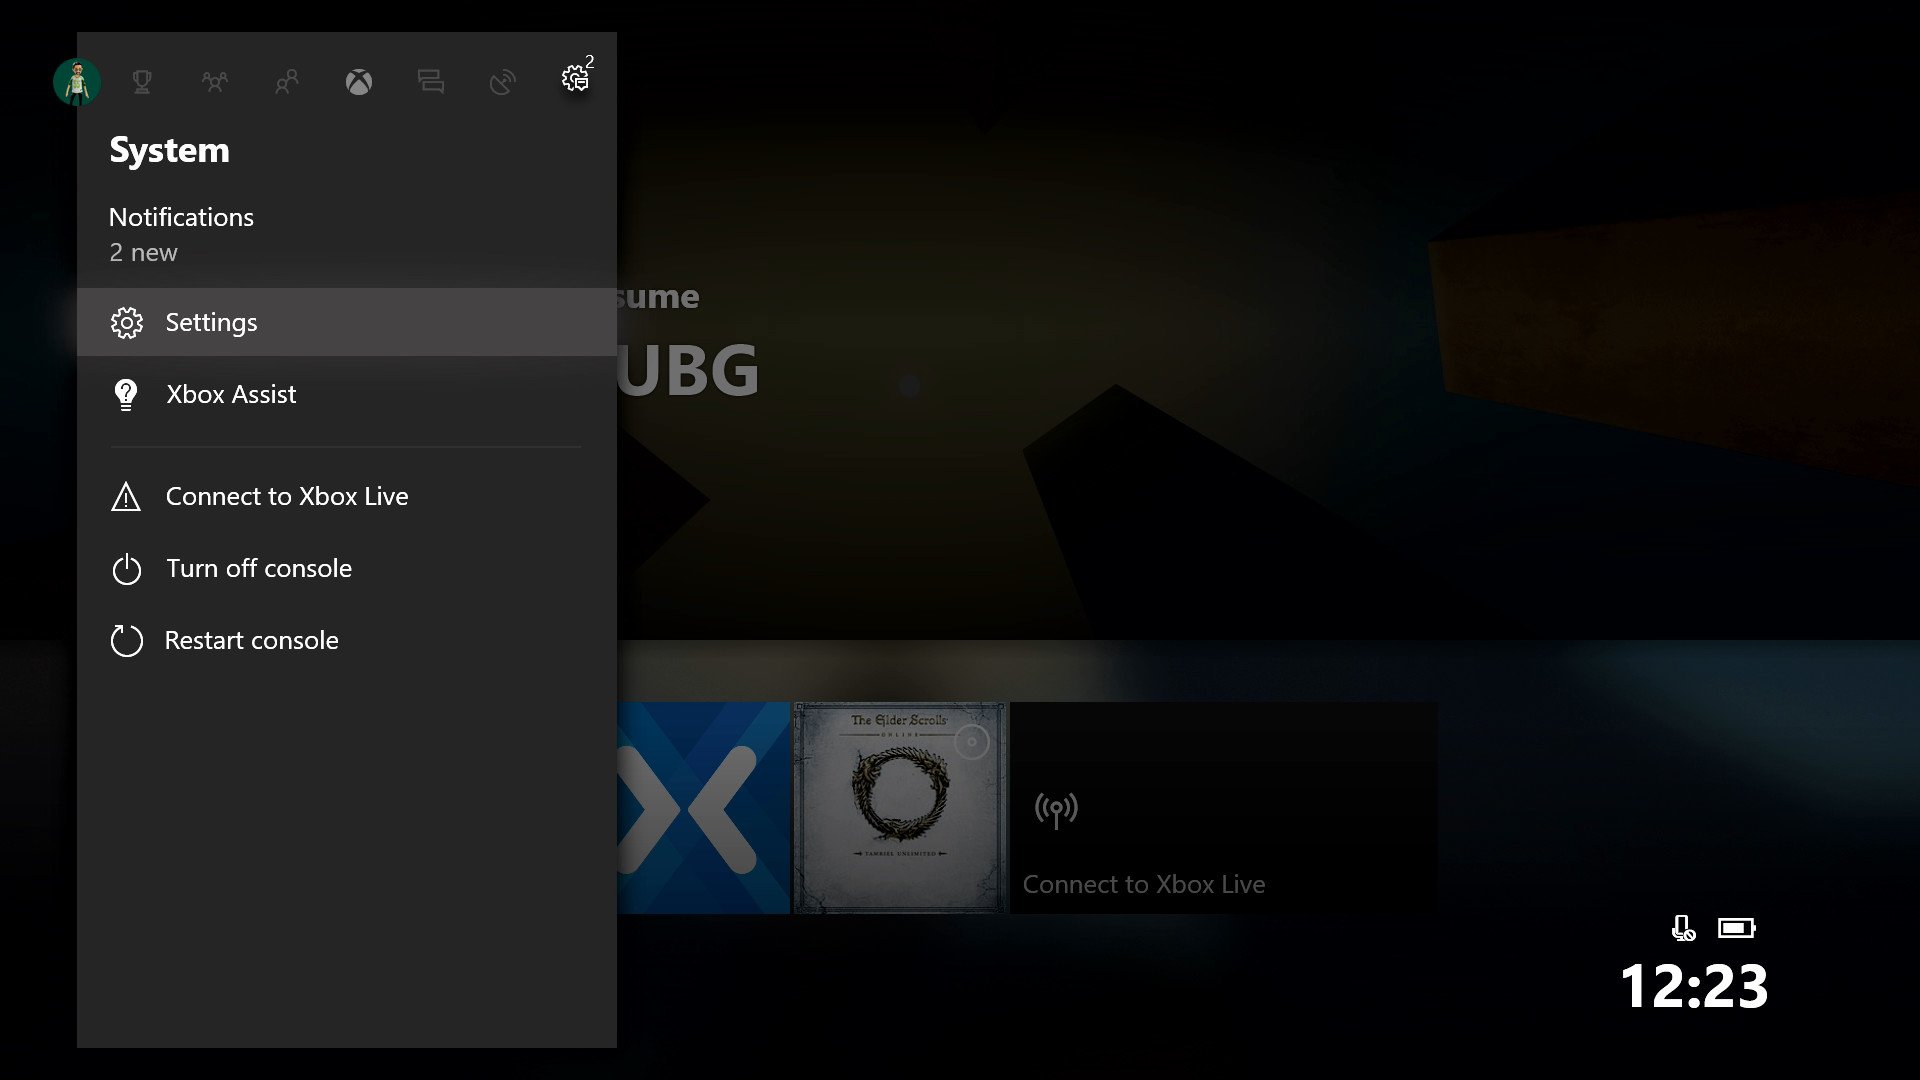
Select settings.
Note: "A" on the Xbox controller is near-universally considered the select button, whereas "B" will take you back to the previous option if you make a mistake.
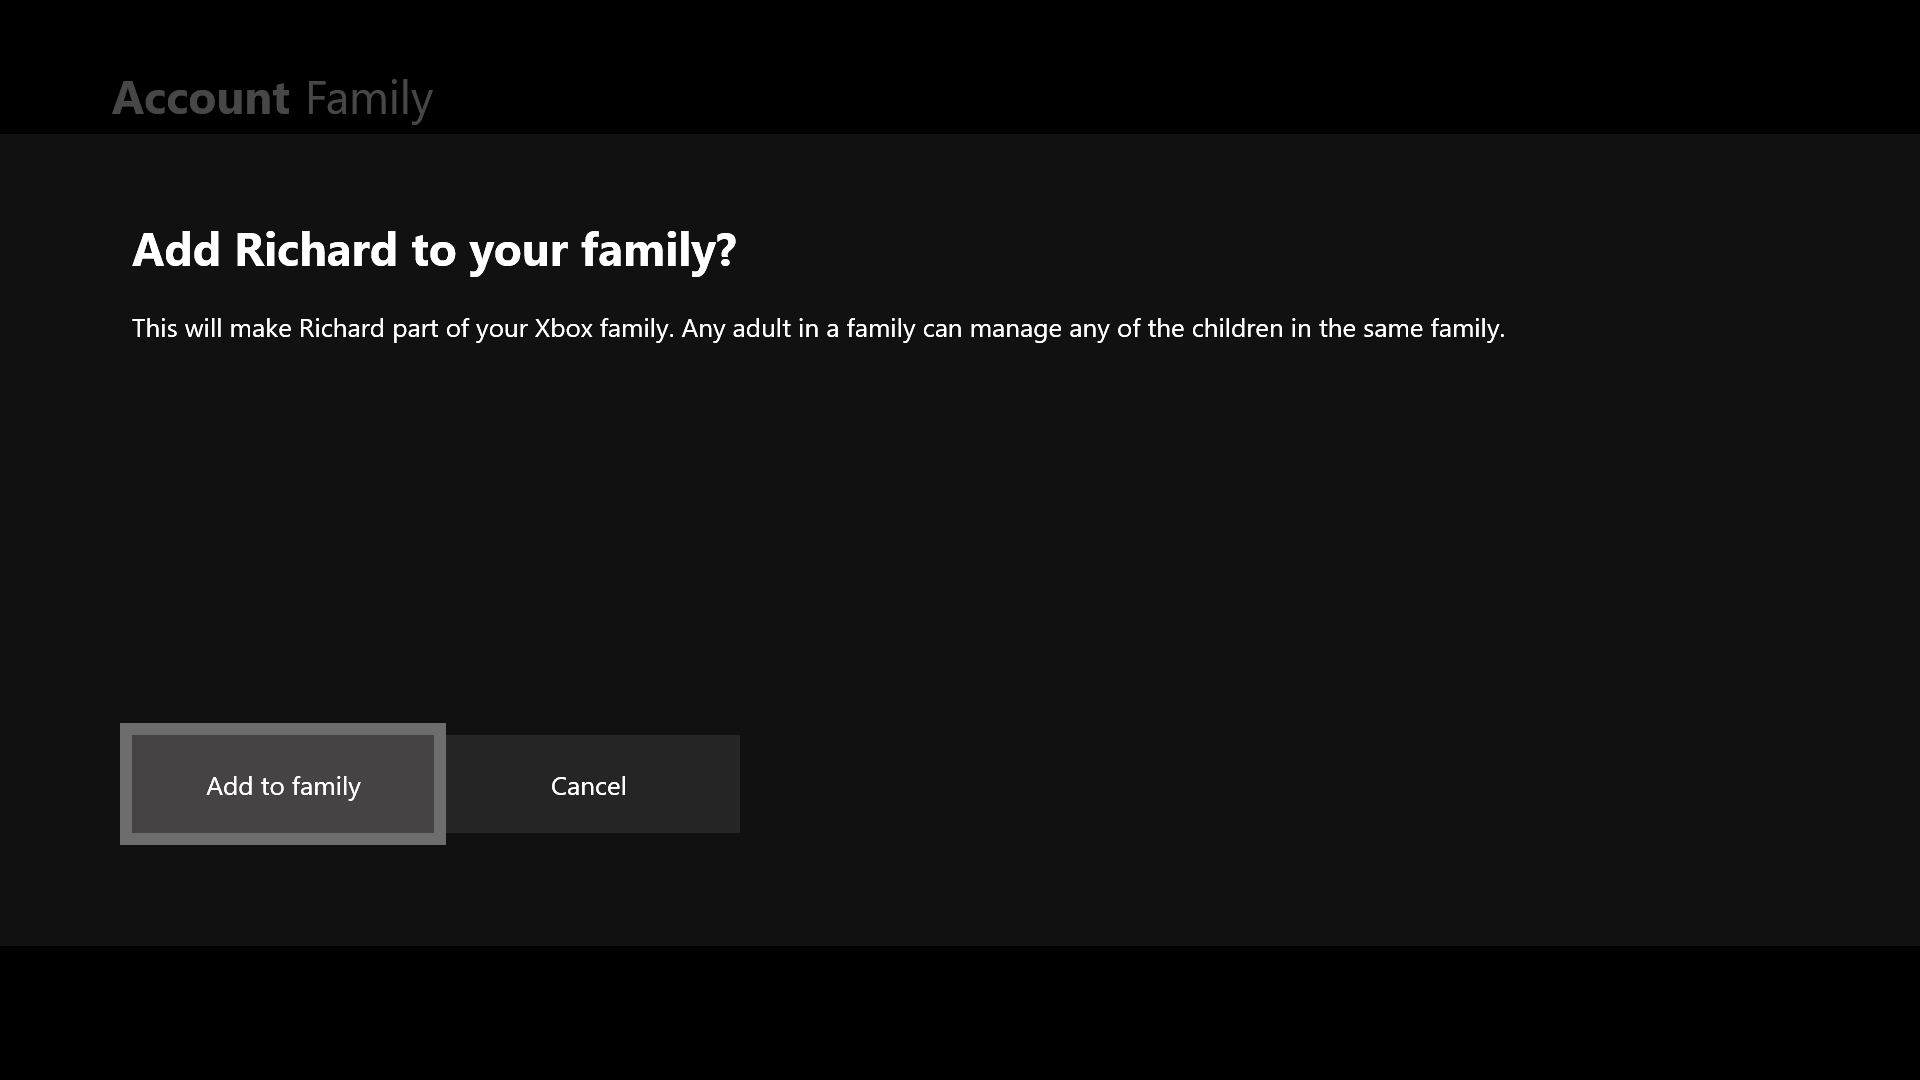
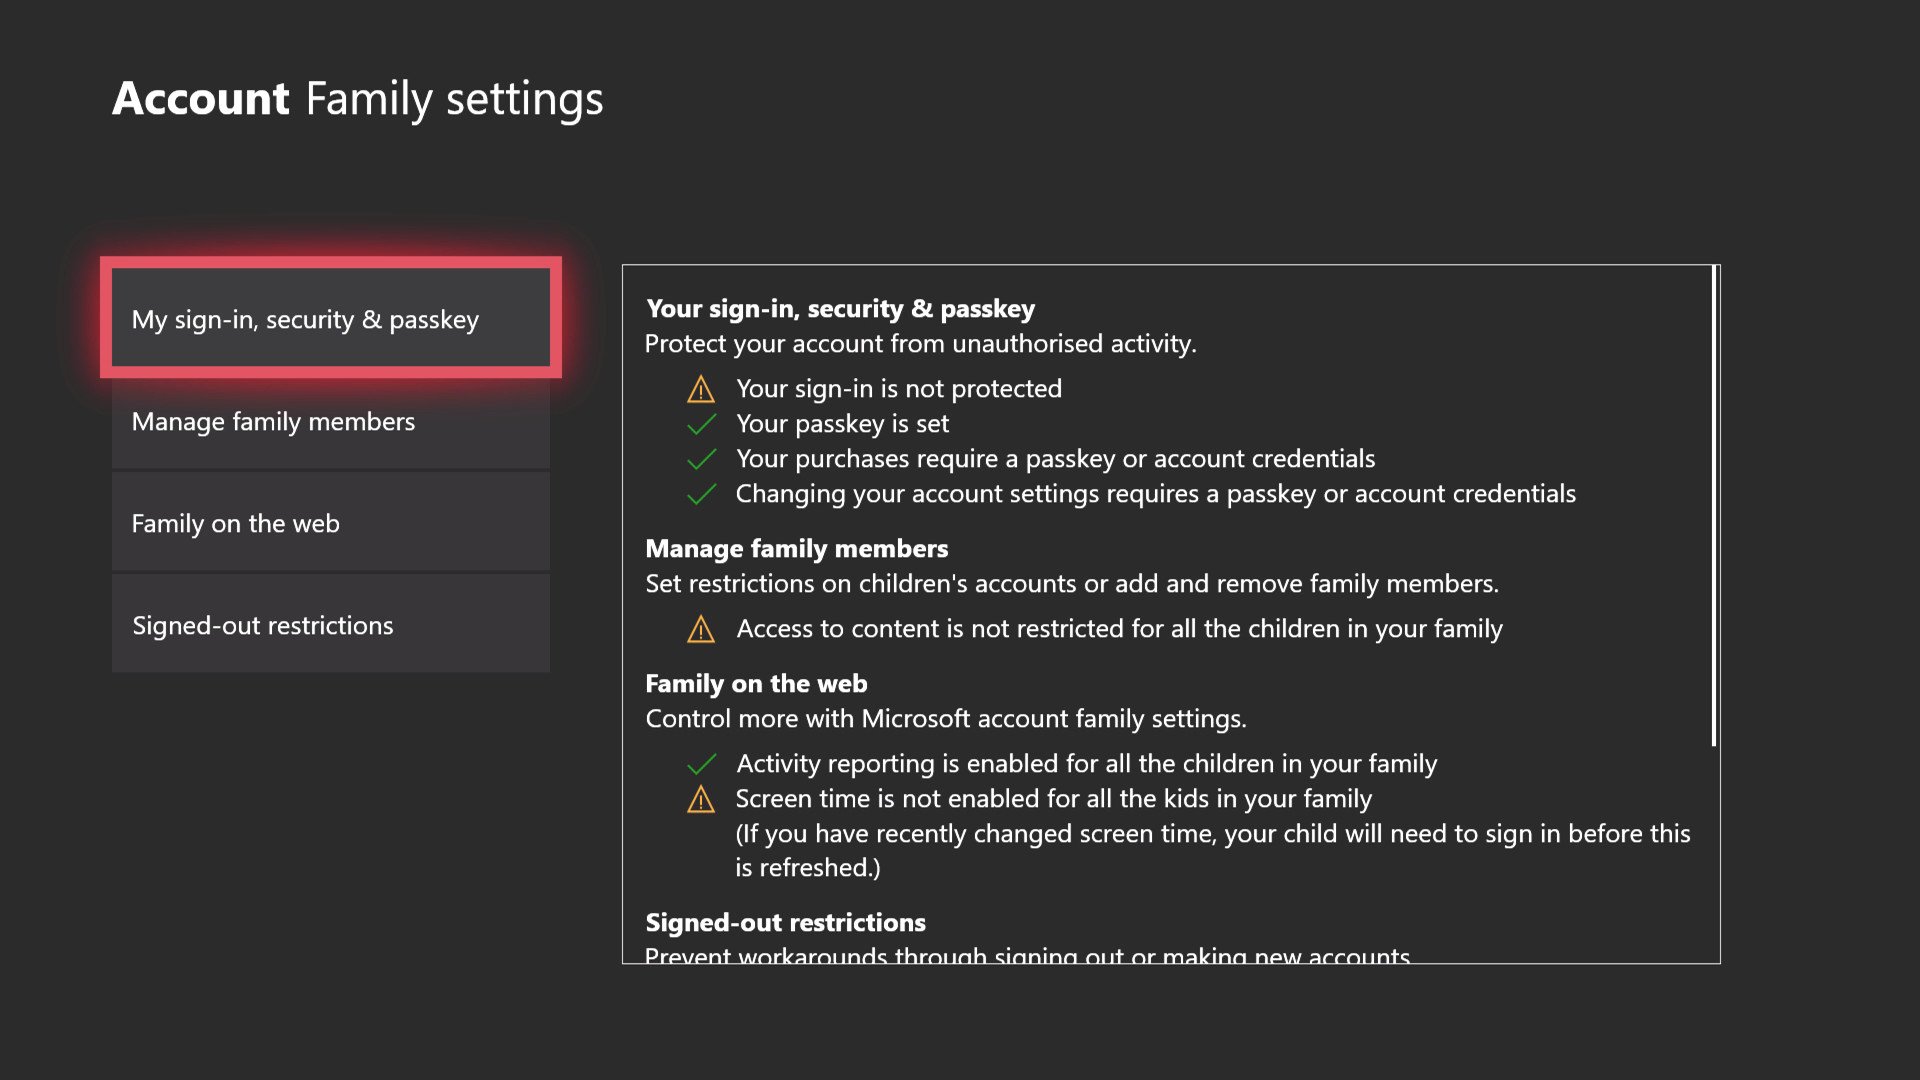
- Select Family under the Account section.
- Select Add to Family
- Select Add New.
- Sign in with your child's Microsoft Account and password. You will then be prompted to sign in as the parent.
-
Sign in with your Microsoft account and password.
Once the parent account has been signed in, your child will be designated a random Gamertag and offered security settings:
- No barriers allows anyone to sign in as the child, which might be less than ideal in scenarios with multiple children sharing the same Xbox.
- Ask for my passkey allows a child to set up a 6-figure code for buying things and changing settings. Parents still have ultimate control.
- Lock it down allows the child to require their Microsoft Account password for signing in, changing settings, and spending Xbox credit.
- Once you have selected security settings, Microsoft offers some information about Gamerpics and Gamertags, before allowing your child to customize their Xbox's accent color.
-
You will then be offered the option of purchasing Xbox Live Gold, which is required for online play, receiving discounts, in addition to four free games per month. You can also decline.
Note: Only one signed-in user needs an Xbox Live Gold subscription for everybody on that Xbox to enjoy the benefits. It's probably best to manage this on your parental account.
- The child can now sign-in by tapping the Xbox button to open the Guide, and moving to the far left by using the left bumper button.
- Select the child's profile with the "A" button to sign in.
Before creating their Gamertag, let's switch back into your parent account to double-check that your child's privacy and access settings have been correctly configured.
Customize your child's Xbox privacy and content settings
Your child's Microsoft Account will sync settings that you've set up previously on the web in the first section, and if you need to make further changes, you can do it either via your Xbox One or via the Microsoft Account Family settings found here. Be sure to bookmark it!
Alternatively, follow the steps below for information on how to customize your child's experience on Xbox Live.
- Sign in with your parental Microsoft Account (if you're already signed in, skip to Step 5).
- To do this, press the Xbox button at the top-center of your controller to open the Guide menu.
- Navigate to the sign-in menu at the top using the left bumper.
- Select your profile with the "A" button, then hit Switch profile.
- Press the Xbox button to open the Guide menu.
- Select the Settings cogwheel at the far right with the right bumper.
- Select Settings.
-
Select Family under the Account page.
- Select manage familly and find the child account you wish to customize.
- From here, you can cycle through various menus to fully customize what your child can do on their Xbox.
- Select Privacy & Online Safety then Xbox Live privacy to choose between Child, Teen, and Adult presets. The Child setting blocks non-friends from contacting the user, and the parent must approve friend requests. Teens can choose who they contact, while Adults have full access. Each setting gives more detail over what they do, but you can go nuclear by selecting View & Customize, giving you access to various new menus for blocking different Xbox Live features.
- Select App privacy to tailor what permissions apps have over your child's content on Windows 10 devices.
- From the main Privacy & Online Safety settings menu, select Access to content to decide what age-rated content your child can access.
- Select Web filtering to choose what websites children can access on Microsoft Edge on Windows 10 devices they are signed in to. You can further tailor these settings on the Microsoft Account Family settings page online.

Once you're happy with your child's privacy settings, it's time to move on to the next section and give them a Gamertag and a Gamerpic!
Create a Gamertag and set up a Gamerpic
Updating a Gamertag and Gamerpic!
With the boring stuff out of the way, you should encourage your child to select a Gamerpic and Gamertag of their own on the system. Depending on the privacy settings you've tailored above, the Gamertag will be used as their method for connecting with friends and sharing content on Xbox Live. The first change is free, but subsequent Gamertag changes cost money, so choose wisely!
- Sign in with your parental Microsoft Account (if you're already signed in, skip to Step 5).
- To do this, press the Xbox button at the top-center of your controller to open the Guide menu.
- Navigate to the sign-in menu at the top using the left bumper.
- Select your profile with the "A" button, then hit Switch profile.
- Press the Xbox button to open the Guide menu.
- Select My Profile.
- Select Customize Profile.
- Select your child's randomly generated Gamertag to create a new one.
- From this menu, you can also edit:
- Your location.
- A brief biographical description.
- Your Xbox color.
- You can also create a 3D Avatar and select a Gamerpic.
Note: You can return to this page at any time to change these settings.
Xbox Family Settings mobile app
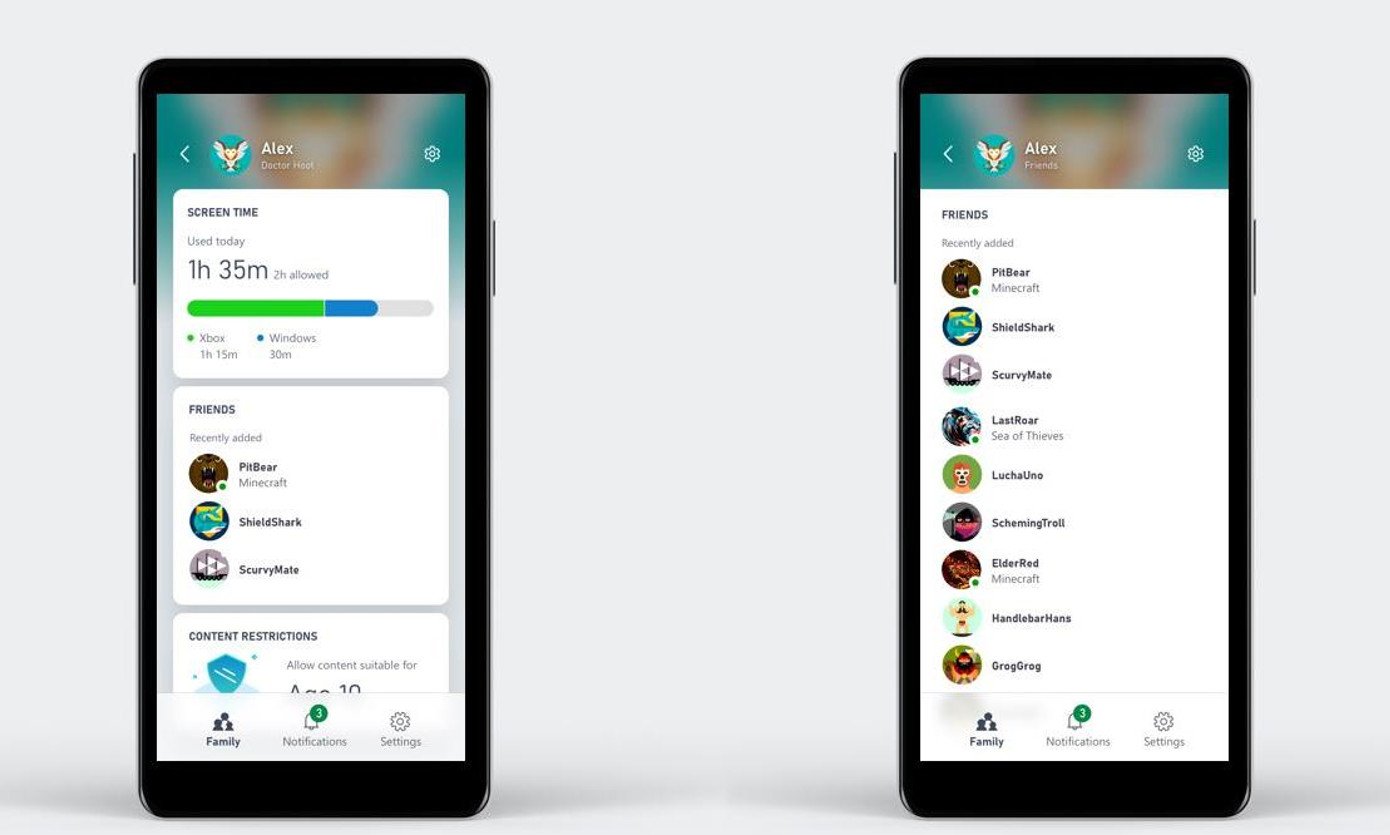
Microsoft has also recently introduced into preview the Xbox Family Settings app for iPhone and Android. The Android version can be downloaded by anyone from the Google Play Store while the iPhone version was only opened up to the first 10,000 applicants through Testflight.
It doesn't do anything you can't already do through the web portal as detailed above, but what it does (or will do when it's fully released) is allow you to apply and monitor settings and activity from your smartphone, removing the need to be in front of a PC.
It's still a work in progress but it's a pretty handy thing to have, and in conjunction with the main Family Safety app which is also in preview gives you access to everything you need wherever you are.
Portable monitoring
Xbox Family Settings preview
A convenient way to manage your family settings
Still in preview, this app from Microsoft will allow you on-the-go access to your family settings without the need to be at a PC.
Further information
For more information on how to use your Xbox One, refer to the guide below!





0 comments:
Post a Comment