System Restore can undo system changes to fix problems, and in this guide, we show you how to use the feature on Windows 10.
System Restore is a legacy feature built into Windows 10 that allows users to create a snapshot of the computer's current working state and save it as a "restore point" when important changes are detected. In the event of a critical problem after installing an update, driver, or program, or after modifying the system settings incorrectly with the Registry Editor or another tool, you can use a restore point to revert the device to an earlier point in time to fix the problem without losing your files.
Although this is a useful recovery tool, System Restore comes disabled by default, meaning that you have to enable it before the system can save restore points automatically or manually by you.
In this Windows 10 guide, we walk you through the steps to set up System Restore as well as the steps to recover from problems that may be affecting the normal operation of a computer.
- How to enable System Restore on Windows 10
- How to create a System Restore point on Windows 10
- How to recover using System Restore on Windows 10
How to enable System Restore on Windows 10
Windows 10 does not have System Restore turned on by default, and you must enable it manually within Control Panel.
To enable System Restore on Windows 10, use these steps:
- Open Start.
- Search for Create a restore point and click the top result to open the System Properties page.
- Under the "Protection Settings" section, select the main "System" drive.
-
Click the Configure button.
-
Select the Turn on system protection option.
Quick tip: Windows 10 can automatically manage the space. However, under the "Disk Space Usage" section, you can also use the slider to specify the storage amount to use for recovery. You will also find a Delete button, which you can use to remove all restore points, which can come in handy to free up space or want to start over with the recovery feature.
- Click the Apply button.
- Click the OK button.
Once you complete the steps, Windows 10 will automatically create a restore point when applying a new update or when specific system changes are made.
When configuring System Restore, know that this is not a feature you can enable globally. If you have additional hard drives, you must enable the protection feature manually on each one. Only remember that the feature is meant to undo settings changes. It's not a backup solution.
How to create a System Restore point on Windows 10
Once System Restore is enabled, it will create a checkpoint when it detects system changes automatically. However, if you plan to make configurations manually, you always want to create a restore point manually.
To create a restore point on Windows 10 manually, use these steps:
- Open Start.
- Search for Create a restore point, and click the top result to open the System Properties page.
-
Under the "Protection Settings" section, click the Create button.
-
Type a descriptive name for the restore point — for example, before modifying the Registry settings.
- Click the Create button.
- Click the Close button.
- Click the OK button.
- Click the Close button.
After you complete the steps, you should be able to undo system changes in the event that something happens while installing a new driver, program, or applying changes to the Registry.
How to recover using System Restore on Windows 10
If something unexpected happens after installing or modifying system settings, you can use System Restore to apply a restore point to undo the changes and fix the problem. You can complete this task from the Windows 10 desktop or the advanced startup settings if the computer no longer starts correctly.
Undo system changes from desktop
If you have access to the Windows 10 desktop, you can revert the system changes using these steps:
- Open Start.
- Search for Create a restore point, and click the top result to open the System Properties page.
-
Click the System Restore button.
Quick note: If the option is grayed out, it means that the system does not have any restore point available.
- Click the Next button.
-
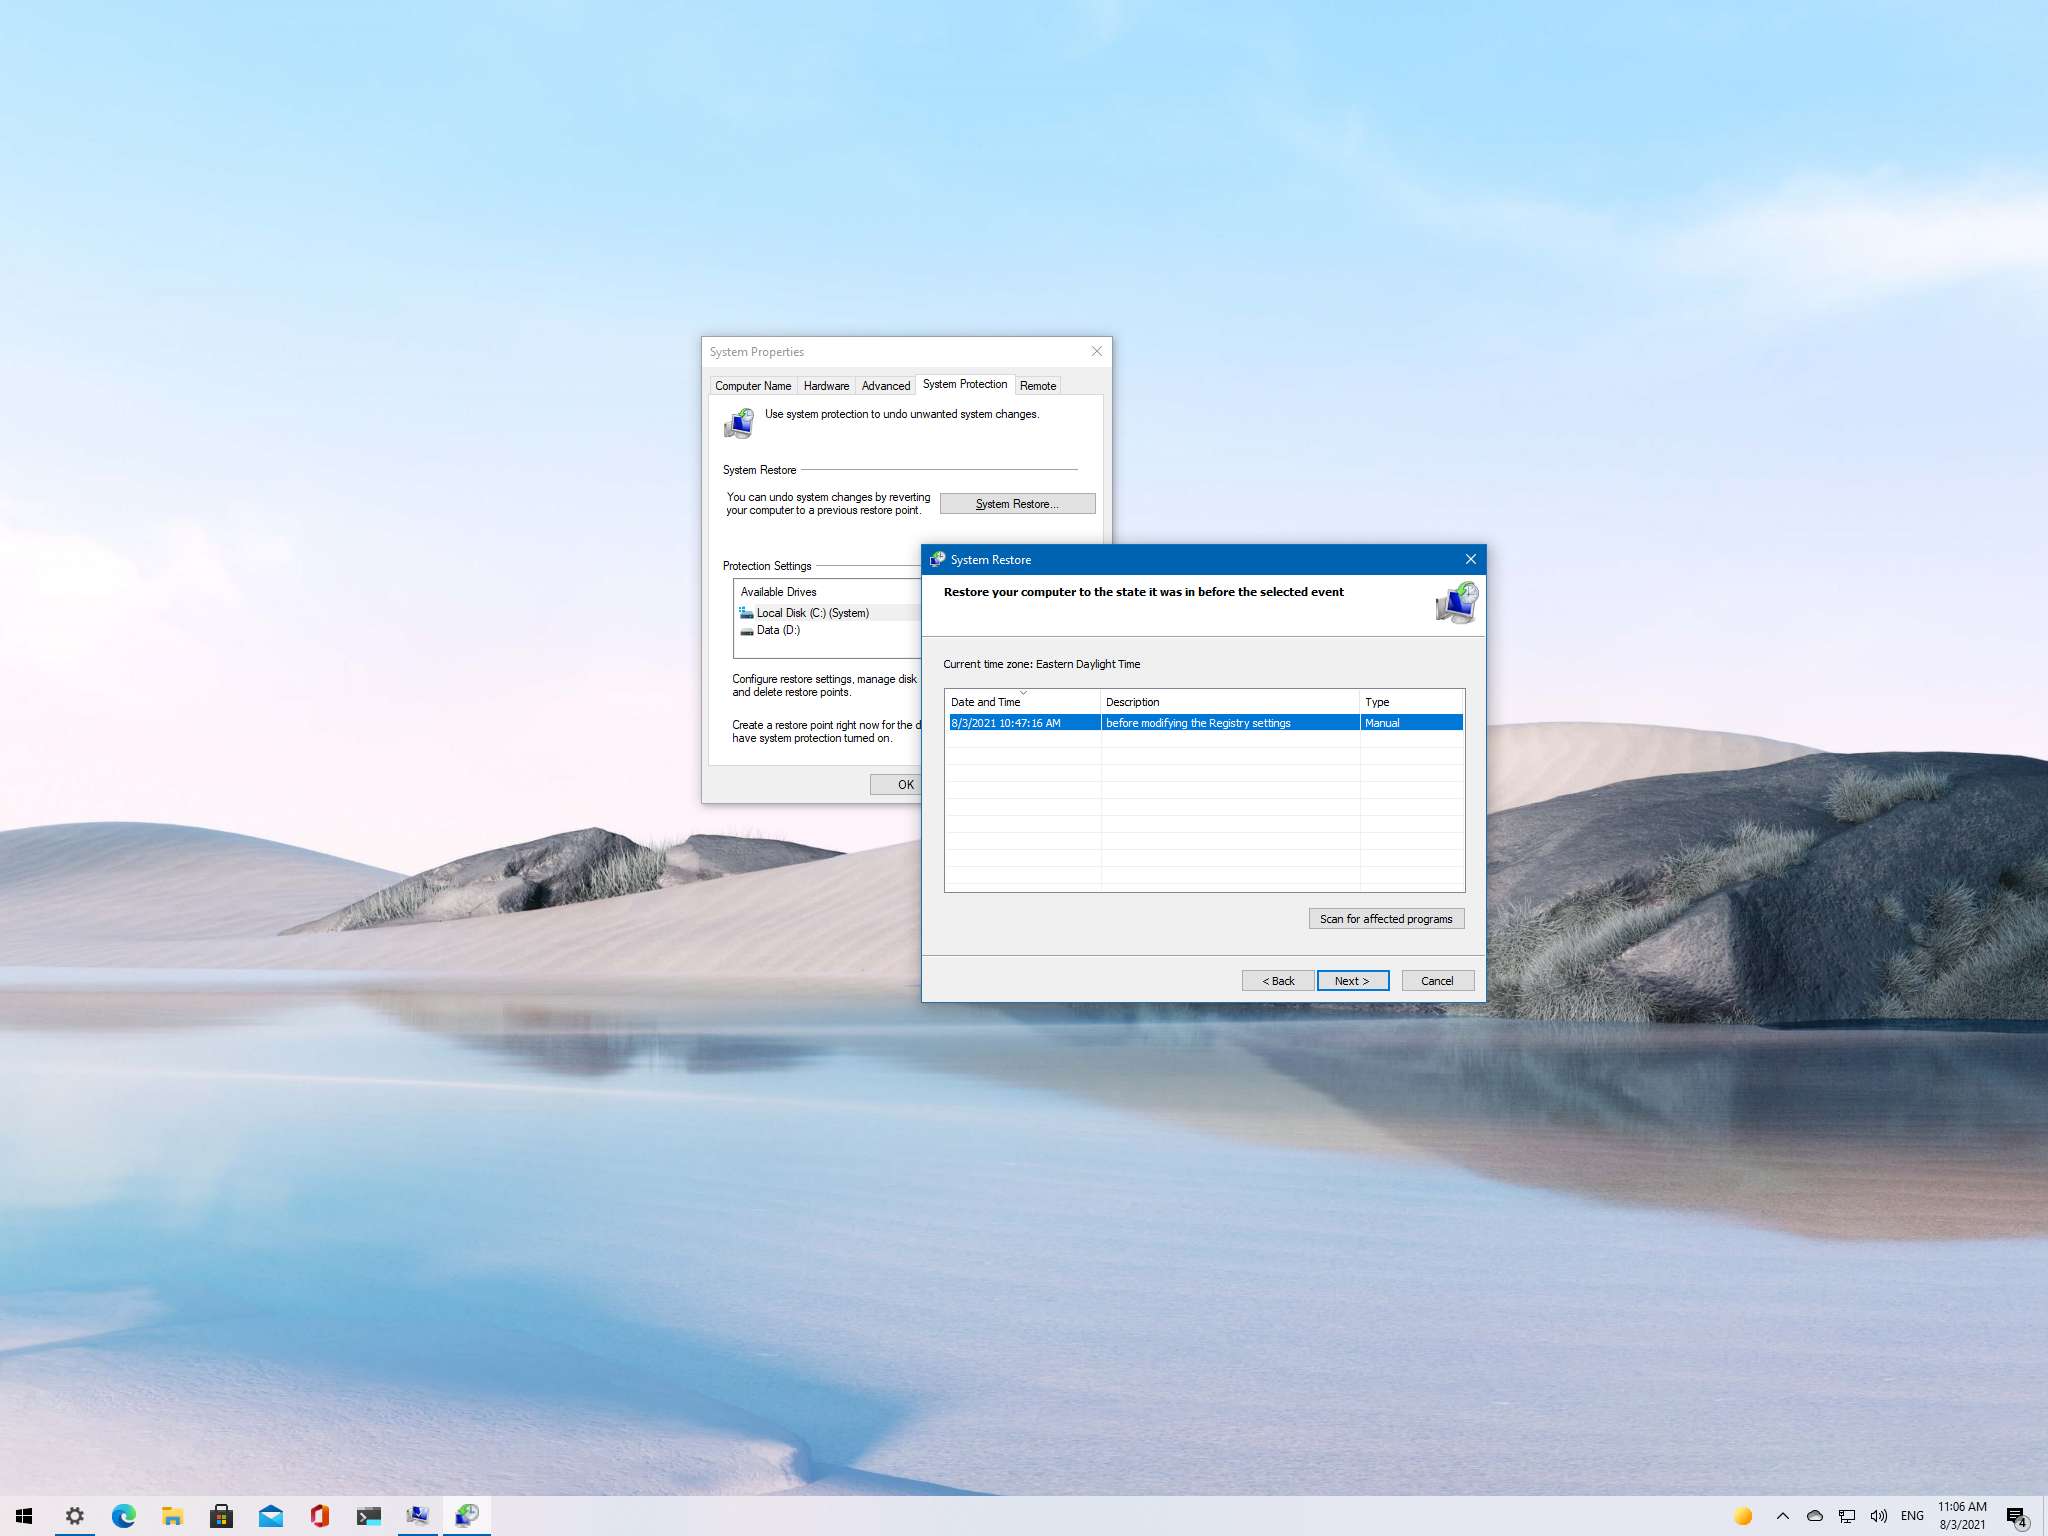
Select the restore point to undo changes and fix problems on Windows 10.
- Click the Scan for affected programs button to confirm the apps that will be removed because they were added after creating the restore point.
- Click the Close button.
- Click the Next button.
-
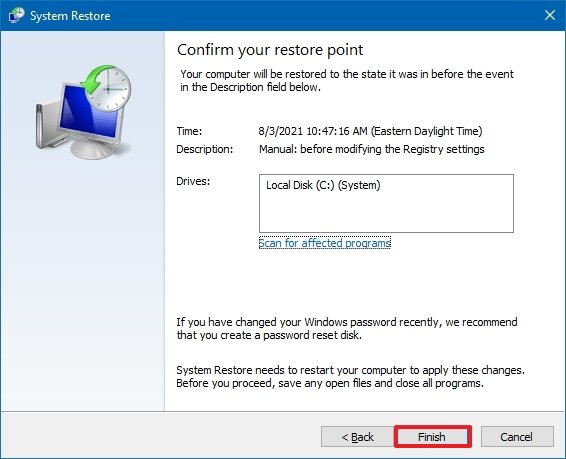
Click the Finish button.
Once you complete the steps, System Restore will apply the restore point returning the computer to the previous good working state. If one or more apps were affected, remember to reinstall them again after the recovery process.
Undo system changes from Advanced startup
If the computer does not start correctly, you can use Advanced startup settings to access the System Restore feature to recover your Windows 10 installation.
Access Advanced startup
To access the Windows 10 Advanced startup environment to use System Restore, use these steps:
- Start the device.
-
As soon as the Windows logo appears on the screen, press the power button to interrupt the boot sequence.
- Repeat steps No. 1 and 2 two more times. (Or until the device boots into the recovery experience.)
After you complete the steps, you can use the steps below to revert system changes with System Restore.
Alternatively, if you cannot access the recovery environment with the above steps, you can start the computer with a Windows 10 installation media, and while in the "Windows Setup" experience, click the Next button, click the Repair your computer button from the bottom-left corner, and then use the steps below.
Undo changes with System Restore
To use System Restore from the Advanced startup environment on Windows 10, use these steps:
-
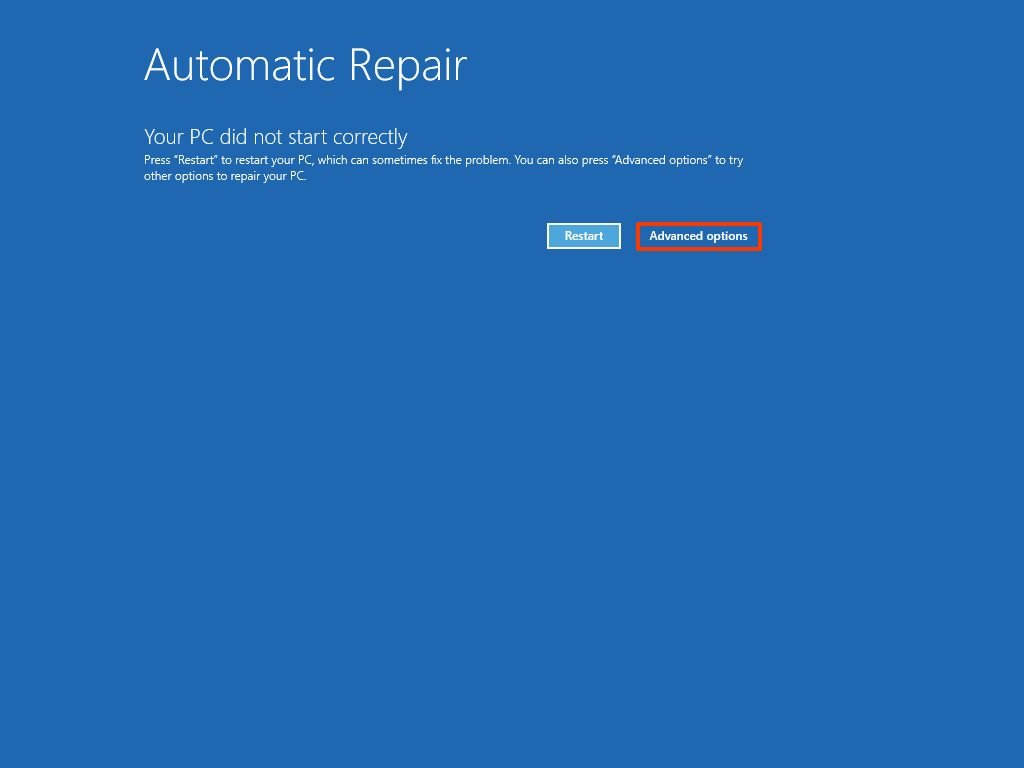
Click the Advanced options button.
-
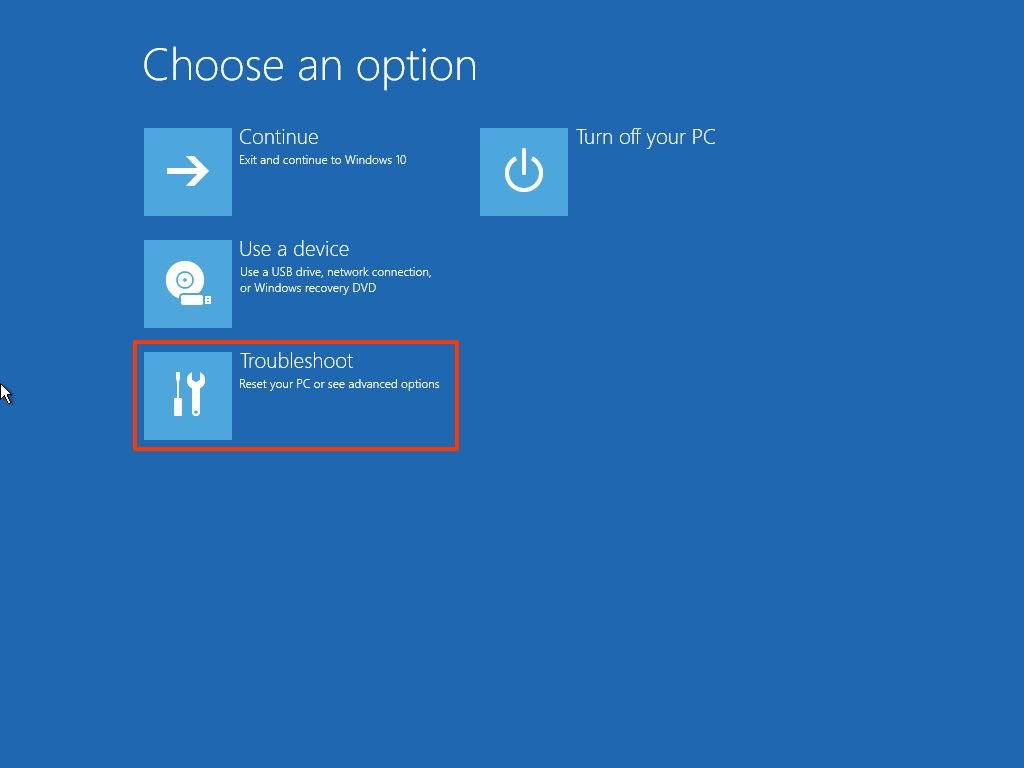
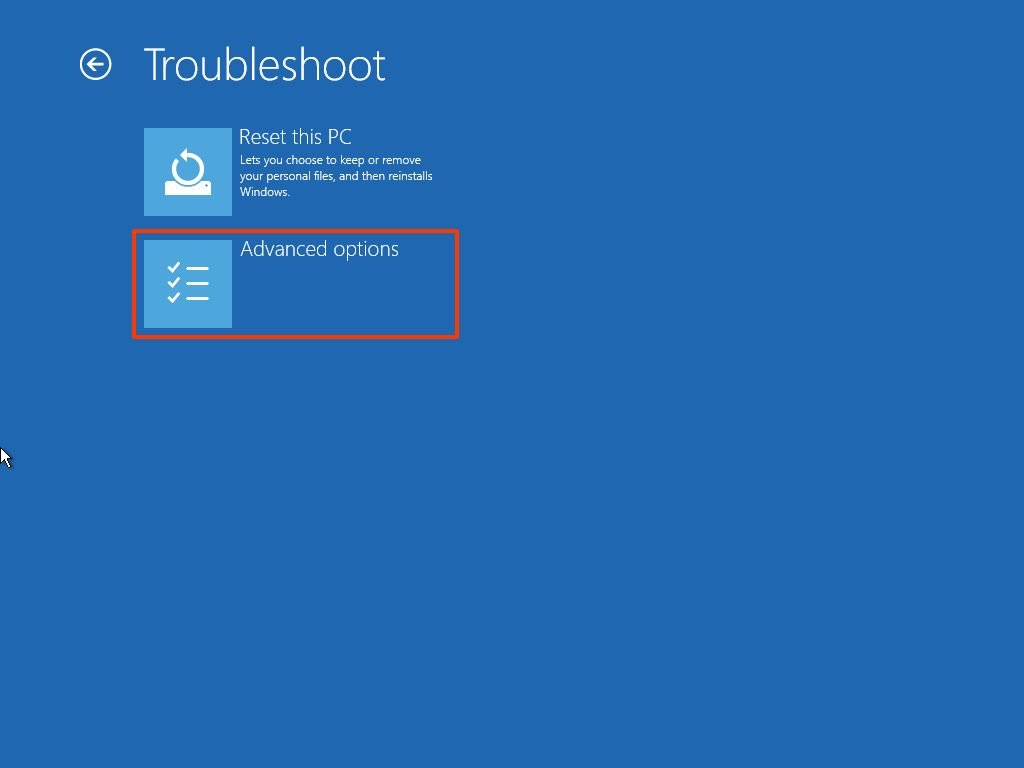
Click on Troubleshoot.
-
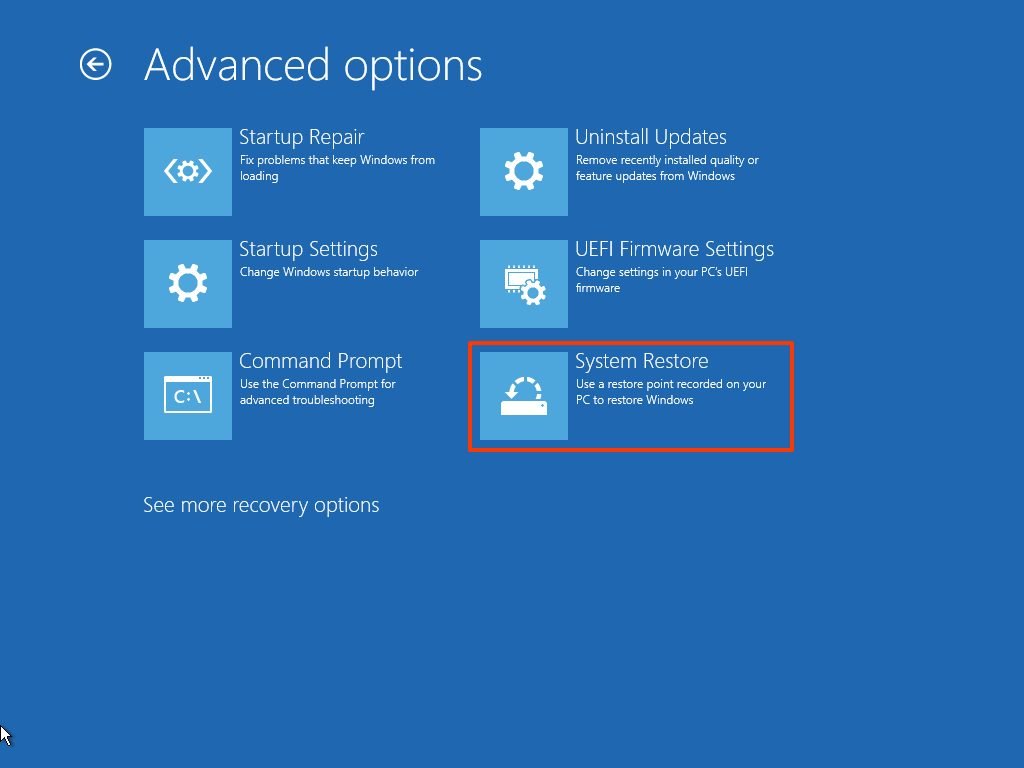
Click on Advanced options.
-
Click on System Restore.
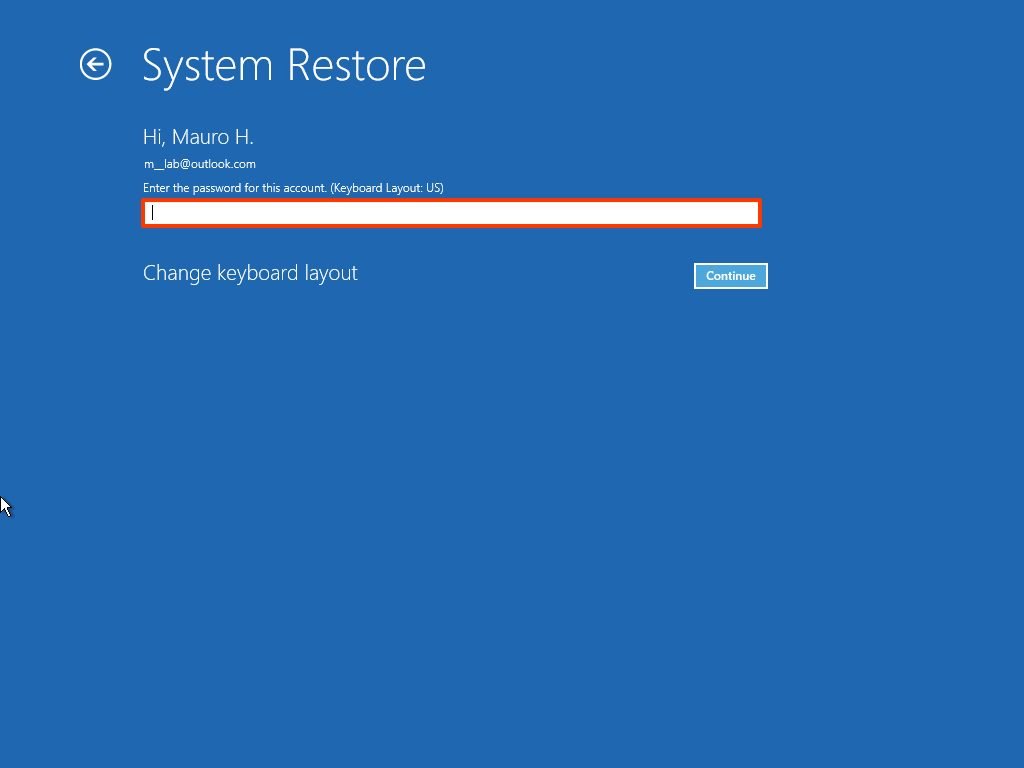
- Select your Windows 10 account.
-
Confirm the account password.
- Click the Continue button.
-
Click the Next button.
- Select the restore point to revert changes and fix problems with the computer.
- Click the Scan for affected programs button to confirm the apps that will be removed because they were added after creating the restore point.
- Click the Close button.
- Click the Next button.
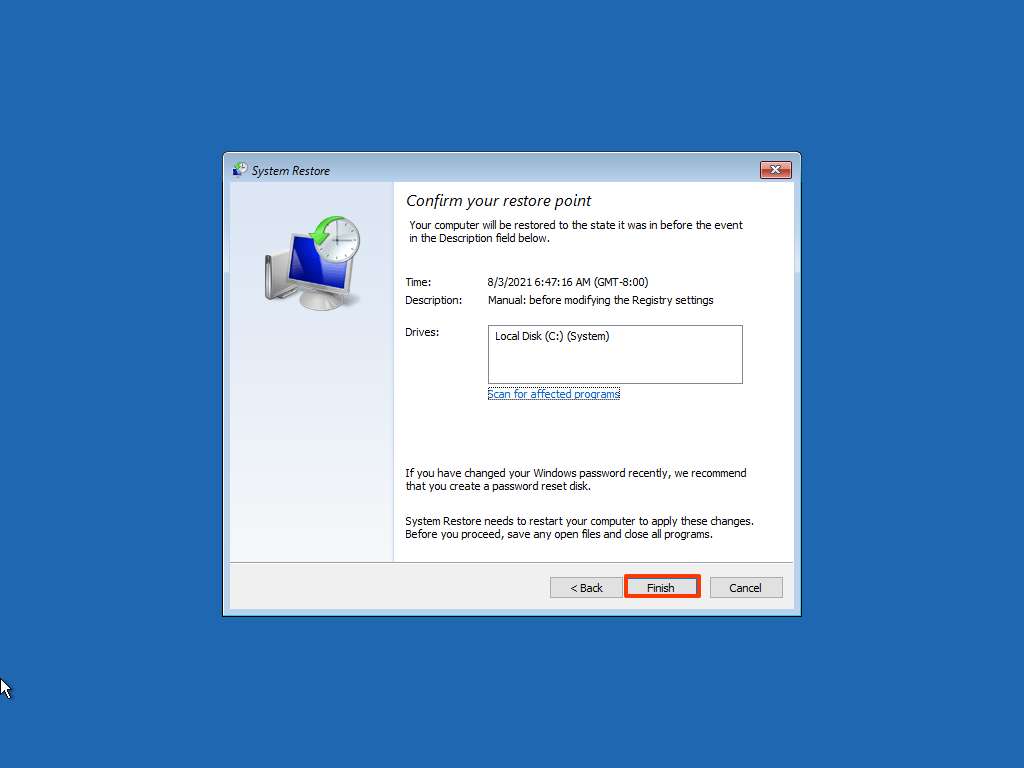
-
Click the Finish button.
Once you complete the steps, the restore point will apply to undo system changes that may be causing problems with the computer, including preventing it from starting correctly.
We are focusing this guide on Windows 10, but since this is a legacy feature, you can also refer to these instructions if you use Windows 8.1 or Windows 7.
System Restore is only a feature to recover a device from configuration problems quickly. It is not a feature to replace a backup solution or an option to reset the computer to the factory default settings.
More Windows resources
For more helpful articles, coverage, and answers to common questions about Windows 10 and Windows 11, visit the following resources:







0 comments:
Post a Comment