Microsoft Teams now offers noise suppression for meetings and calls, and here's how you enable or disable the feature.
Microsoft Teams has a feature that can automatically suppress unwanted background noise during meetings and calls to keep everyone in focus. The feature uses AI to analyze the audio in real-time to isolate the human voice audio and apply a filter to the surrounding noises (such as barking dogs, air conditioners, computer fans, motors, slamming doors, etc.) that can interfere and distract other participants.
The noise suppression feature includes three levels of suppression, including "Auto," which allows Microsoft Teams to determine the noise reduction automatically. The "Low" option removes persistent unwanted noises, and the "High" option eliminates all noises except speech, but it requires specific hardware and uses more system resources. Also, if you prefer not to use the feature or you have a high-fidelity microphone, you even get an option to disable the feature.
In this Windows 10 guide, we'll walk you through the steps to use the noise suppression feature for meetings using Microsoft Teams.
- How to enable noise suppression on Microsoft Teams
- How to disable noise suppression on Microsoft Teams
How to enable noise suppression on Microsoft Teams
Microsoft Teams provides at least two ways to manage the ability to reduce background noise. You can configure the feature in the main settings or while you're in a meeting or call.
Control background noise using settings
To reduce background noise on Teams meetings, use these steps:
- Open Microsoft Edge.
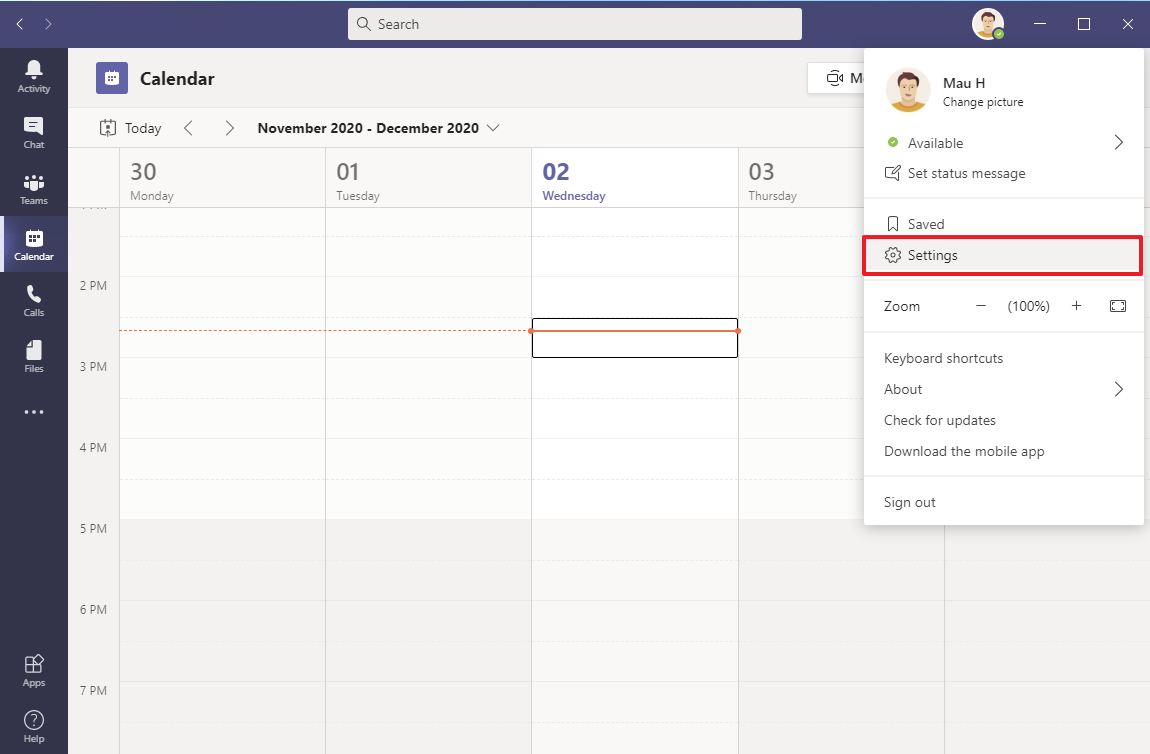
- Click the Profile menu from the top-right.
-
Select the Settings option.
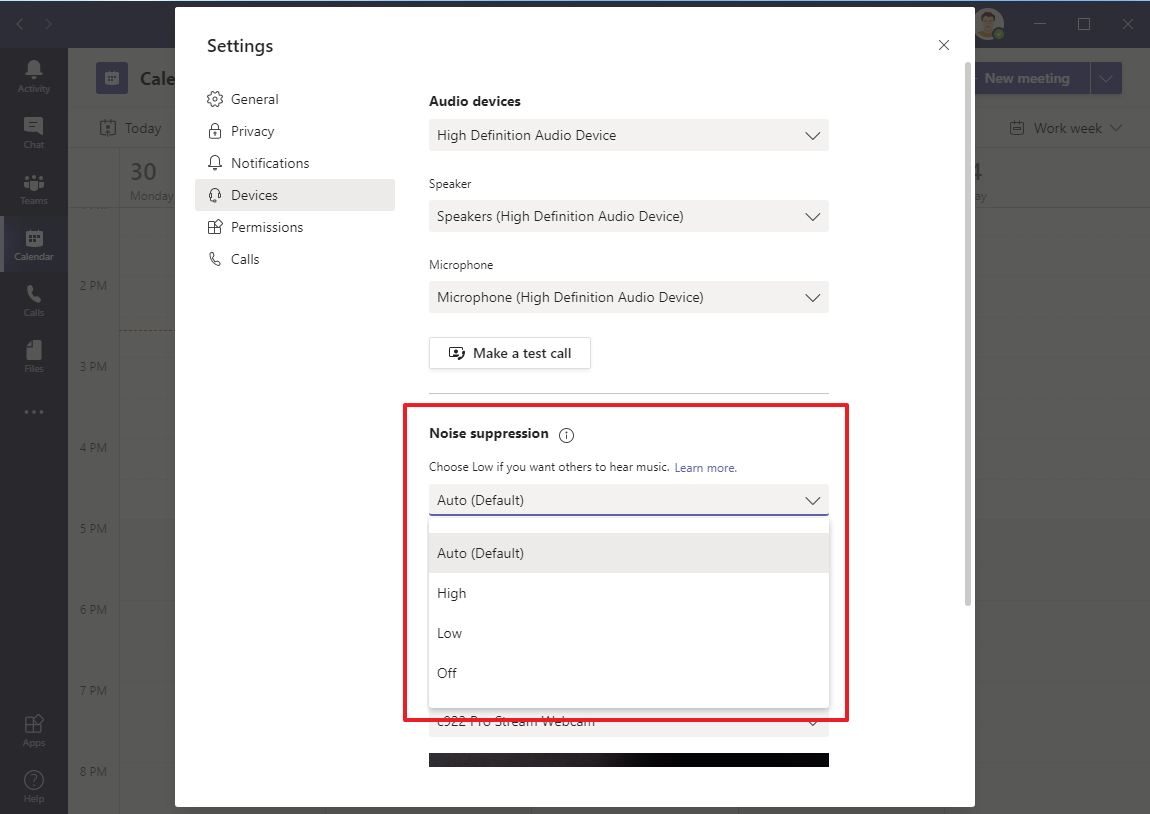
- Click on Devices from the left navigation pane.
-
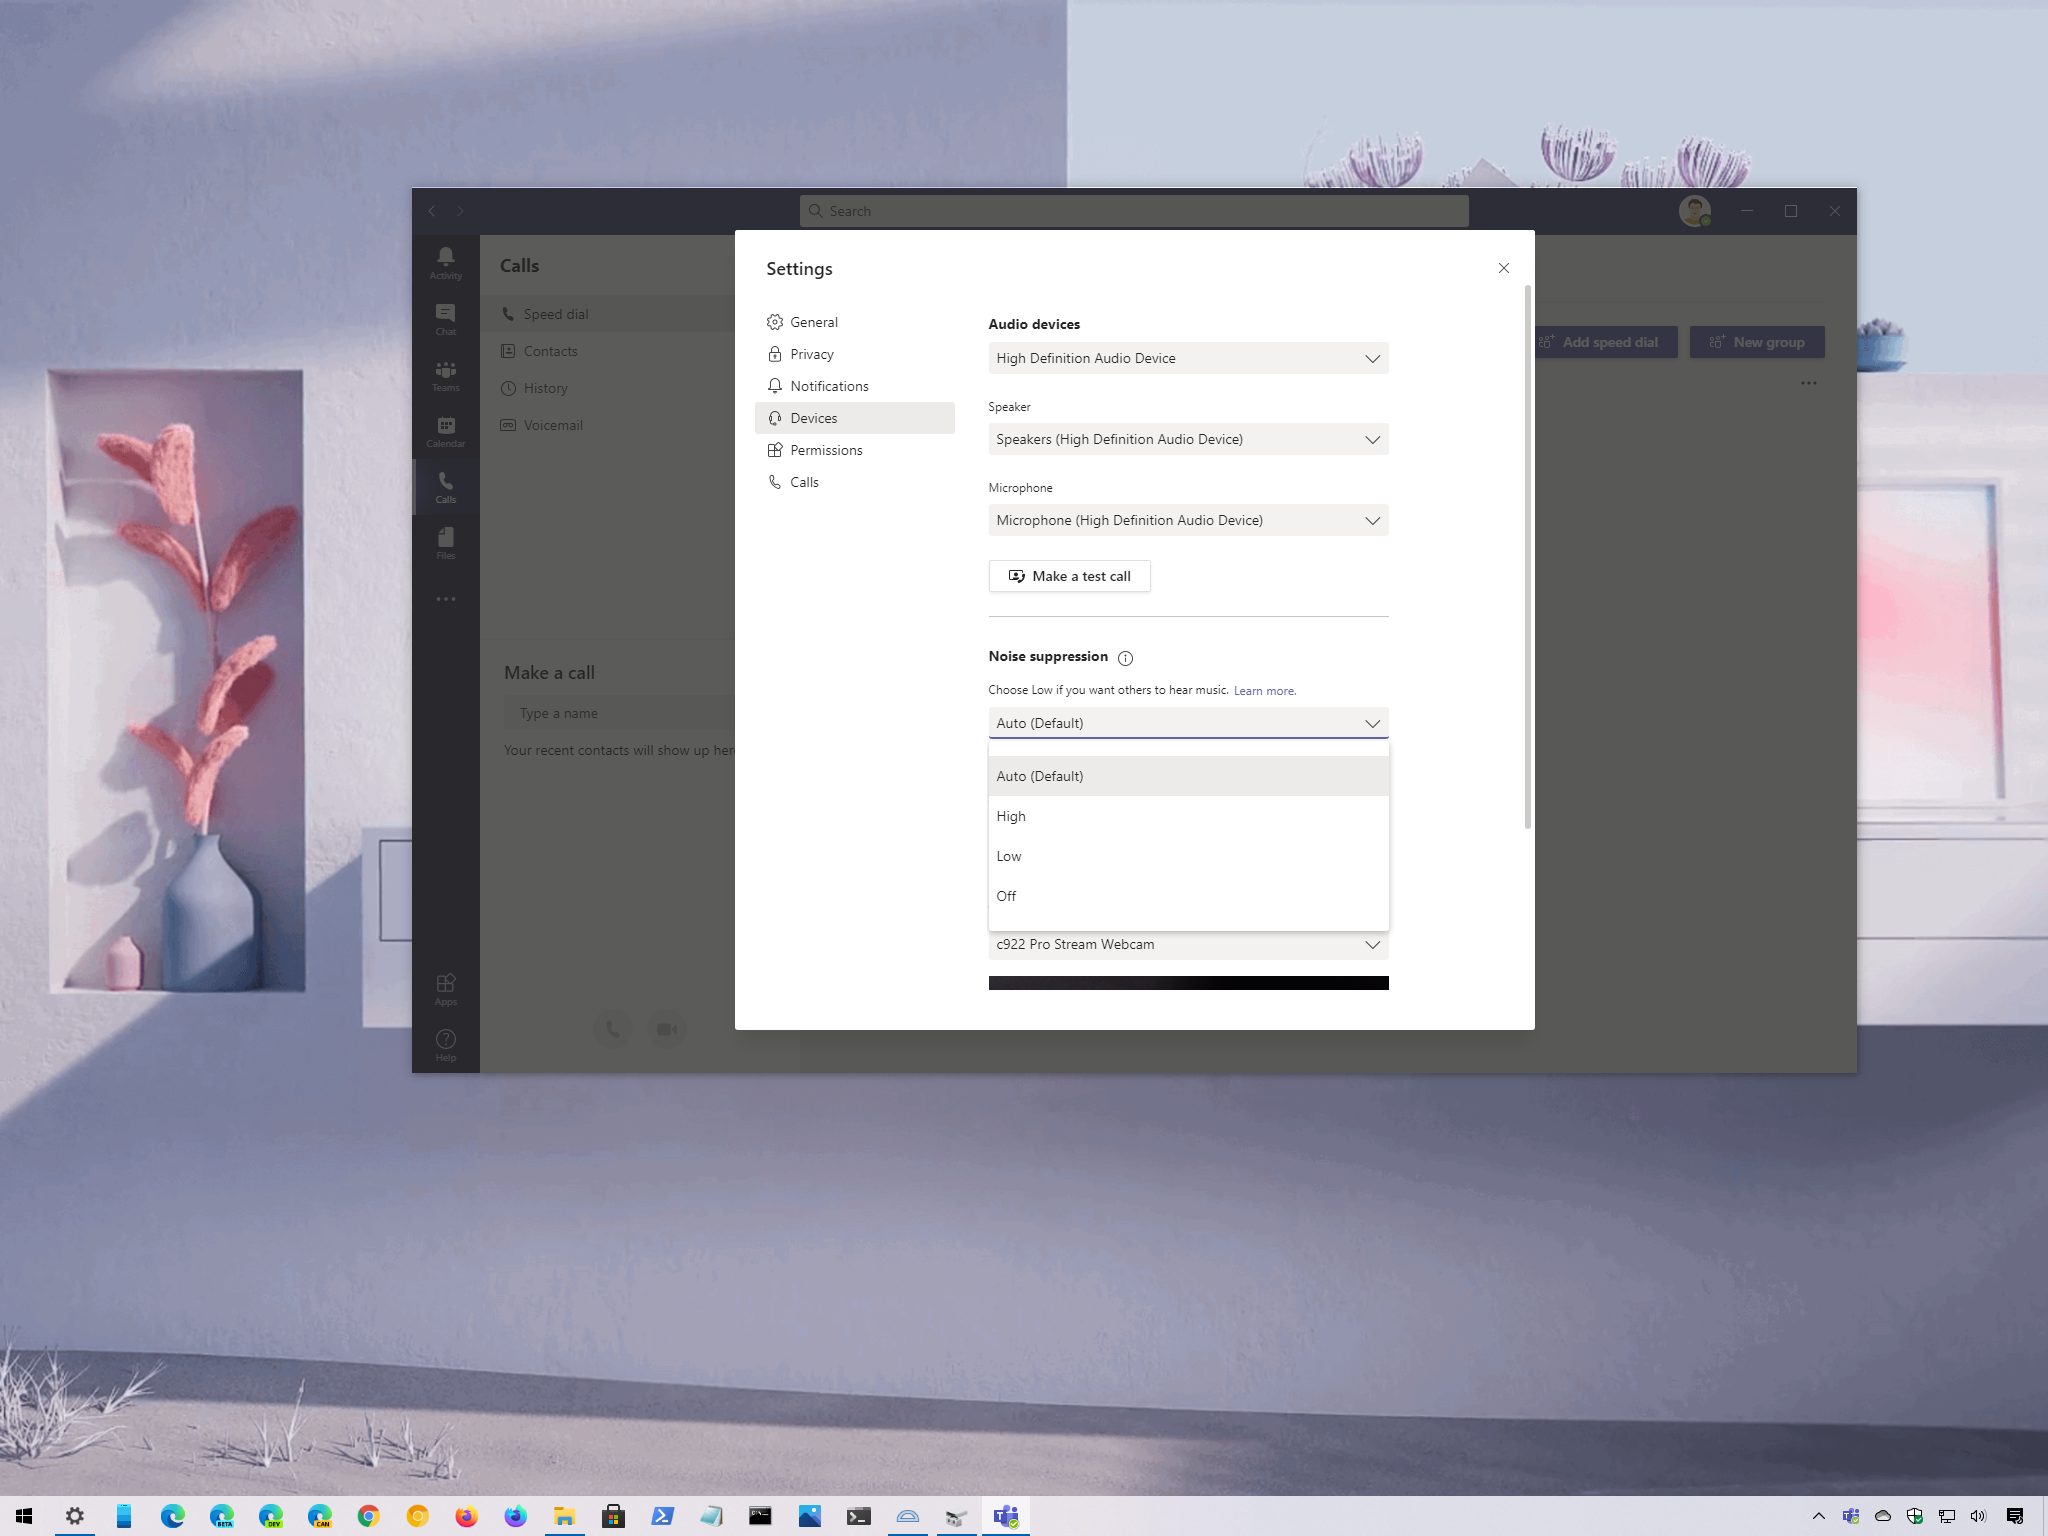
Under the "Noise suppression" section, use the drop-down menu and select the level of suppression:
- Auto – Teams analyzes the noise and determines the suppression automatically.
- High – Suppresses all background noise except speech. However, it's an option available on processors with Advanced Vector Extensions 2 (AVX2) support and uses more system resources. This option will also not work if the live caption is enabled or the call is being recorded.
- Low – Eliminates specific background noises like air conditioners, computer fans, vacuums, etc. However, sounds such as music will not be suppressed.
Once you complete the steps, meetings, or calls should no longer include loud background noise.
Control background noise during meetings
To manage background noise during a meeting, use these steps:
- Open Microsoft Edge.
-
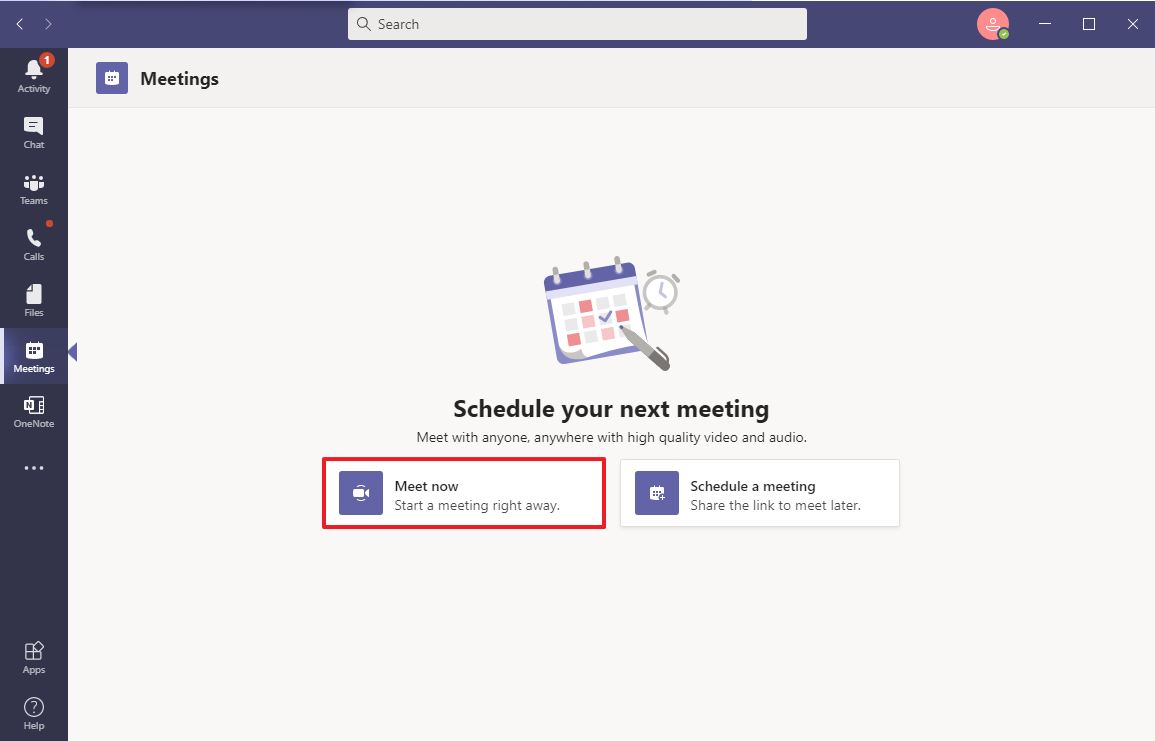
Click on Meetings from the left navigation pane.
Quick note: The background noise reduction is also available for Microsoft Teams calls.
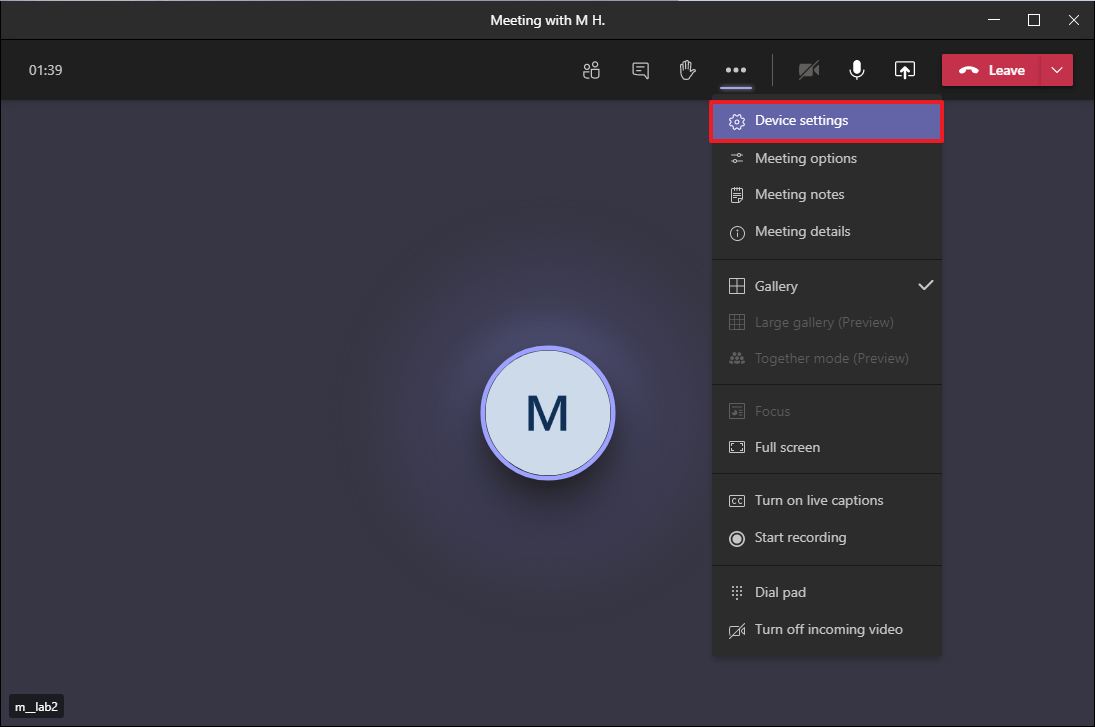
- Click the More options (ellipsis) button and select the Devices settings option.
-
Click the Meet now button.
- Under the "Noise suppression" section, use the drop-down menu and select the suppression level.
After you complete the steps, you will be able to continue the call or meeting without distracting noises.
How to disable noise suppression on Microsoft Teams
To disable noise suppression on Teams, use these steps:
- Open Microsoft Edge.
- Click the Profile menu from the top-right.
-
Select the Settings option.
- Click on Devices from the left navigation pane.
-
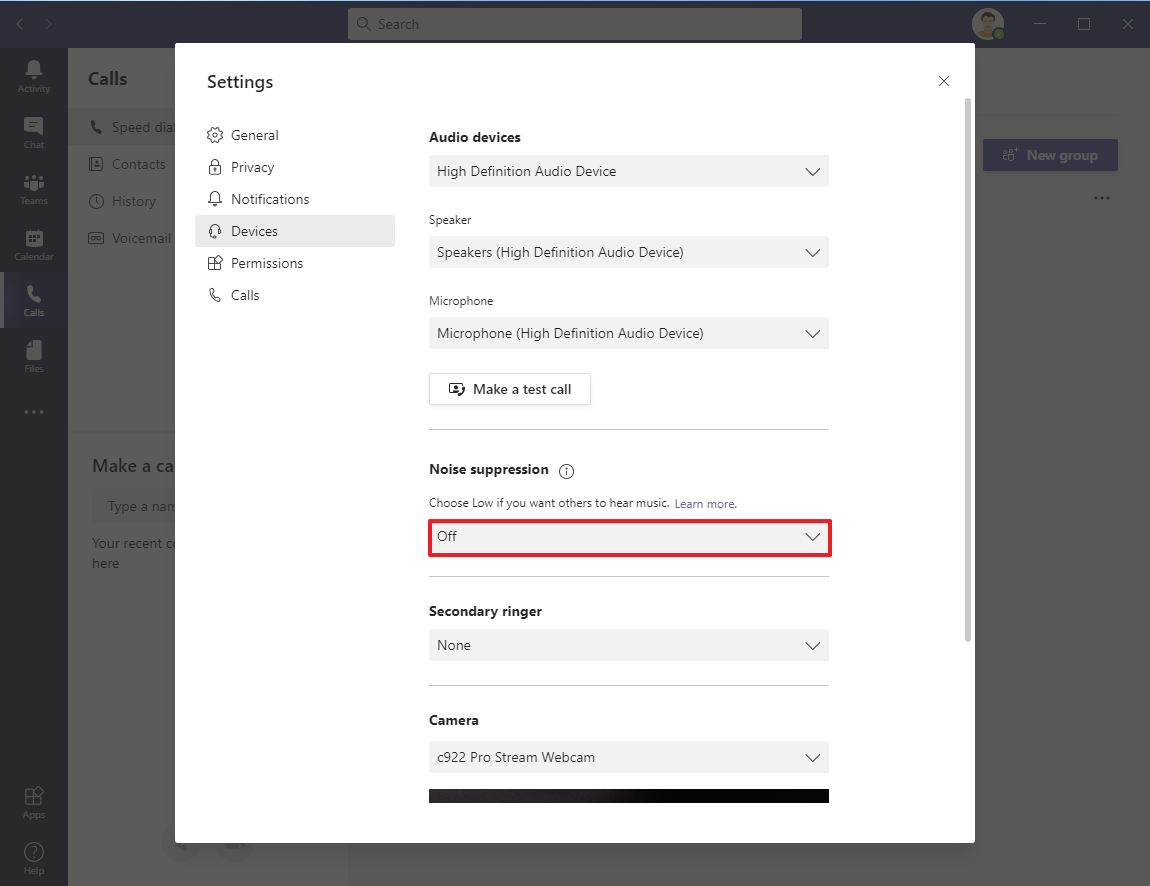
Under the "Noise suppression" section, use the drop-down menu and select Off option.
Once you complete the steps, Microsoft Teams will no longer suppress background noise during meetings or calls.
The ability to remove unwanted noises is relatively new. If you don't see the option, you may want to make sure you're using the latest version of the app.
More Windows 10 resources
For more helpful articles, coverage, and answers to common questions about Windows 10, visit the following resources:



0 comments:
Post a Comment