You can access or extract the contents of an ISO image without third-party tools, and in this guide, you'll learn how to complete this task on Windows 10.
An ISO image is a container format designed to store the contents of a physical disk (CD, DVD, or Blu-ray). Software companies usually use this file format as a medium to distribute the applications and tools without the need to ship physical media, which can be costly and time-consuming. For example, Microsoft uses this format to distribute previews of Windows 10 to testers and many other products.
Although you can find a lot of tools to work with images, Windows 10 includes the ability to mount and mount ISO files natively without the need for extra software.
In this Windows 10 guide, we'll walk you through the steps to mount and unmount the ISO images using File Explorer as well as PowerShell commands.
How to mount ISO image with File Explorer
On Windows 10, you can access the content of an image in at least three different ways using File explorer. You can double-click the file, you can use the content menu option, or the option available in the ribbon menu.
Mount image with double-click
To quickly mount an ISO file on Windows 10, use these steps:
- Open File Explorer.
- Browse to the folder with the ISO image.
-
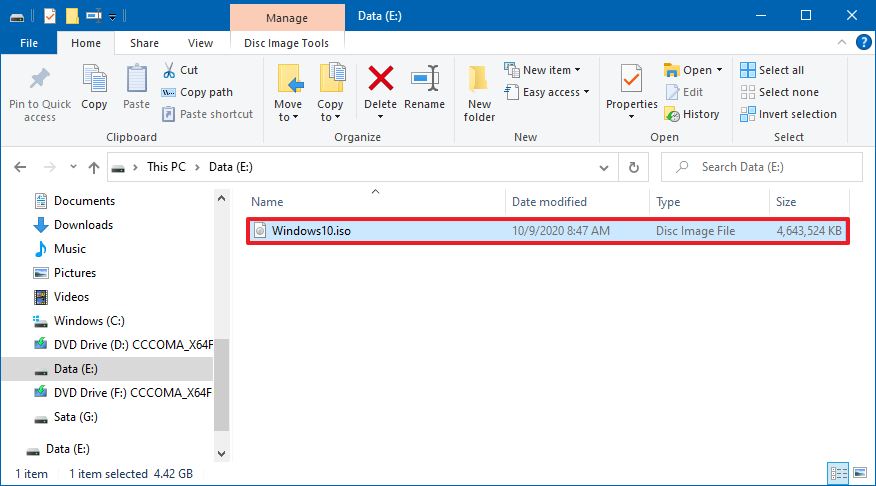
Double-click the .iso file file to mount it.
Once you complete these steps, the ISO file will open like any other folder, allowing you to access and extract the contents as necessary.
Mount image from context menu
To mount an ISO image with the File Explorer context menu, use these steps:
- Open File Explorer.
- Browse to the folder with the ISO image.
-
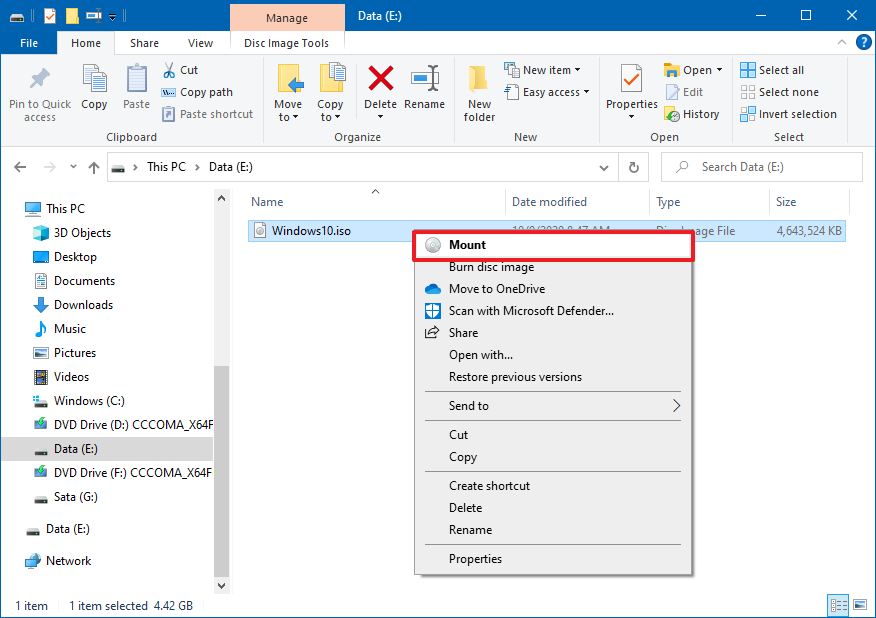
Right-click the .iso file and select the Mount option.
Once you complete the steps, you can access the contents of the image by selecting the virtual drive from the left navigation pane.
Mount image from ribbon menu
To mount an image with the ribbon menu, use these steps:
- Open File Explorer.
- Browse to the folder with the ISO image.
- Select the .iso file.
- Click the Disk Image Tools tab.
-
Click the Mount button.
If you have a third-party tool to open compressed files (such as .zip, .tar, .rar, etc.), it's possible the tool may also be configured as the default application to open ISO images. When this happens, you won't see an option to mount images. However, you can still right-click, select the Open with submenu, and select the Windows Explorer option to mount the ISO.
Unmount image
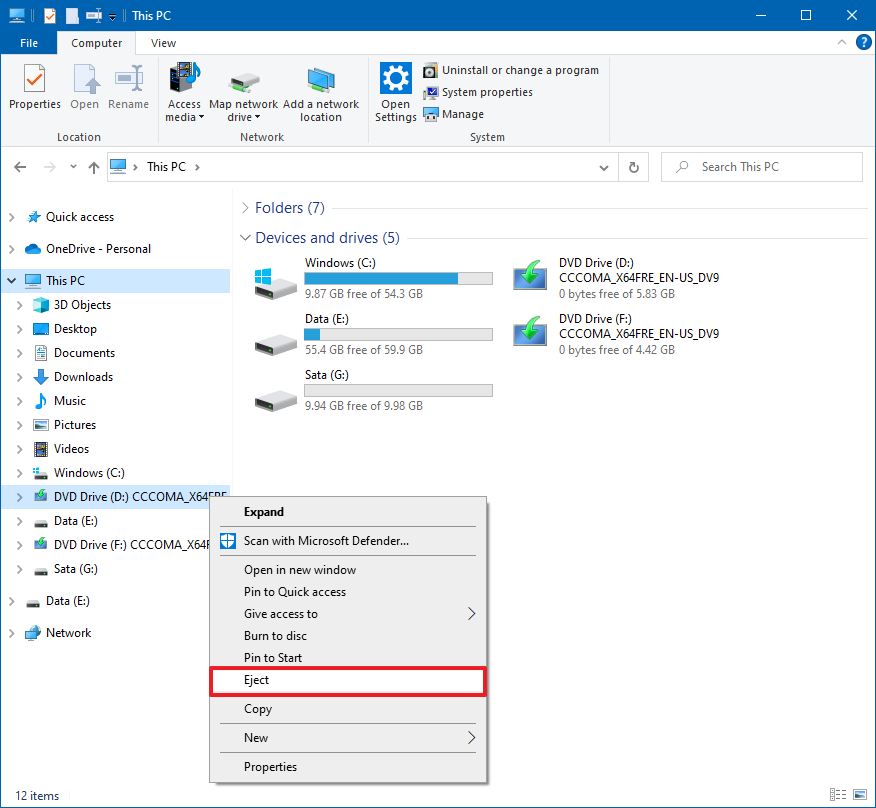
Once you are no longer using the image, you can quickly unmount the file by right-clicking the virtual drive under This PC in File Explorer and selecting the Eject option.
- Open File Explorer.
- Expand This PC from the left navigation pane.
-
Right-click the virtual drive and select the Eject option.
After you complete these steps, the image will no longer be accessible until you mount it again.
How to mount ISO image with PowerShell
It's also possible to mount and unmount an image using commands with PowerShell.
Mount ISO image command
To mount an ISO image using a PowerShell command, use these steps:
- Open Start.
- Search for PowerShell, right-click the top result, and select the Run as administrator option.
-
Type the following command to mount an ISO image and press Enter:
Mount-DiskImage -ImagePath "PATH\TO\ISOFILE"In the command, make sure to replace the "PATH\TO\ISOFILE" with the actual path of the .iso file.
For example, this command mounts an image in the "E:\" virtual drive:
Mount-DiskImage -ImagePath "E:\Windows10.iso"
Once you complete the steps, the ISO image will mount, and you will be able to access the contents to install the application or extract the image contents from the newly-available drive letter.
Unmount ISO image command
To unmount an image with PowerShell, use these steps:
- Open Start.
- Search for PowerShell, right-click the top result, and select the Run as administrator option.
-
Type the following command to mount an ISO image and press Enter:
Dismount-DiskImage -ImagePath "PATH\TO\ISOFILE"In the command, make sure to replace the "PATH\TO\ISOFILE" with the actual path of the .iso file.
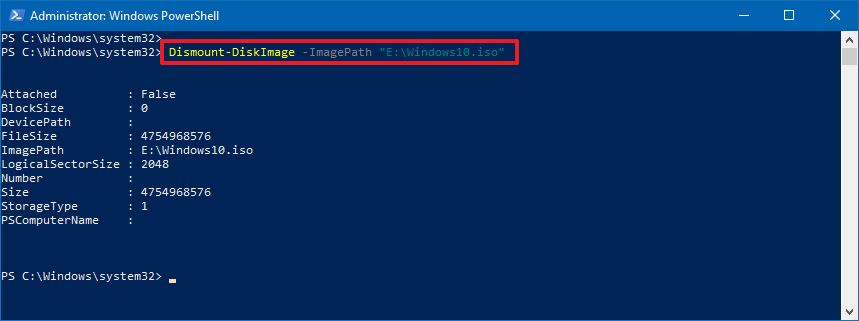
For example, this command removes the mount for an image in the "E:\" virtual drive:
Dismount-DiskImage -ImagePath "E:\Windows10.iso"
After you complete the steps, the virtual drive will be removed, and the image will no longer be accessible until you mount it again.
More Windows 10 resources
For more helpful articles, coverage, and answers to common questions about Windows 10, visit the following resources:


0 comments:
Post a Comment