
Here's how to conquer the new raid experience in Destiny 2's Beyond Light expansion.
Raids have always been some of the best content on offer within Destiny, and the new Destiny 2 raid Deep Stone Crypt (which requires owning the Beyond Light expansion to access) is arguably one of the best raids ever made by Bungie. With its clever mechanics, intense boss battles, and awesome loot, the Deep Stone Crypt is yet another raid for the history books. If you're looking to learn each of the encounters but don't know where to go for guidance, fear not; we're here to help with a detailed and in-depth guide to each of the raid's four encounters, as well as the gear that you should have on-hand before going in.
Wield the Darkness
Destiny 2: Beyond Light
Welcome to Europa, Guardian...

From $40 at Microsoft Store From $40 at Steam (GMG) See at Xbox Game Pass
In Beyond Light, players will encounter a dark Fallen faction, travel to new locations, and go beyond the Light to wield the power of the Darkness.
Quick menu
- Loadout recommendations
- Encounter #1: Crypt Security
- Encounter #2 Atraks-1, Fallen Exo
- Encounter #3: The Rapture
- Encounter #4: Taniks, the Abomination
Deep Stone Crypt: Loadout recommendations
In the Deep Stone Crypt raid, it's important to have the right gear so that you're able to kill enemies effectively, survive the attacks from the bosses and ads (general enemies), and deal sufficient damage to the bosses in the damage-per-second (DPS) phases. Make sure that you're using guns that have PvE-oriented perks, such as ones that boost damage after kills or speed up reloading. Here's a list of the types of weapons we recommend having at your disposal:
Primary weapons
- The Gnawing Hunger Auto rifle is the best overall primary weapon.
- Pulse rifles are also good due to the medium range of many firefights.
- SMGs are strong in the first and third encounter specifically due to the close-range nature of them.
- In the second encounter, it may be beneficial for a player or two to use scout rifles.
Special weapons
- One person should use the Divinity trace rifle in the final boss battle.
- Shotguns are excellent for the entirety of the raid.
- The Witherhoard grenade launcher is also a very safe option.
- Sniper rifles are good in the second encounter, and can also be good for final boss DPS.
Heavy weapons
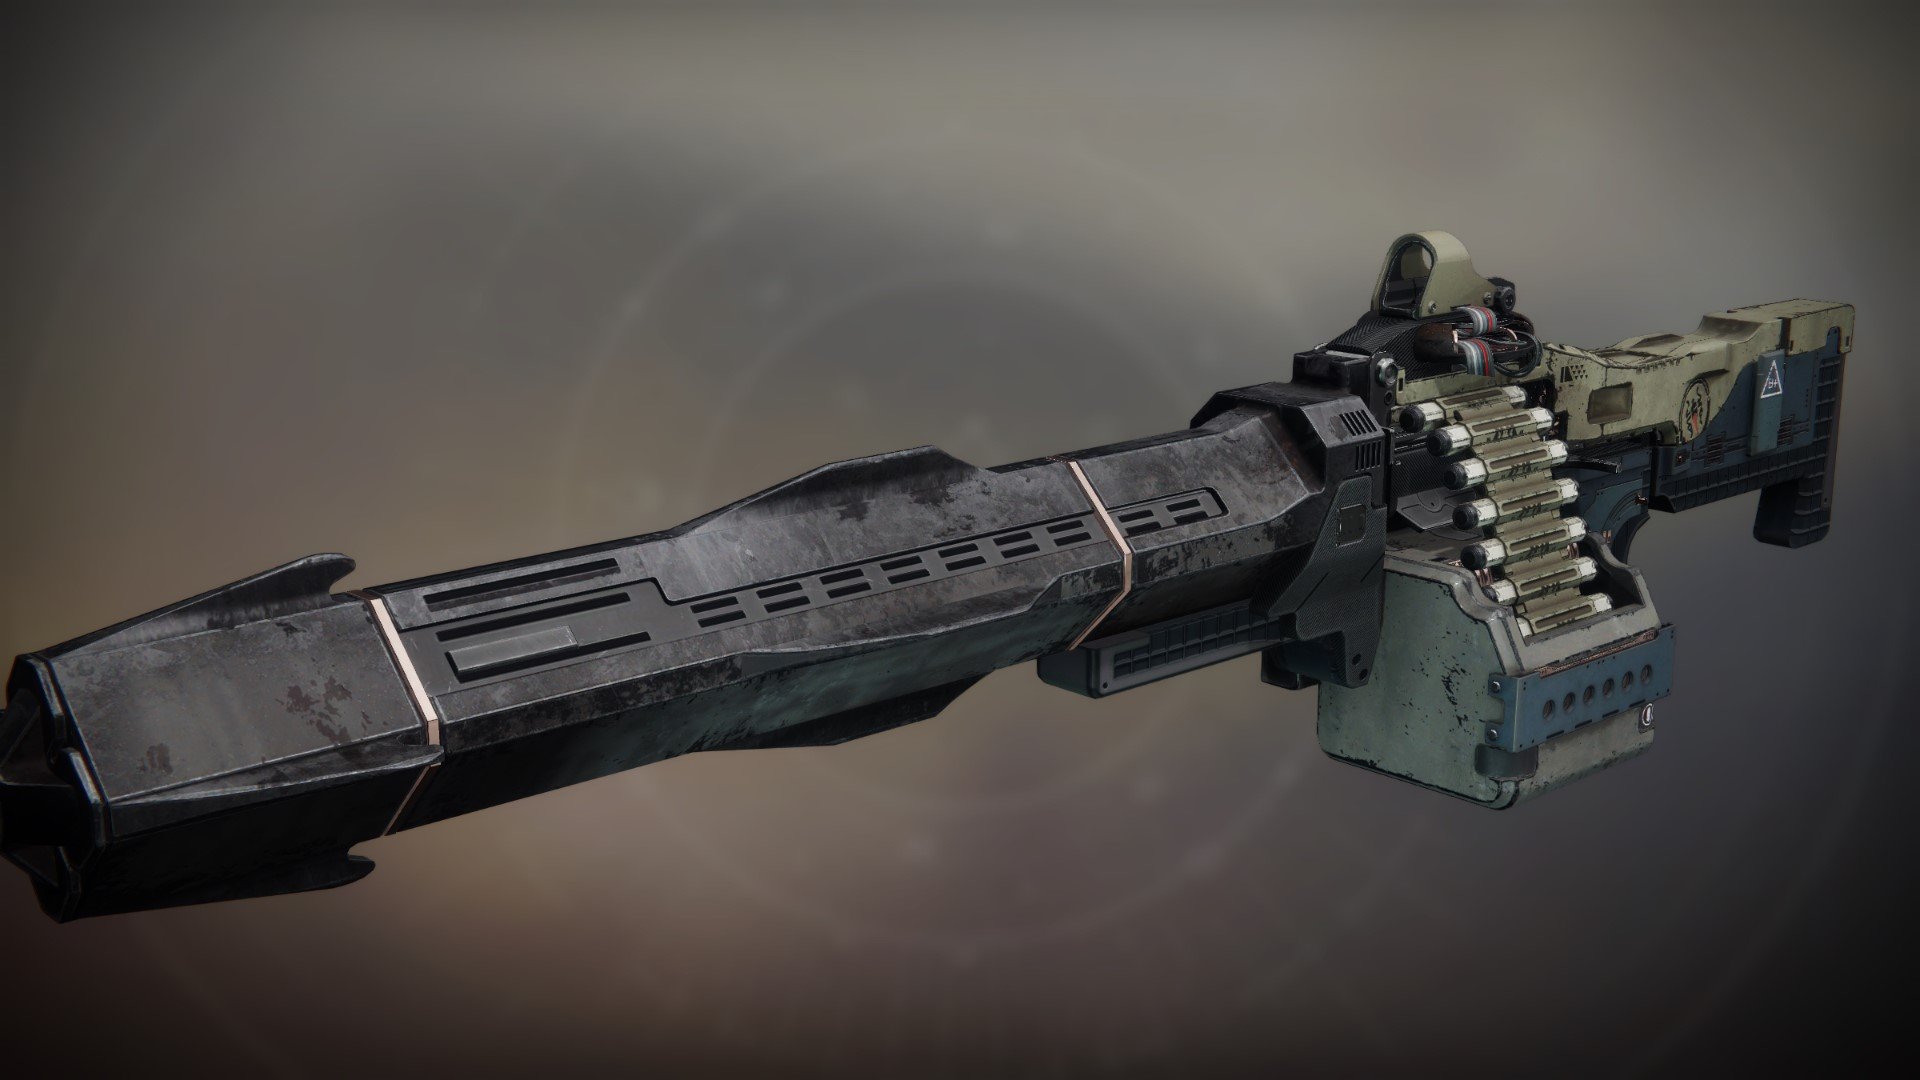
- The Xenophage machine gun is fantastic across the board.
- The Falling Guillotine and especially The Lament swords are the best options for the second and third encounter.
- Anarchy is the top choice for final boss DPS if you're also using a good special weapon.
- Whisper of the Worm, Izanagi's Burden, and One Thousand Voices work well with Divinity in the final encounter.
- A heavy grenade launcher with spike grenades is also excellent for final boss DPS.
Armor and weapon mods
- Arc resistance is excellent throughout the raid, as most Fallen attack with Arc damage.
- Sniper rifle resistance is strong in the second encounter, while melee resistance is great in the final one.
- Special ammo finder is important for players using special weapons for DPS in boss encounters. It's also important if you're using Divinity to weaken bosses.
- Use the ammo finder and reserves mods that correspond to your heavy weapon type.
- Encounters one and three have Overload Champions, so Overload mods are important.
- Make sure you put boss spec on weapons in boss encounters. Use minor or major spec during the first and third encounters.
Best subclasses

In addition to having the right gear, you're also going to want to make sure you and your teammates are using the right subclass during each encounter. Here's what we suggest:
- For Titans, top-tree Sentinel is excellent across the board since the Ward of Dawn Super provides the Weapons of Light buff and can also be used to create safe spots in emergencies. In the final boss fight, a Titan could also swap to top-tree Sunbreaker and use Hammer of Sol for boss DPS if the team is lacking damage towards the end of the encounter.
- Warlocks should use Well of Radiance in all four encounters since the rapid healing and damage buff is invaluable. If someone else has Well of Radiance covered, bottom-tree Voidwalker can also be used as backup boss DPS since Nova Bomb does a lot of single-target damage.
- Hunters should use Arcstrider or bottom-tree Nightstalker for ad control in the first and third encounter. In the second and final boss encounter, Hunters should use bottom-tree Golden Gun with the Celestial Nighthawk Exotic helmet equipped for huge boss DPS. If you're not comfortable with Golden Gun, bottom-tree Nightstalker is also useful for debuffing bosses.
Deep Stone Crypt: Crypt Security
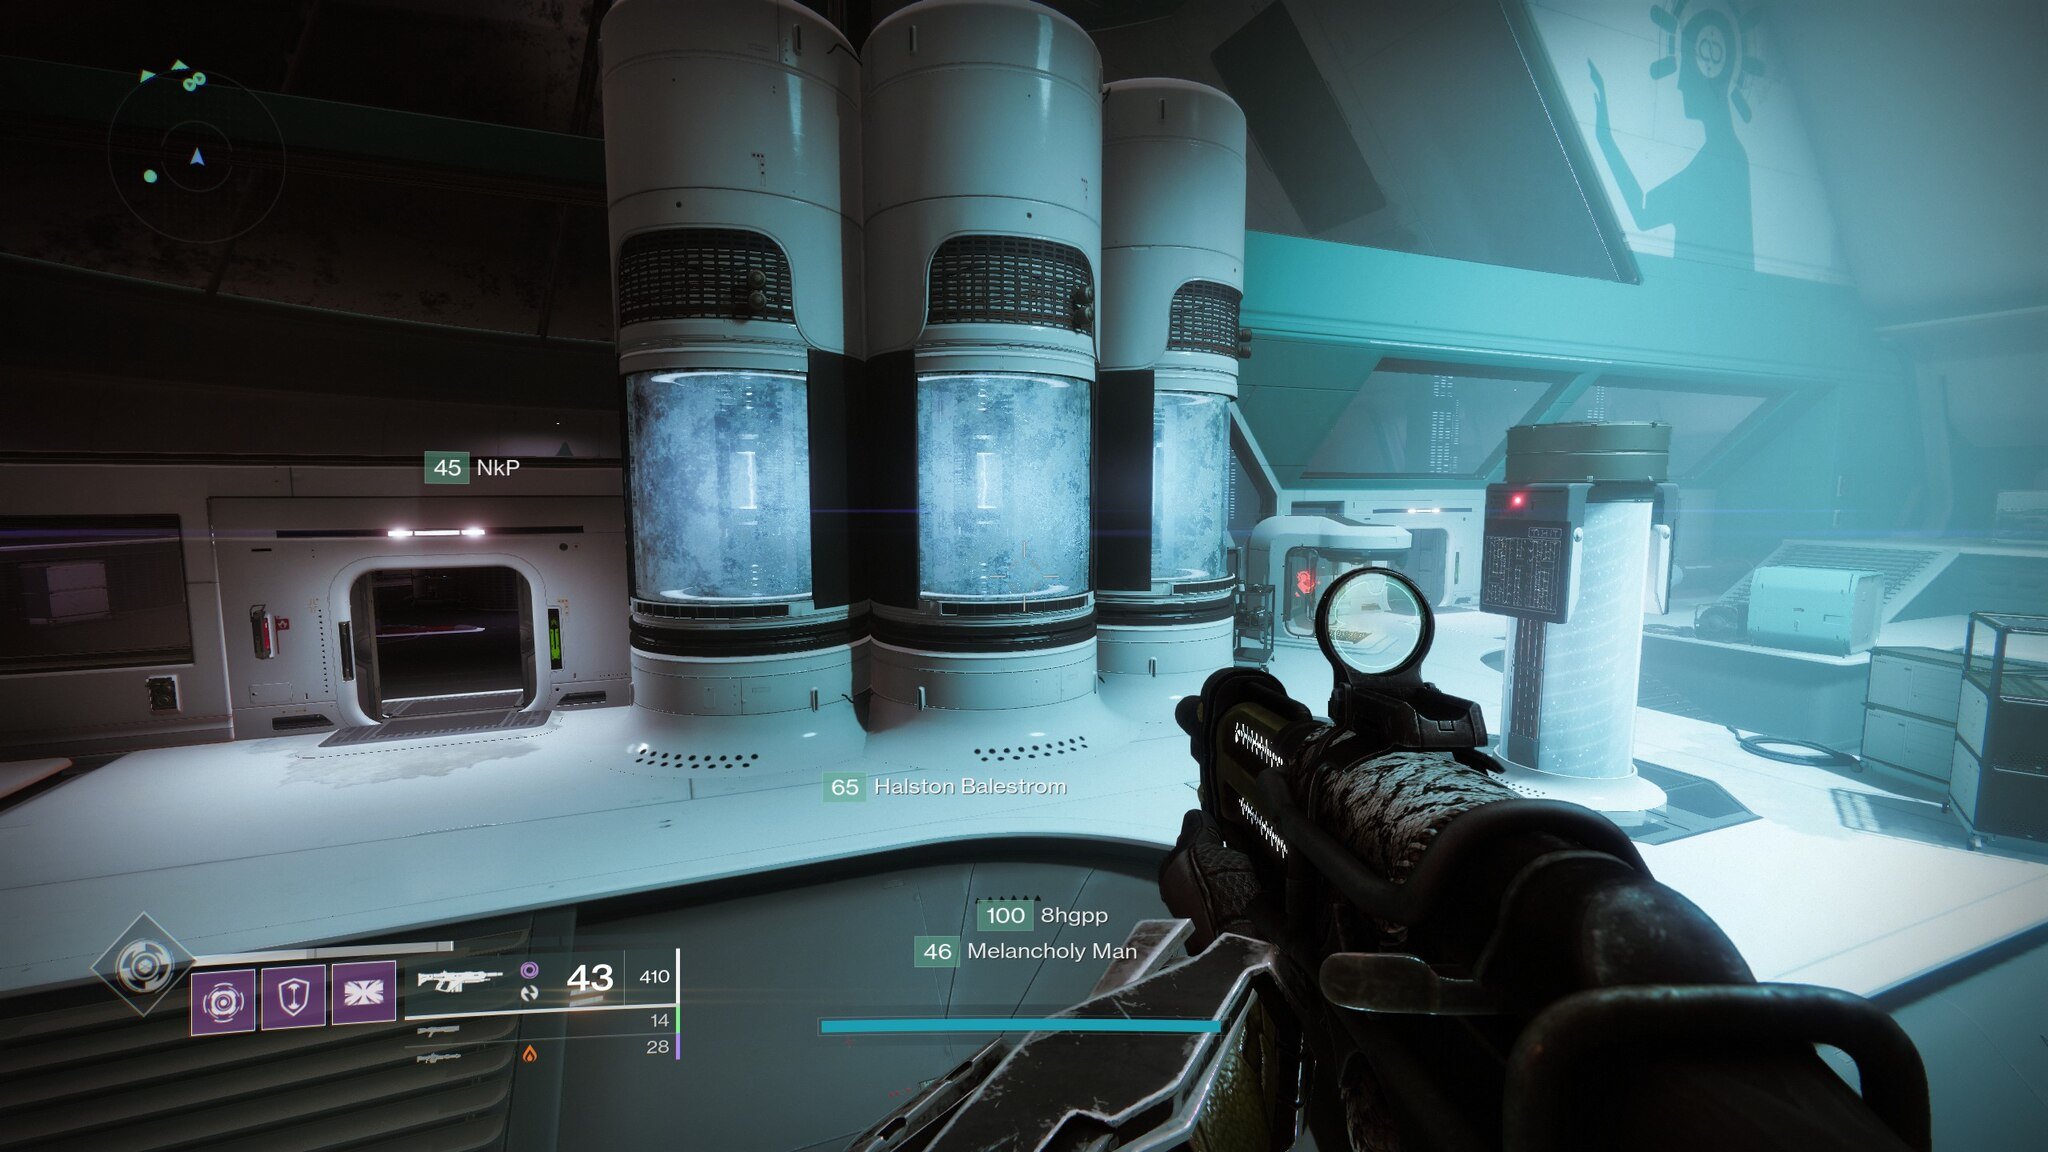
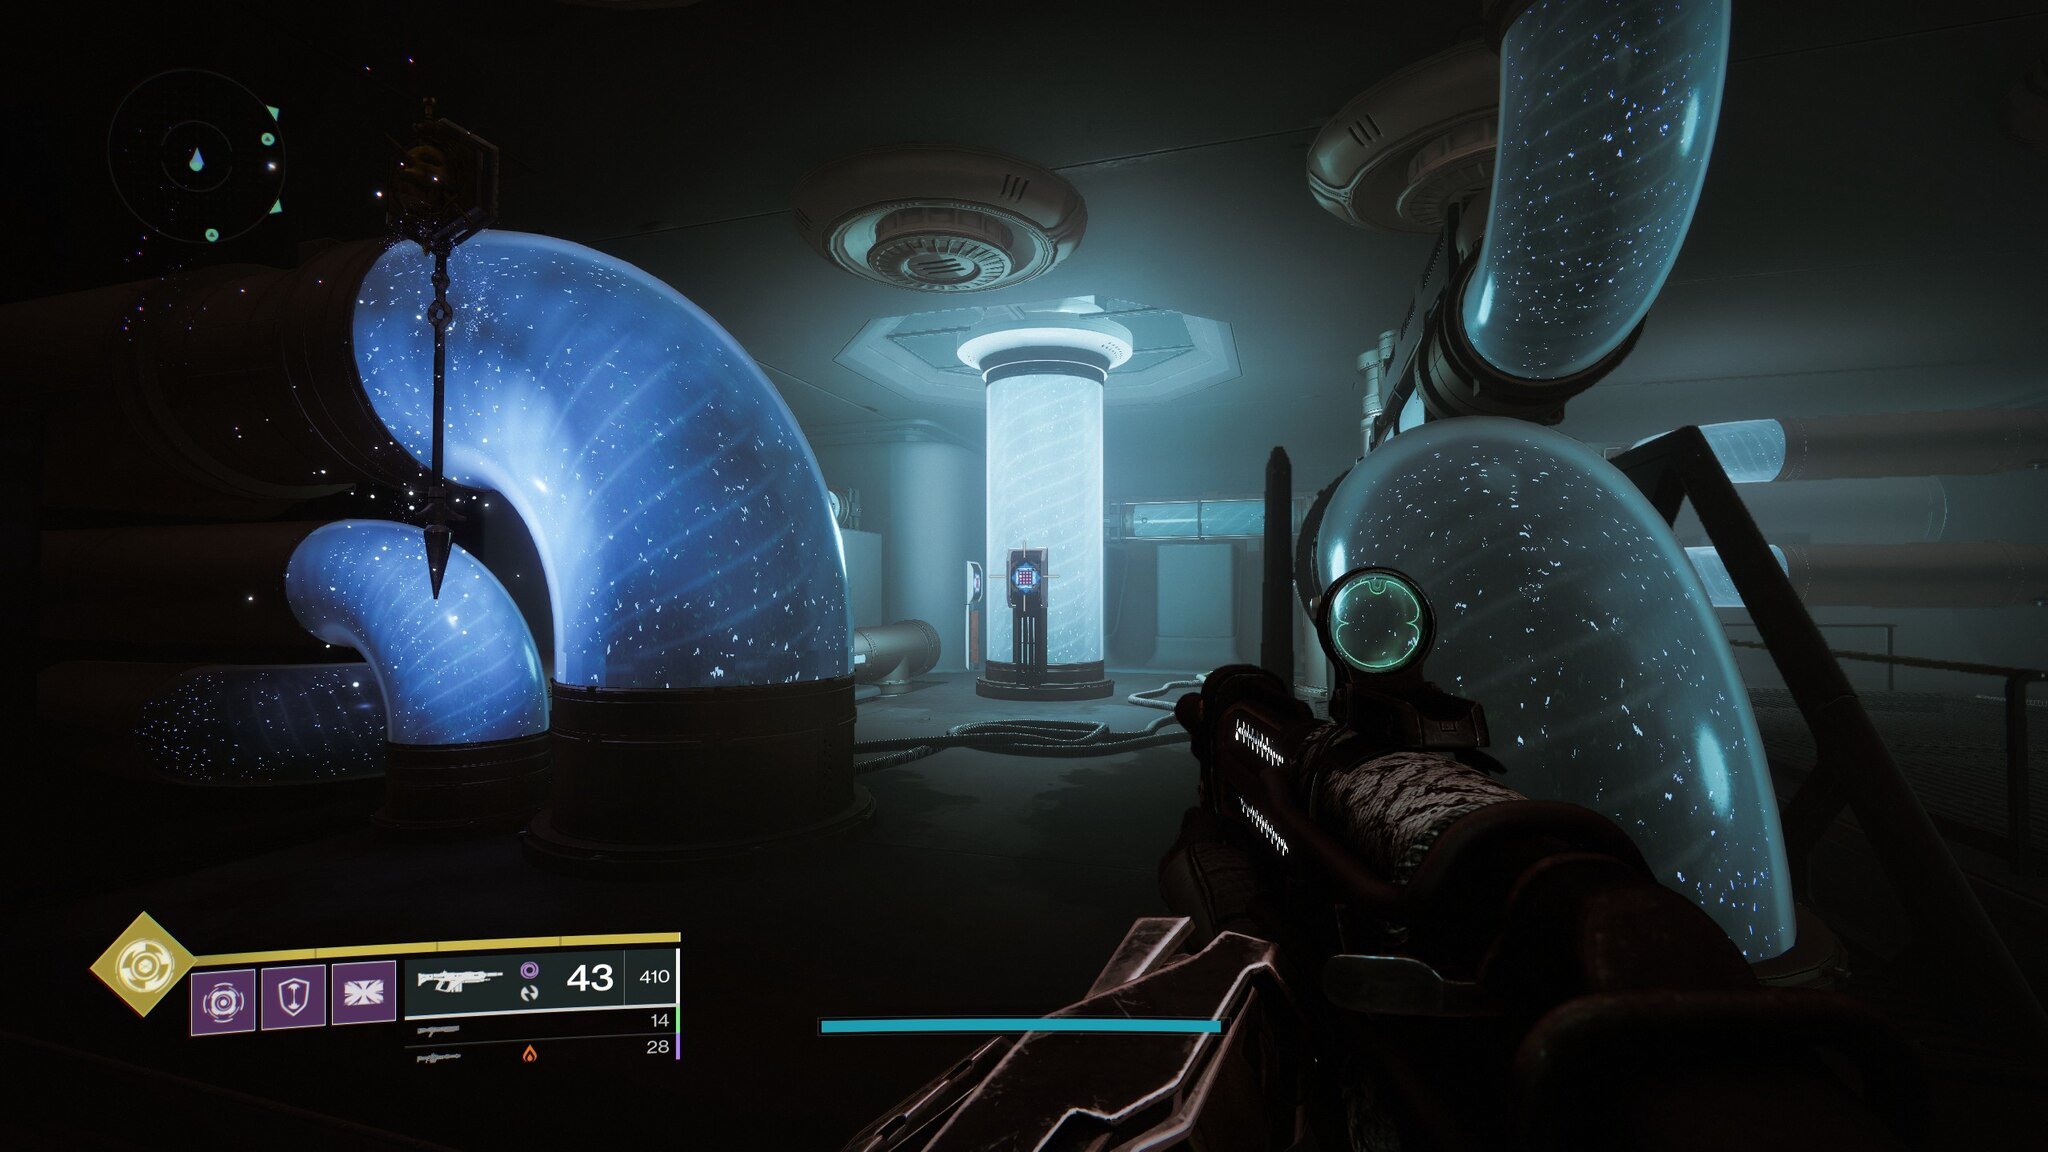
The first encounter in the Deep Stone Crypt is Crypt Security, in which your goal is to break six different security fuses (pictured above). First, you're going to want to orient your team into two teams of three. One team will go into the brightly-lit white room, while the other will enter the dimly-lit dark one. Here's what each room looks like:
Light room (left) and dark room (right).
In addition, there's also a basement area accessible from the back of both rooms that players should become familiar with. You can explore it before the encounter begins.
Once you've split up into your teams, you're going to want to designate one player on each team as a Scanner and an additional player in the light room as an Operator. The goal of the Scanners will be to pickup a yellow buff from a Hacker Vandal that will spawn during the encounter (he always appears in the dark room) and to look through the glass floors around the pillars in both rooms to identify which of the keypads in the basement area are glowing yellow. The job of the Operator will be to pickup the red buff from the terminal and go down into the basement and then shoot the keypads the Scanners tell them to shoot (nobody but a Scanner can see the yellow glow). The players who do not have one of these roles will need to focus on killing ads. When the Operator picks up their buff from the terminal, the encounter starts.
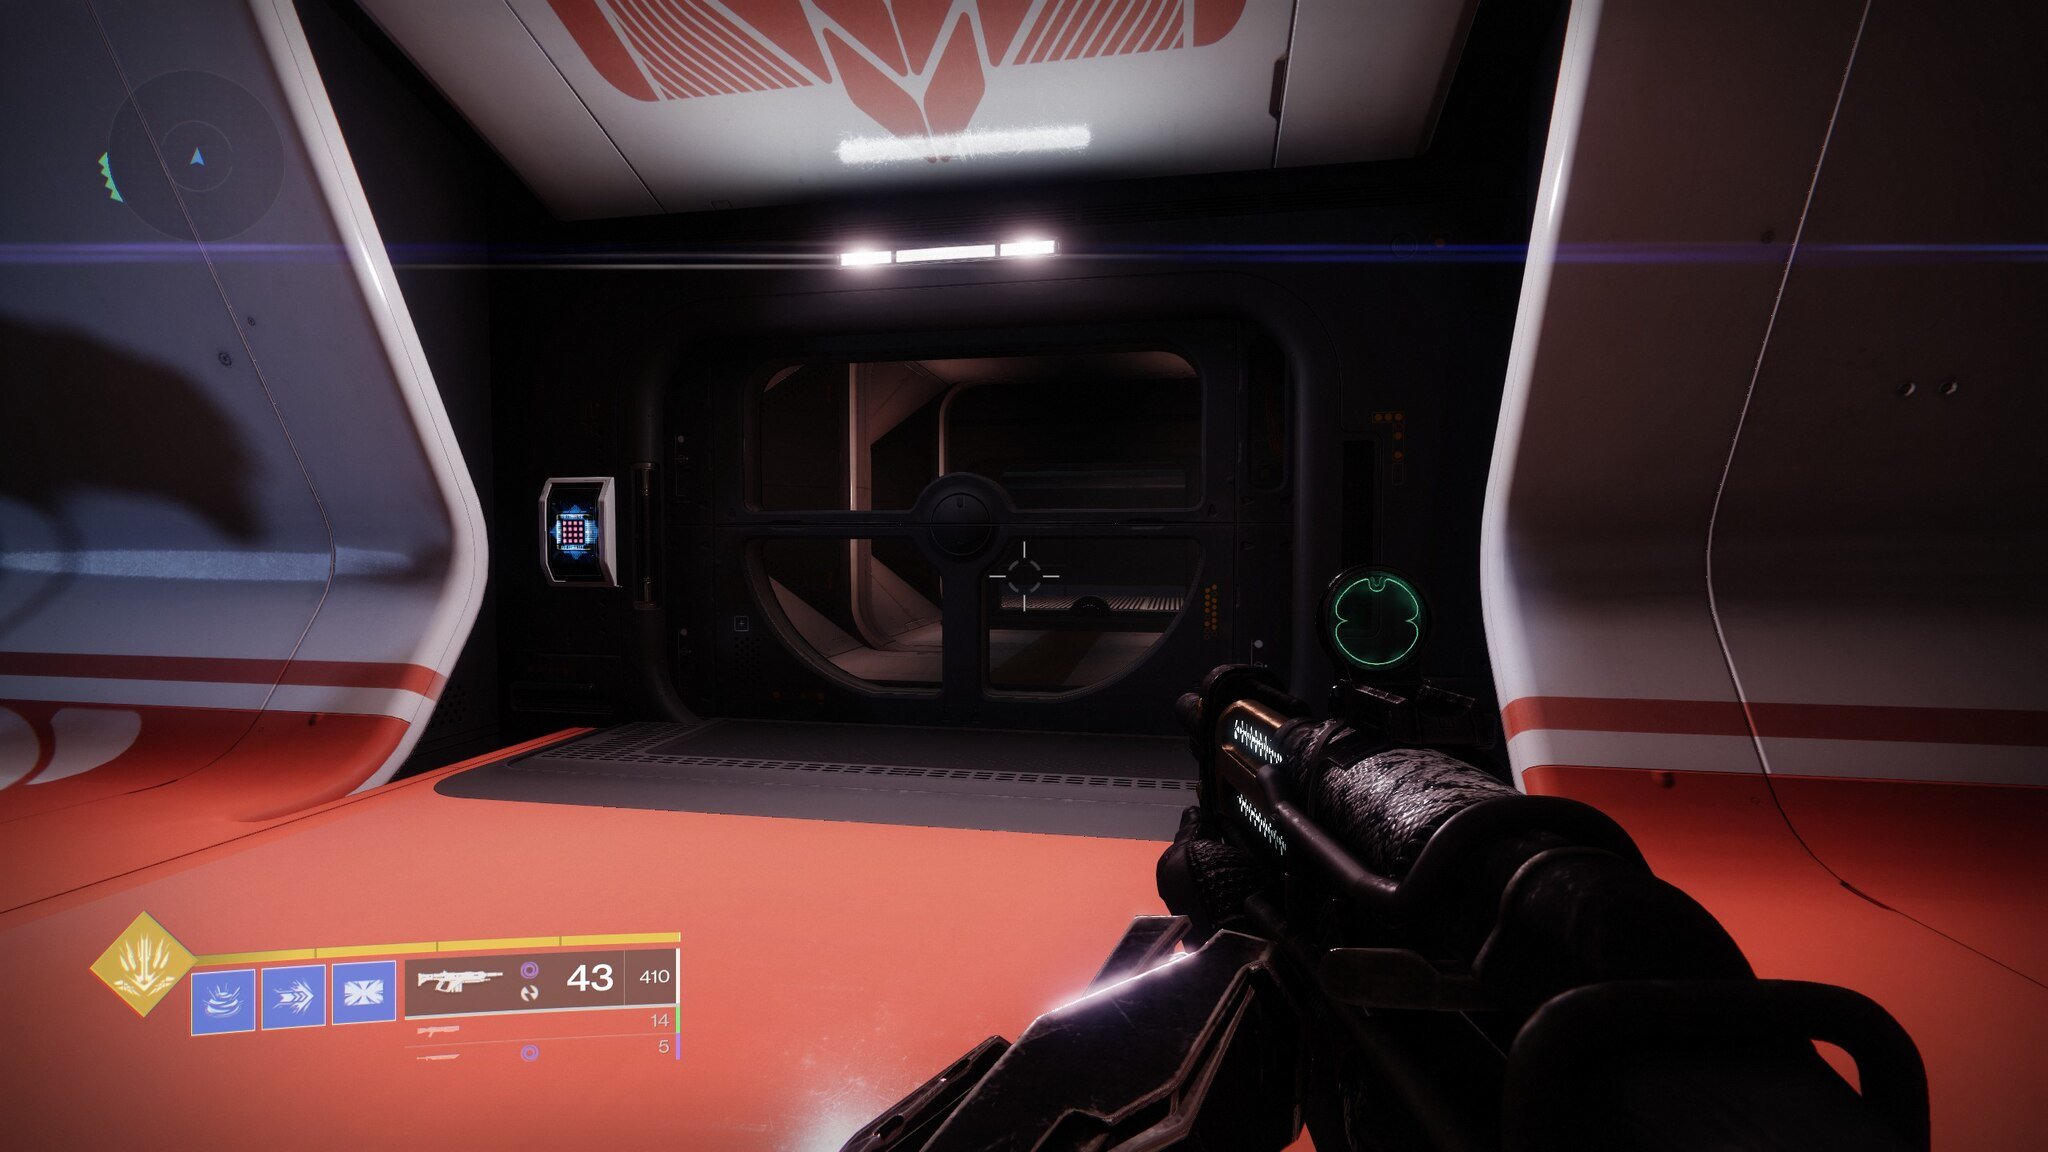
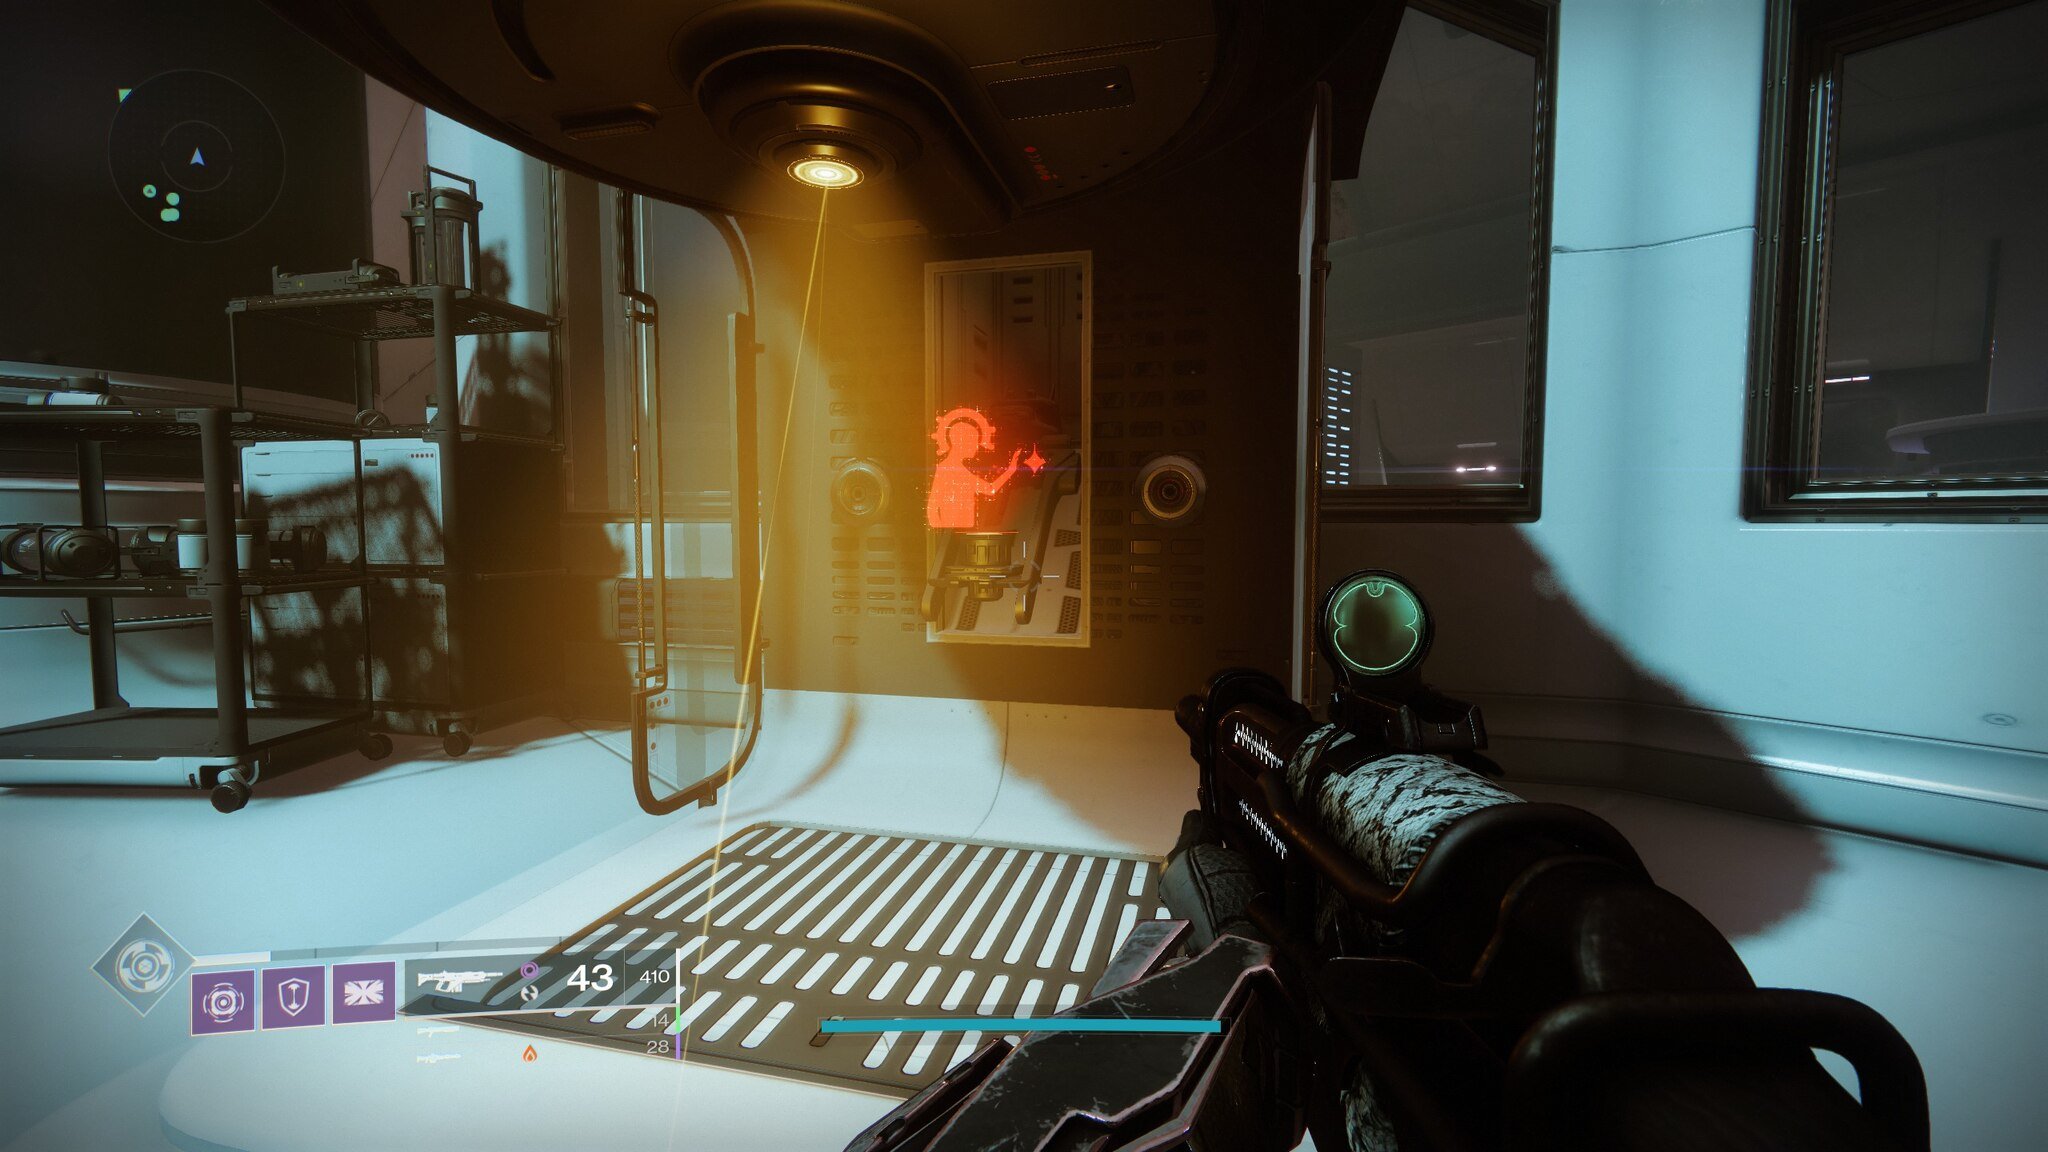 The terminal with the Operator buff in it at the start of the encounter.
The catch here is that there will only be one Scanner buff available and that the doors between all the areas close at the start of the encounter. Therefore, once the dark room player has identified which keypads to shoot on their side of the basement, they need to use a terminal (the same one that the Operator picked their buff up from) to send the Scanner buff to the light room so that the second Scanner player can do the same. Each room has a terminal. Something important to note here is that periodically, Sentinel Servitors will spawn that prevent use of the terminals. The ad clear players need to kill these as quickly as they can so that the Scanners can successfully do their job.
The Operator can go into the basement at any time by shooting the controls to the basement door, but we advise not doing so until two of the correct keypads are known. This is because if the Operator is in the basement for over a minute, the floor will catch on fire and kill them. However, if you wait for all four of the keypads to be known, you won't have as much time to do damage to the fuses later. This way, you can destroy the first two keypads right before the light room Scanner finds the next two for you and directs you to them. Here's what the basement keypads look like:
 One of the keypads in the basement room.
Once the correct keypads have been activated, the fuses will become unshielded and will be exposed for the damage phase. However, shooting them in the incorrect order will cause a team wipe. Therefore, in order to figure out which order you need to shoot the fuses in, the Operator player needs to return to the basement entrance and put their buff into the terminal there. Next, one of the ad clear players up top should pick that buff up. Then, the player with the Scanner buff needs to put their buff into the terminal. Finally, the original Operator will pick up that Scanner buff in the basement and become a Scanner. Above you on the side of a mainframe, there will be six cores — three on the left, three on the right.
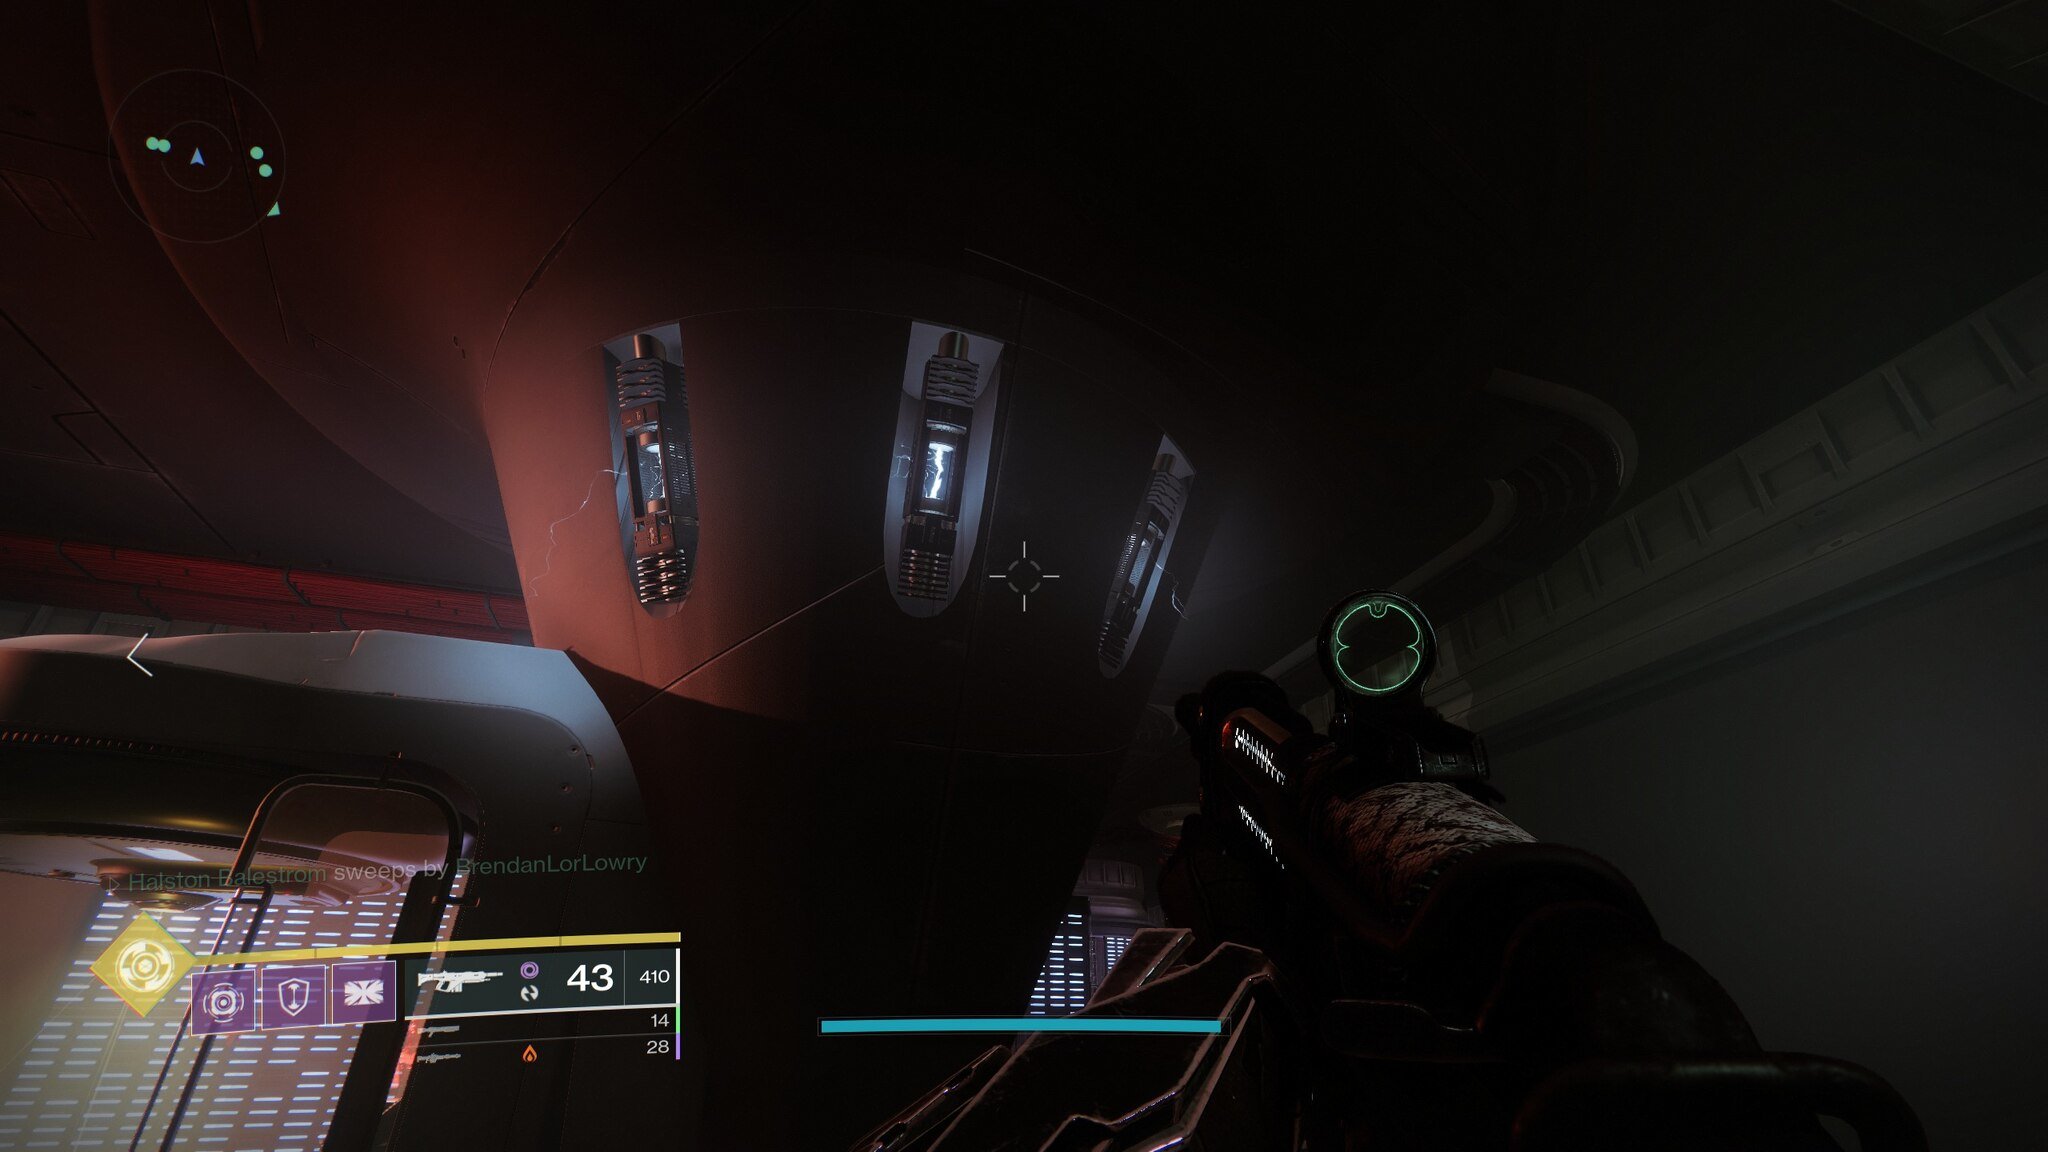 Three of the cores that indicate which fuse to shoot.
The cores on the left correspond to the three fuses in the light room, while the cores on the right correspond to the ones in the dark room. When you're holding the Scanner buff, one of these six cores will be glowing yellow — this corresponds to the fuse that everyone else needs to shoot next with their heavy weapons up top. For example, if the middle core on the right side is glowing, you would tell everyone else to shoot dark middle. Then, once a fuse is destroyed, a new one will glow. Continue this until either all the fuses are destroyed or the fuse shields go back up. If the shields go back up and you need to complete another cycle, the player in the basement should put the Scanner buff back in the terminal for the Scanners on top. The basement player can also be saved before they burn by the ad clearer that picked the Operator buff up right before the damage phase. Simply shoot the door controls to the basement doors and let the basement player run out; then, take their place. From here, the encounter repeats until all fuses are destroyed.
Deep Stone Crypt: Atraks-1, Fallen Exo

The second encounter of the Deep Stone Crypt is a boss fight, and quite a tough one at that. You'll be facing off against Atraks-1, a Fallen who became an Exo and is helping the newly-resurrected Taniks.
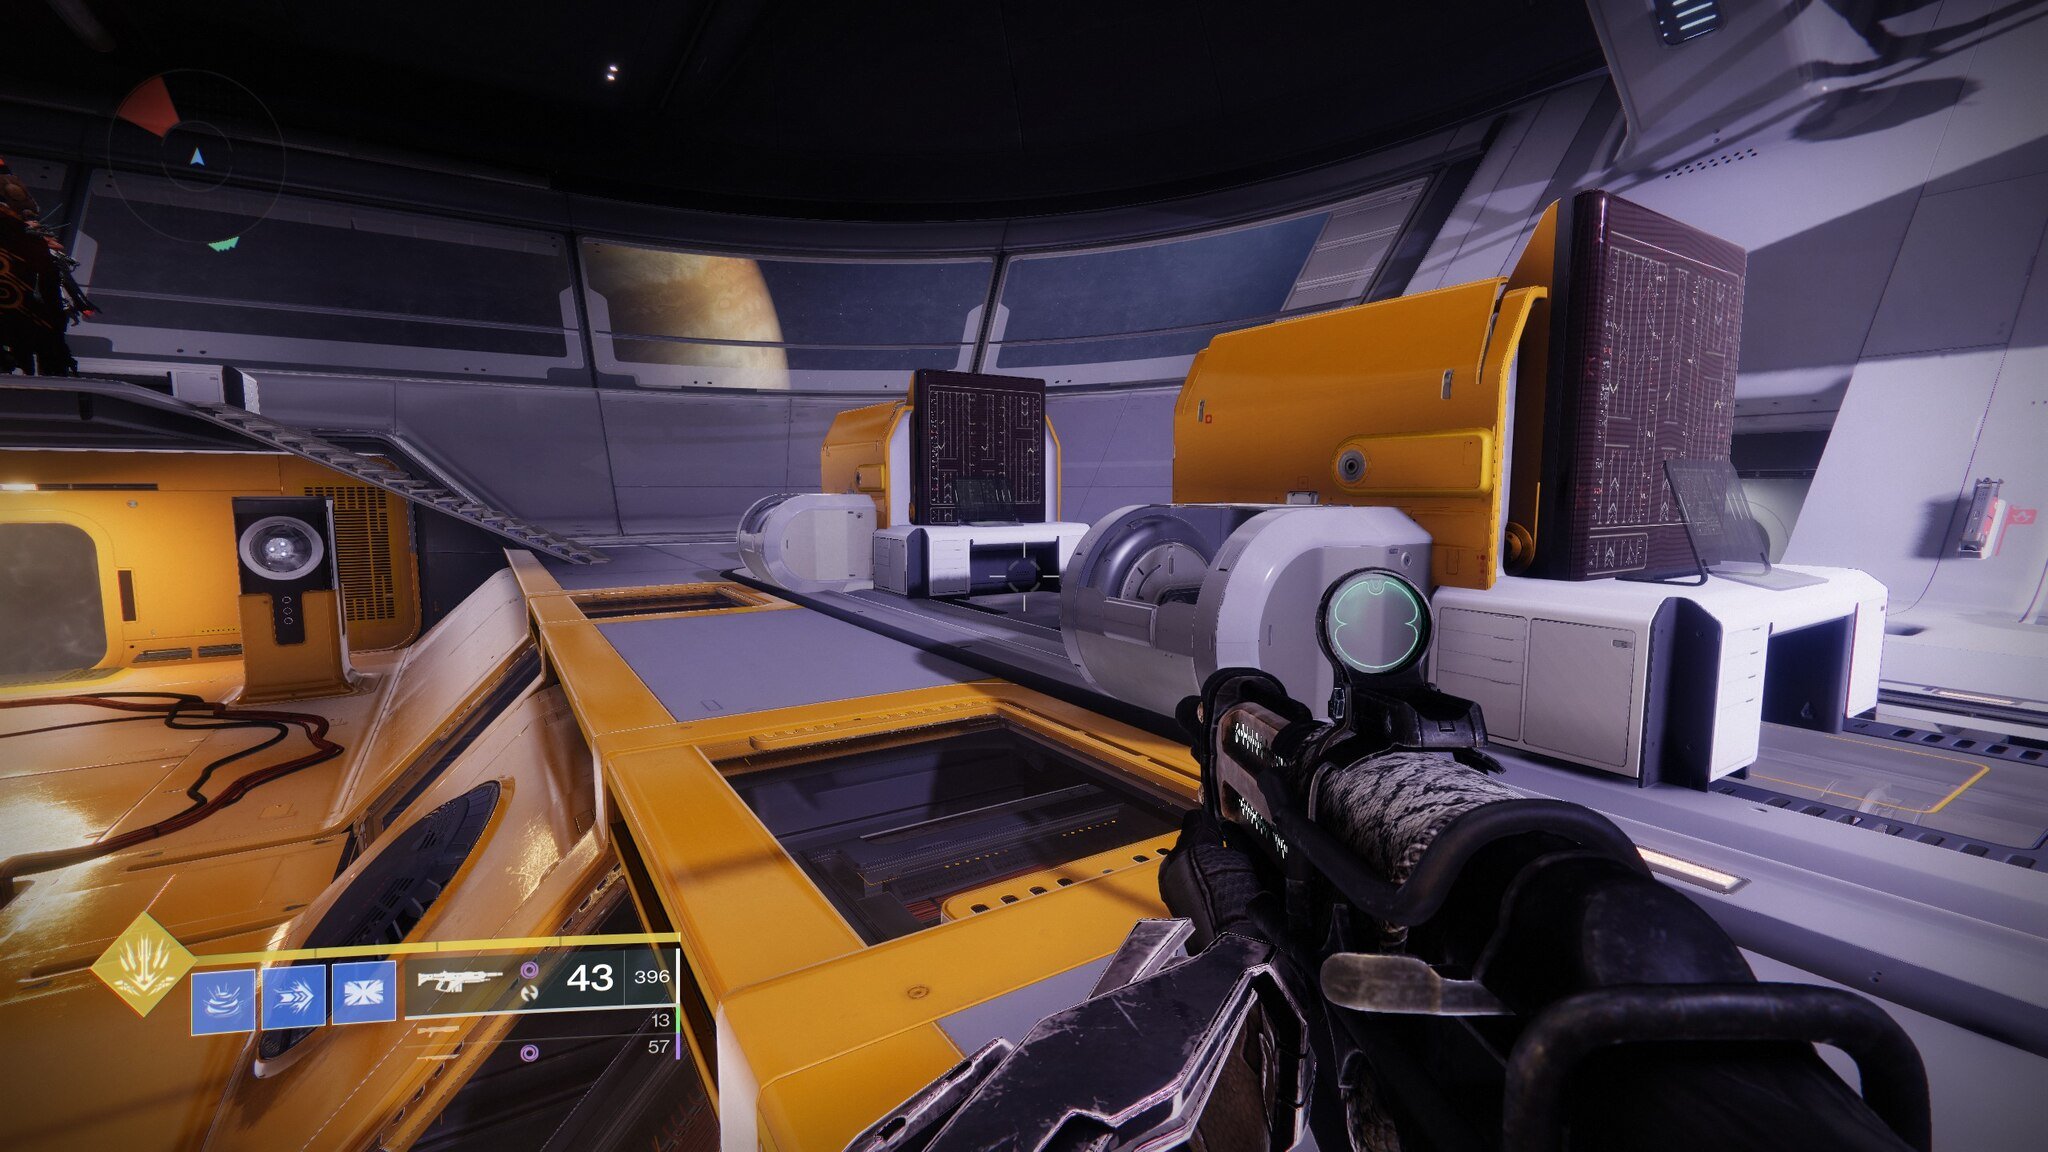
The encounter arena is split into two rooms: bottom and top. Start off by splitting your team into two teams of three, with each team committed to a room. You won't be able to up to the top room until the encounter begins, but the top team can wait near the slots for the pods that will take you to it. Also, we recommend organizing your bottom team so that one player is stationed at the left and right hallways, with the third player acting as support for each side as needed. Make sure to take note of the locations of the buff trading terminals in the bottom area — there's one on the left and right as well as one in the hallway that connects them (this one is the safest). Additionally, you're going to want to designate one player in the bottom team as a Scanner, while you need to designate one player as Scanner and one as Operator in the top team. The encounter begins when someone (ideally someone from top team) touches the purple orb floating near the pod slots.
 The pod slots for top team.
Immediately, bottom team is going to want to start killing ads while the top team takes the pods that arrive up into space (there are several buff terminals in space as well). After a minute or so, Sentinel Servitors will spawn in both rooms — just like in the Crypt Security encounter, these need to be killed quickly (since the Servitors will tend to stay near the boss clones, using scout rifles and sniper rifles is a good way to kill them safely). Alongside them, a Vandal with a Scanner buff will spawn in the top room while one with the Operator buff will spawn in the bottom room. The top team Scanner needs to get the Scanner buff right away, while the bottom team needs to hold the Operator buff temporarily.
Both teams should have noticed that four "clones" of the boss are in each room. In bottom room, there's a boss on the top left, bottom left, middle, and right. Meanwhile, on top, there's a boss at the front, left, right, and back of the room. Soon after the Vandals with buffs spawn in the rooms, all four of the boss clones in the top room will begin to charge a wipe attack. You need to damage them to stop it, but the issue is that hitting the wrong one will cause a wipe. This is why it's important to get Scanner quickly; the correct boss to damage will be glowing yellow. The Scanner up top needs to tell everyone which boss it is, and then they, along with their teammates, need to damage the boss at the same time (Falling Guillotine and The Lament are superb here). This will kill the clone.
Immediately afterwards, the Scanner player needs to send the buff to the bottom team so that they can do the same thing since their four boss clones prepare their own wipe attack soon after. Right after the bottom Scanner player gets the Scanner buff, the player temporarily holding the Operator buff should also quickly send it up to the top for the Operator player to grab before bottom team's bosses prepare the wipe attack. After bottom team's first clone is dead, they then send the Scanner buff back up so the top team can kill a second clone, and then it goes back down to bottom team so that a second clone can be killed there too. After the second clone at the bottom dies, the Scanner buff is sent back up since top always has to kill a clone first in each new cycle. In total, you need to transfer the buff between rooms four times and kill four clones, two in each room.
There's an added complication, however. When a clone dies in either room, it will drop a purple orb. This is essentially Atraks-1's soul, and if it is allowed to sit for a few seconds, a clone will respawn at the orb's location and wipe the team. Therefore, players need to pick it up (the timer players have before the team wipes is much longer at 45 seconds) so that it can be cleansed in the top room at one of the four airlocks on the walls.
 This is one of the four airlocks in the top room.
This is where the Operator comes in. First off, the Operator needs to send each pod back down by shooting the keypads next to them so that players who collect purple orbs in the bottom room can go to the top room. Secondly, the Operator has to open each of the airlocks so that players with the orbs can run in. Then, the Operator shoots the orb off the player's head so it gets sucked out into space. FInally, the player runs out and the Operator shoots the door controls again to close them. Cleansed players can then return to their position (bottom team players can take a pod back down) and the encounter repeats.
Each airlock can only be used once in each cycle, so it may be easier for consistency's sake to have all of the orb players congregate at one airlock to all be cleansed at once. This is made possible by the fact that the Operator can reset an orb's timer by shooting it off of the player holding it. Then the player simply picks the orb up again. If you accidentally pick up an orb during this process as the Operator, you'll need to put the Operator buff in a terminal so a teammate can pick it up and shoot your orb off.
This continues until you get the boss' health bar down to the final chunk (represented by the part separated with a black line). When this occurs, all players in the bottom room need to come up to the top room. There will be six different boss clones all preparing a wipe attack, and the player who has the Scanner buff at that time needs to call out which clone your team needs to hit. Unlike before, the bosses will continue preparing wipes repeatedly, so you need to be quick on your rotations to each boss clone. While this is going on, the Operator also needs to make sure any players that have the purple orb from the last part of the main phase are reset. Also, players need to pick up orbs spawned from each of the boss clone deaths in this phase, too.
This continues until you finish off the last part of the boss' health. The orbs players are holding go away once the boss is dead, so don't worry about that. If you're unable to do enough damage while stopping the attacks, the boss will eventually wipe your team.
Deep Stone Crypt: Rapture
Now that you've taken care of his second-in-command, it's time to take on Taniks himself. However, you'll need to stop him from nuking Europa first. To do that, you'll need to bring his space station down with Taniks' own nuclear cores.
Once you arrive in the room that the encounter takes place in, you're going to want to split up into three teams of two. As you might expect based on the buff terminals and keypads in the room, the Scanner and Operator buff mechanic is back. This time around, though, there's a third buff to manage: Suppressor. In this encounter, players using the Scanner, Operator, and Suppressor buff all have to work in tandem to successfully dunk nuclear cores into deposit zones multiple times, all while fighting off waves of ads and surviving Taniks' attacks. Each group of two needs to have one buffed player in it and one player acting as a backup (more on why later).
 The deposit zones Scanners need to look at in order to identify which ones are correct.
Let's discuss the role of the Scanner first. Just like in the last two encounters, the player with the Scanner buff needs to identify the correct place for the team to do something — in this case, where to dunk nuclear cores. When the encounter starts (you can begin it by shooting at Taniks), keep an eye out for a Vandal with the yellow buff symbol over his head. Kill him and take the Scanner buff and then look in front of the platform where Taniks is standing on. You'll see four curved white deposit zones, two to the left and two to the right. The ones that are glowing are the ones that your team needs to dunk nuclear cores into. These change around after every round of dunks, so make sure you're always looking to see what the new correct deposit zones are.
The keypads that the Operator needs to shoot at to reduce the number of cores that spawn.
Next we'll go over the Operator's role. In this encounter, the Operator player needs to get the Operator buff from one of the Vandals that spawn. Then, they need to shoot one of the keypads around the room in order to reduce the number of nuclear cores that naturally spawn during the encounter from three to two, since three cannot be managed. This is because of two reasons. The first is that there are only ever two "active" deposit zones. The second is that the nuclear cores cannot be left on the ground for more than 10 seconds or they will explode, wiping the team. You need to make sure you shoot a keypad after each time two cores are dunked.
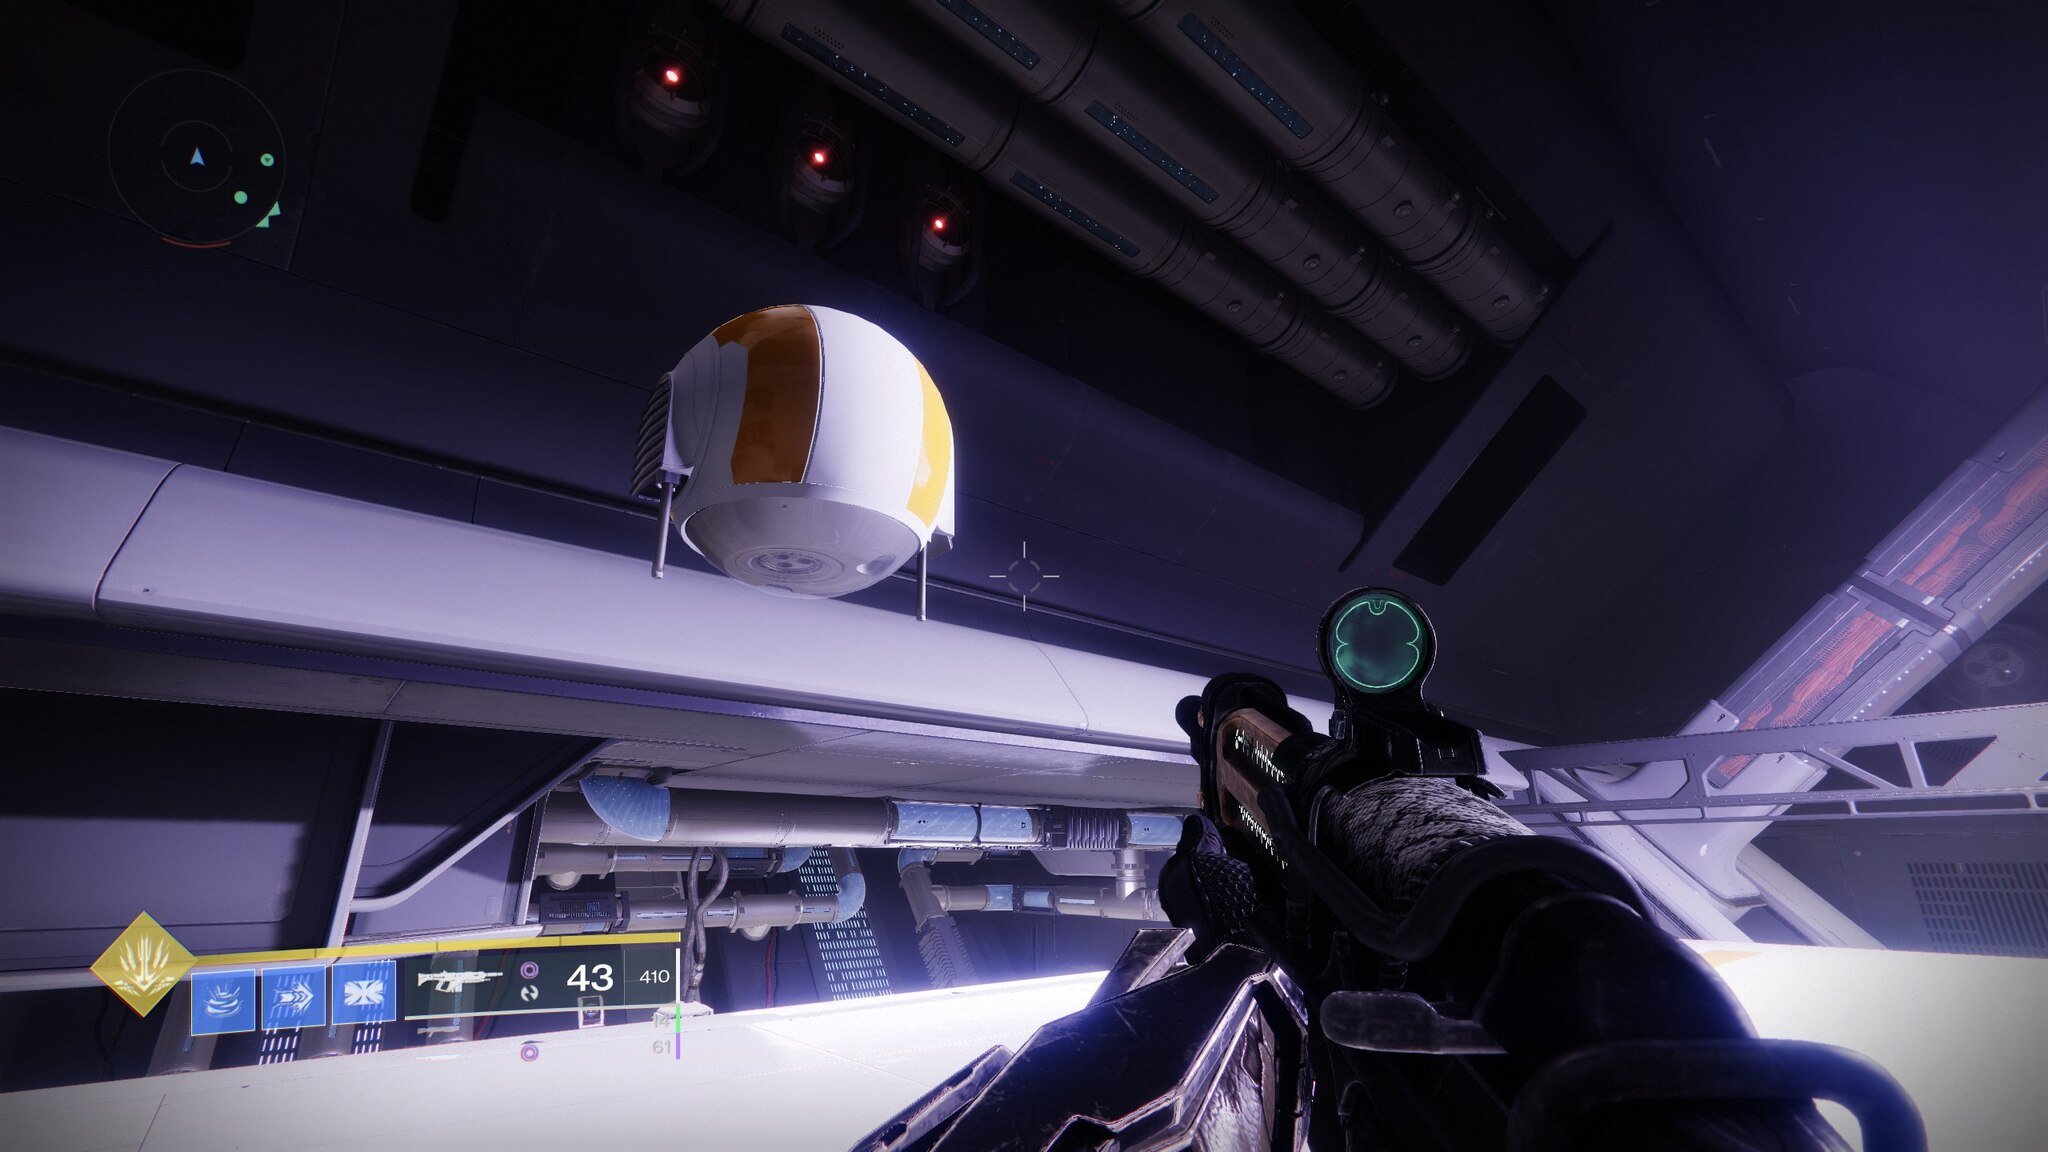 This is what the security drones look like.
Finally, there's the new Suppressor buff, which is blue and also is obtained by killing a Vandal who spawns holding it. Once the cores spawn, this buff allows you to stand underneath each of the three ball-like security drones in the room and become powered up. As you go under the drones, look at the boss. Once he glows blue, shoot him. Repeat this for the other two security drones and you will stun the boss, which is crucial since the core carriers cannot dunk their nuclear cores if the boss hasn't been suppressed. This needs to be repeated each time cores spawn.
If you're not one of these three players, you will act as a backup for one of them. This role is important because for the first time in the raid, the Scanner, Operator, and Suppressor players can have their buffs deactivated once a pair of cores is dunked (this always happens to one of the three buffed players at random). To solve this, the deactivated player needs to deposit their buff into a terminal, and then their backup player needs to pick it back up to get a working version of the buff. At this point, the two players switch; the backup becomes the buffed player and the original buff-holder becomes the backup. These switches need to be made quickly, so keep a keen eye on your buff if you're starting off with one of the buffs so that you can communicate with your partner that it's time to swap. Once this is done, the three buffed players can all do their jobs.
If you're a backup and you don't end up having to fill in for your partner, your job is to ad clear and to carry the nuclear cores to the proper deposit zones when they spawn in. It should also be noted that the Scanner and Operator players can (and should) carry cores too, though you'll always need the Suppressor player to focus on stunning Taniks so the cores can be dunked. Carrying cores builds up a Radiation debuff that kills you when it gets to x10 stacks, so call out to a teammate to take it from you if necessary. Because of the Radiation debuff stacks, you'll want to rotate core-carrying duties with other players to allow the debuff to wear off.
This entire cycle needs to be completed six times in total, and once you do this, a hatch in the floor will open. Drop into it as a fireteam and immediately sprint down the hallway as quickly as you can until you get to the end (Taniks will be chasing behind you). If you make it in time, the encounter will complete. Congratulations — you have successfully crashed Taniks' station into Europa and have prevented him from destroying the planet.
Deep Stone Crypt: Taniks, the Abomination
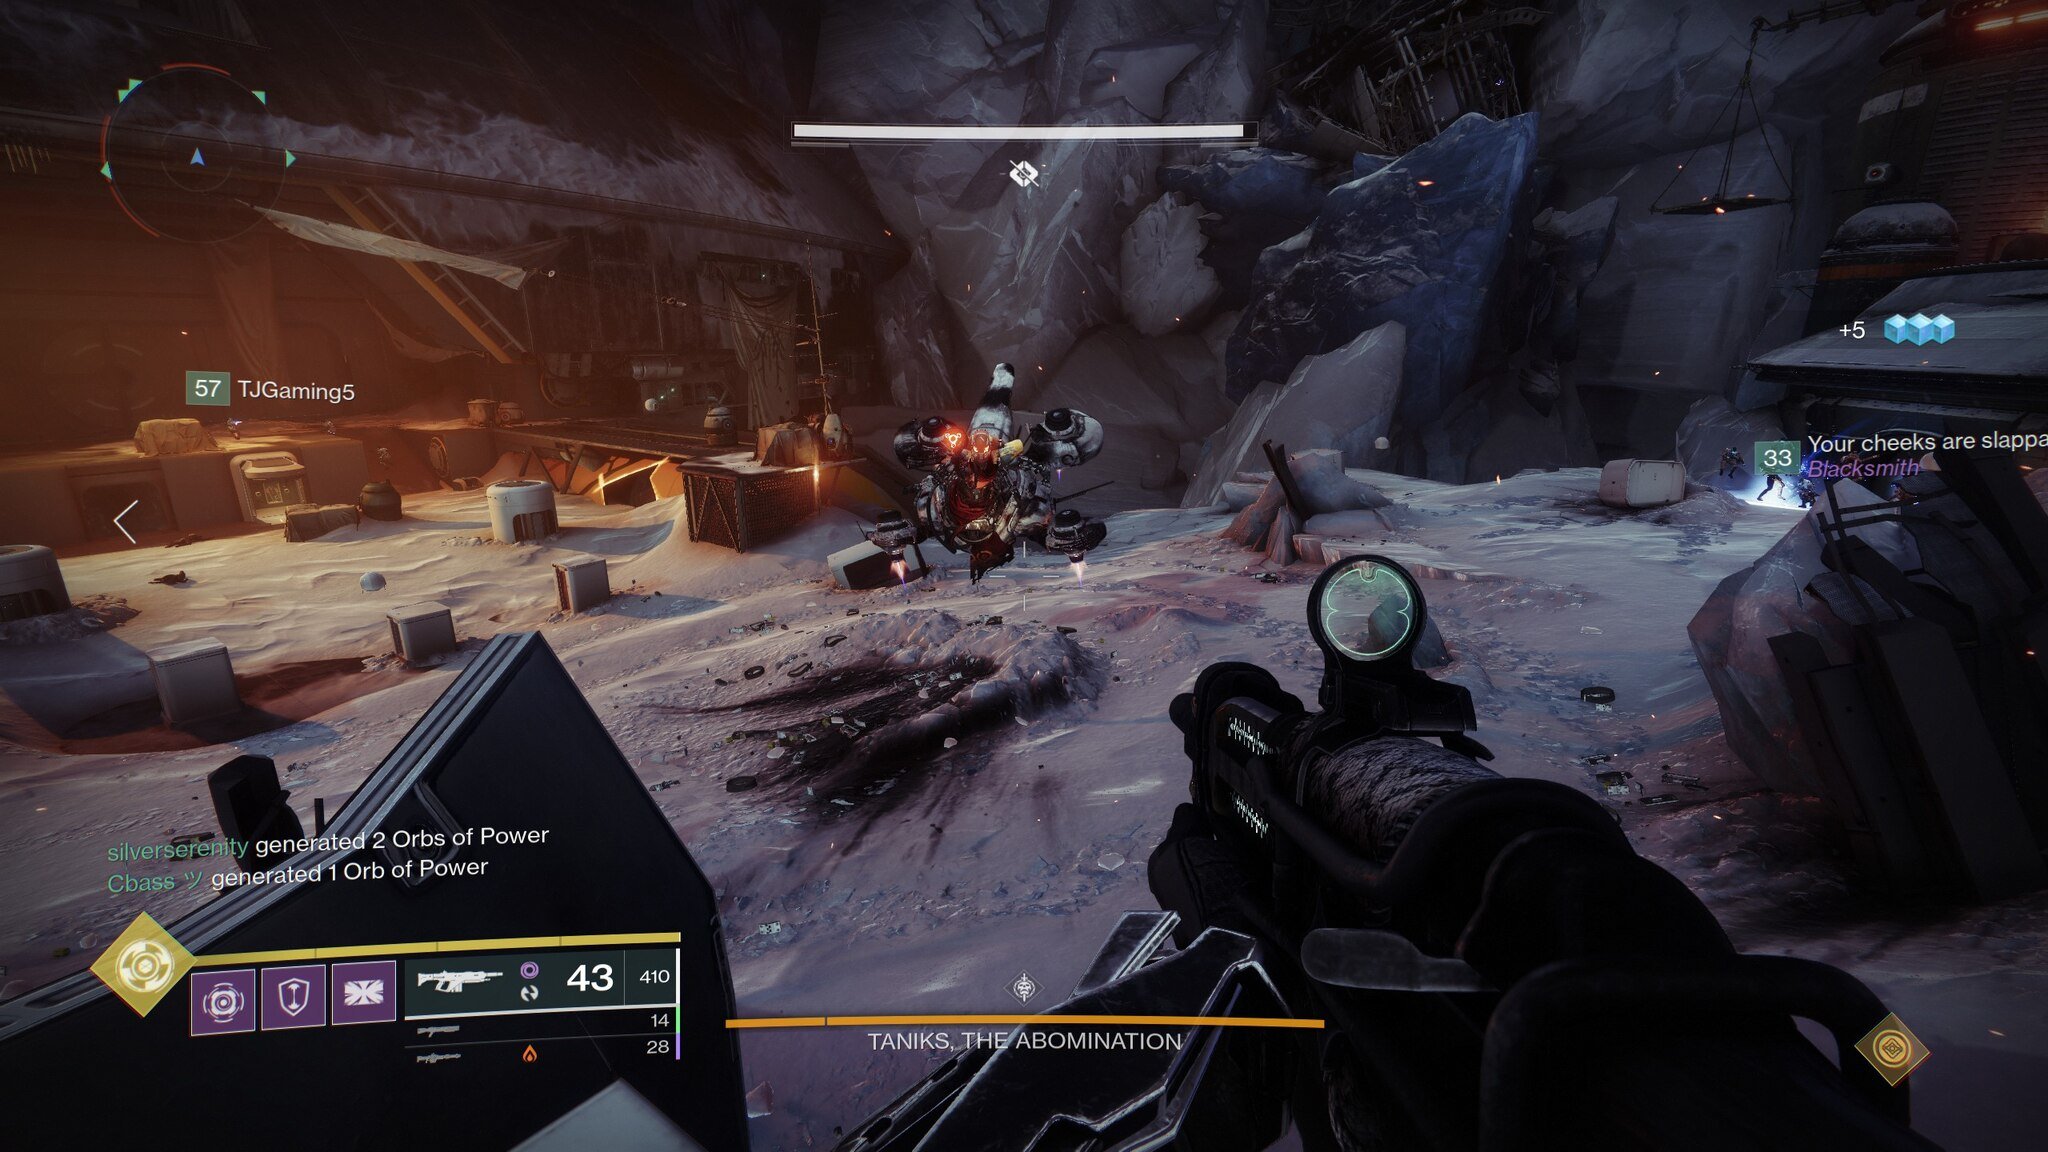
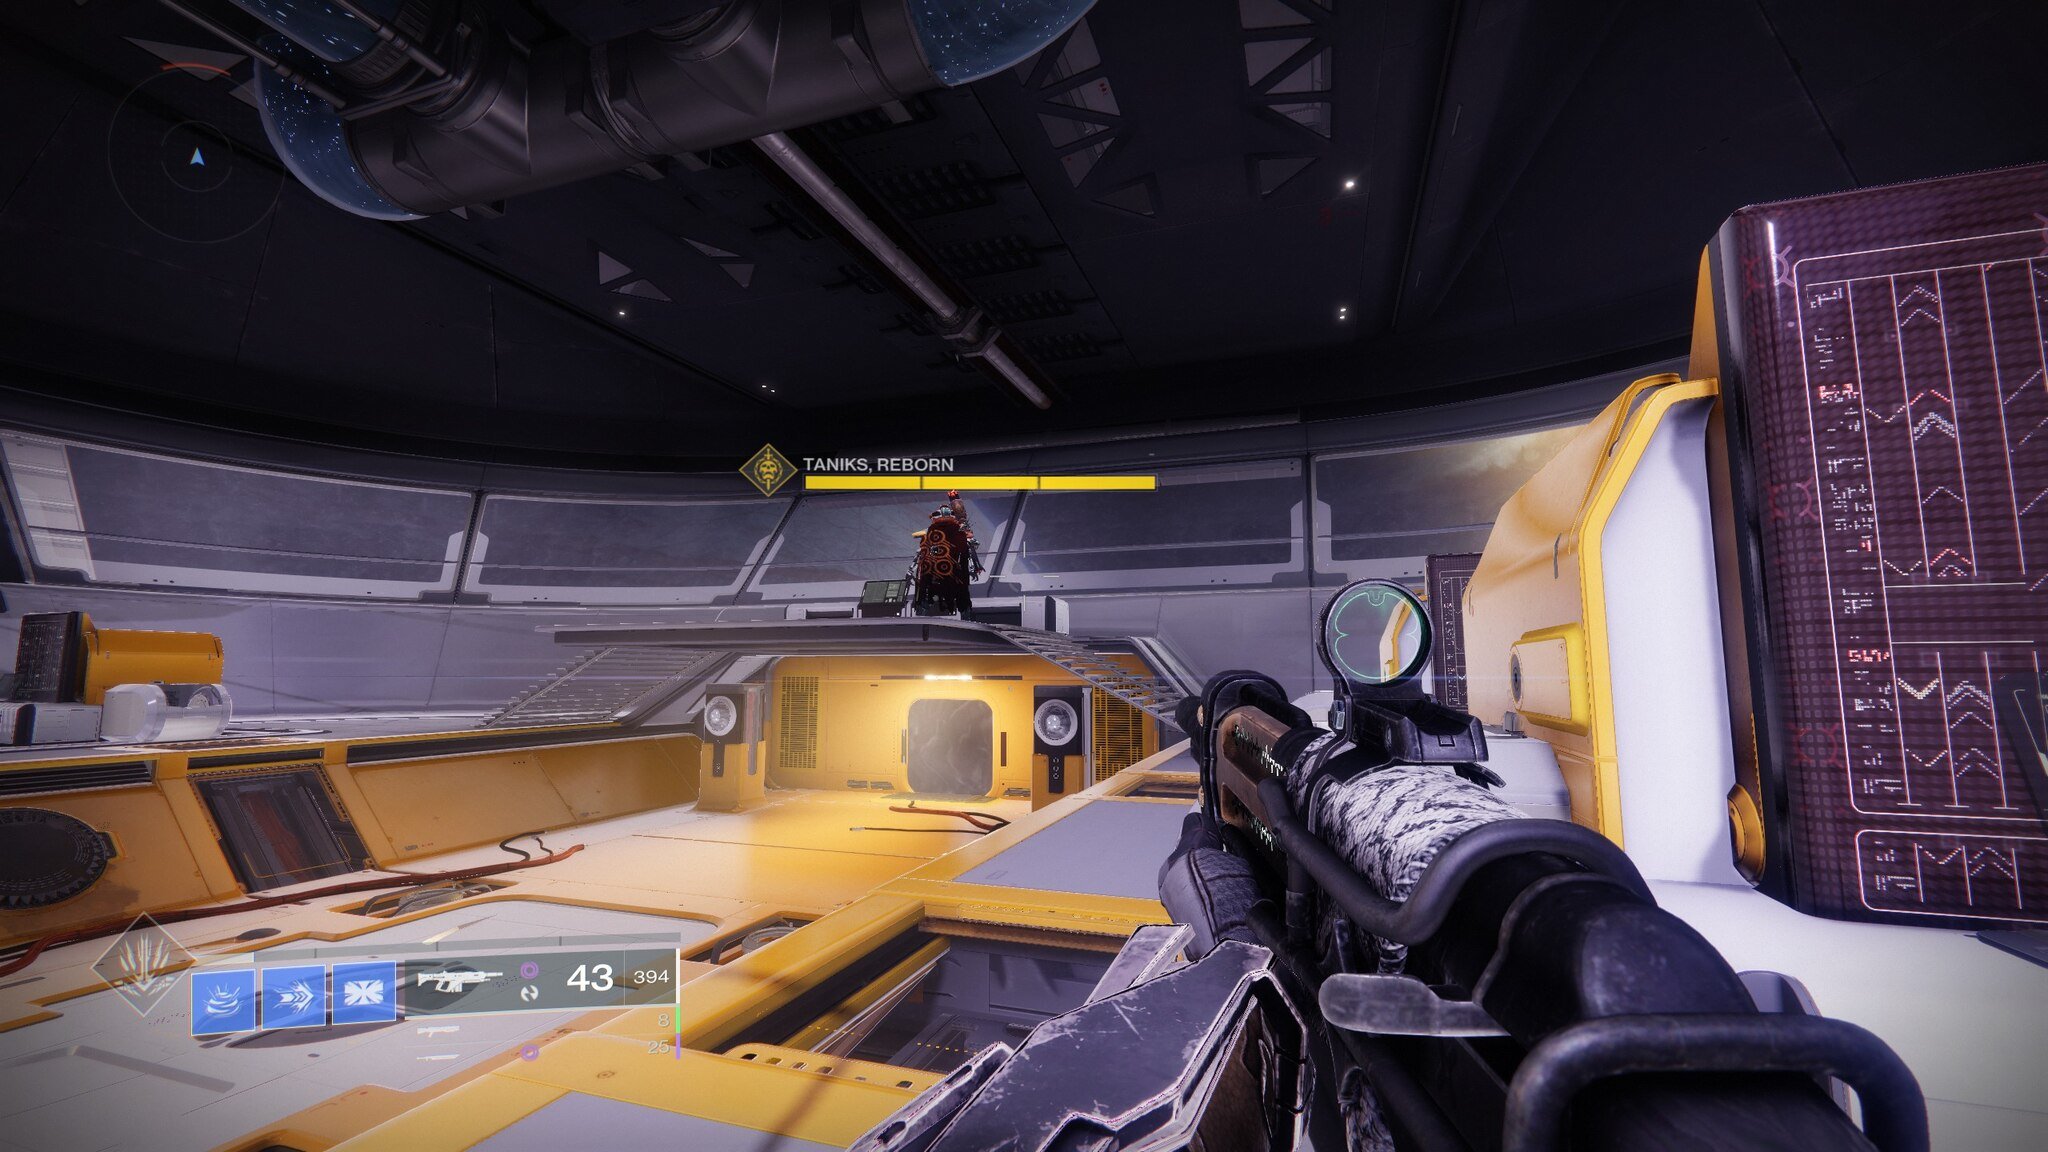
It's time for the fourth and final encounter of the Deep Stone Crypt raid — a showdown with Taniks himself.
As you exit the wreckage of the space station, you'll find yourselves in a large, open area filled with various pieces of debris from the crash. In the middle, there's a particularly large pile of it; this is where Taniks spawns from, so don't go near it just yet. Take a second to look around this area, because there are three important locations here: the spawn area, the area with pipes and blue lights, and the "garage" lit up with orange lights.
From left to right: Spawn, blue, orange.
You should also notice that each area has the same deposit zones that you used in the last encounter, as well as the same security drones and terminals for buff-swapping. This encounter mostly works the same as the last one: the Scanner tells the team which two of the six deposit zones are the right ones to dunk at, and the Supressor stands under each of the three security drones when the cores are active and shoots the boss to suppress him. The only difference is the Operator's role, which we'll touch on later. Once again, split your team up into three teams of two: one person who will pickup one of the three buffs first, and another who will focus on ad clearing, core carrying, and being a backup for the buffed player if necessary.
You are now ready to start the encounter, which you can do by walking close to the middle pile of debris. Taniks in his new half-Eliksni, half-Shank body will pop out of it and ads will start to spawn. After 30 seconds or so of killing ads, a Vandal with one of the buffs will spawn at each area: the one with the Scanner buff spawns in the blue area, the one with the Operator buff arrives near the spawn area, and the one with the Suppressor buff shows up in the orange area. Immediately have all three players pick up their designated buffs. The Scanner should now figure out which deposit zones the team will be dunking at.
Soon, Taniks will head towards one of the three areas and will start raining down Void explosives on you. While he does this, you should notice that each of his four thrusters are glowing brighter; the team needs to shoot two of these until they are destroyed and nuclear cores drop from them. Then, two players need to pick up the cores and carry them to the deposit zones (It's recommended to wait a few seconds before picking them up so that your Suppressor player has enough time to suppress Taniks). Due to the longer distance you need to run the cores compared to the Rapture encounter, the core runners won't likely be able to make it to the deposit zones without dying from the Radiation debuff. Therefore, each core runner needs someone to go with them so that the core can be passed off.
Like with the Rapture encounter, the Scanner is encouraged to help carry cores. However, the Operator should never do this. This is because occasionally, Taniks will trap the core carriers in a purple bubble; the Operator's role in this encounter is to shoot one of the "spots" on the bubble and free the core carriers. If core runners are quick and manage the Radiation debuff well, the Scanner calls out the correct deposit zones, the Operator stays on top of freeing core runners from bubble traps, and the Suppressor stuns Taniks, the cores will be successfully dunked at the right deposit zones. At this point, one of the three buffed players will become deactivated just like they were in the Rapture encounter, and they should give their buff to their backup with one of the buff-swapping terminals. Then, the team needs to complete this entire circuit one more time to start the DPS phase.
When the DPS phase starts, Taniks will spawn a bubble around himself with debris swirling around the outer edges of it. Players should jump over this debris (it will knock you back or kill you if it hits you) and begin to damage Taniks with heavy weapons while also ideally dropping a Well of Radiance if a Warlock is in the fireteam. His head is his crit spot, but it's rather difficult to hit so use of Divinity is recommended to make this easier. Don't get too close to Taniks, though, or the small ring of Arc energy surrounding him will kill you. After a few seconds, Taniks will knock you up and out of the bubble. Jump back in and continue doing damage until the bubble goes away, signaling the end of the DPS phase. You have a total of three DPS phases to get his health to the final chunk, which is, like Atraks-1, represented by the part of his health separated by a black line. If you don't knock his health down to that point in three DPS phases, your team will wipe.
Once you do get his health down to that level, Taniks will make his final stand. He will become normally damageable and launch various attacks at you from one of the locations on the map before teleporting to another one. As he's doing this, players need to be doing as much damage as they can so they can finish Taniks off. Taniks will teleport to a different location five times; if players don't finish him off before the end of his fifth attack, he will wipe the team. However, if you do manage to land the killing blow, the fight will be over and you'll have successfully defeated Taniks and the Deep Stone Crypt raid.
Any questions?
Do you have any questions about the Deep Stone Crypt raid encounters? If so, ask us in the comments and we'll be happy to help.
Destiny 2: Beyond Light is available on Xbox Series X, Xbox Series S, Xbox One consoles, PlayStation 4 and 5, and Windows 10 PCs. It costs $40 but is also available through Xbox Game Pass. If you've never tried out Destiny 2, I recommend doing so, as it's easily one of the best Xbox One shooters. There's really nothing like a good Destiny raid in the shooter market.
Wield the Darkness
Destiny 2: Beyond Light
Welcome to Europa, Guardian...
From $40 at Microsoft Store From $40 at Steam (GMG) See at Xbox Game Pass
In Beyond Light, players will encounter a dark Fallen faction, travel to new locations, and go beyond the Light to wield the power of the Darkness.


0 comments:
Post a Comment