
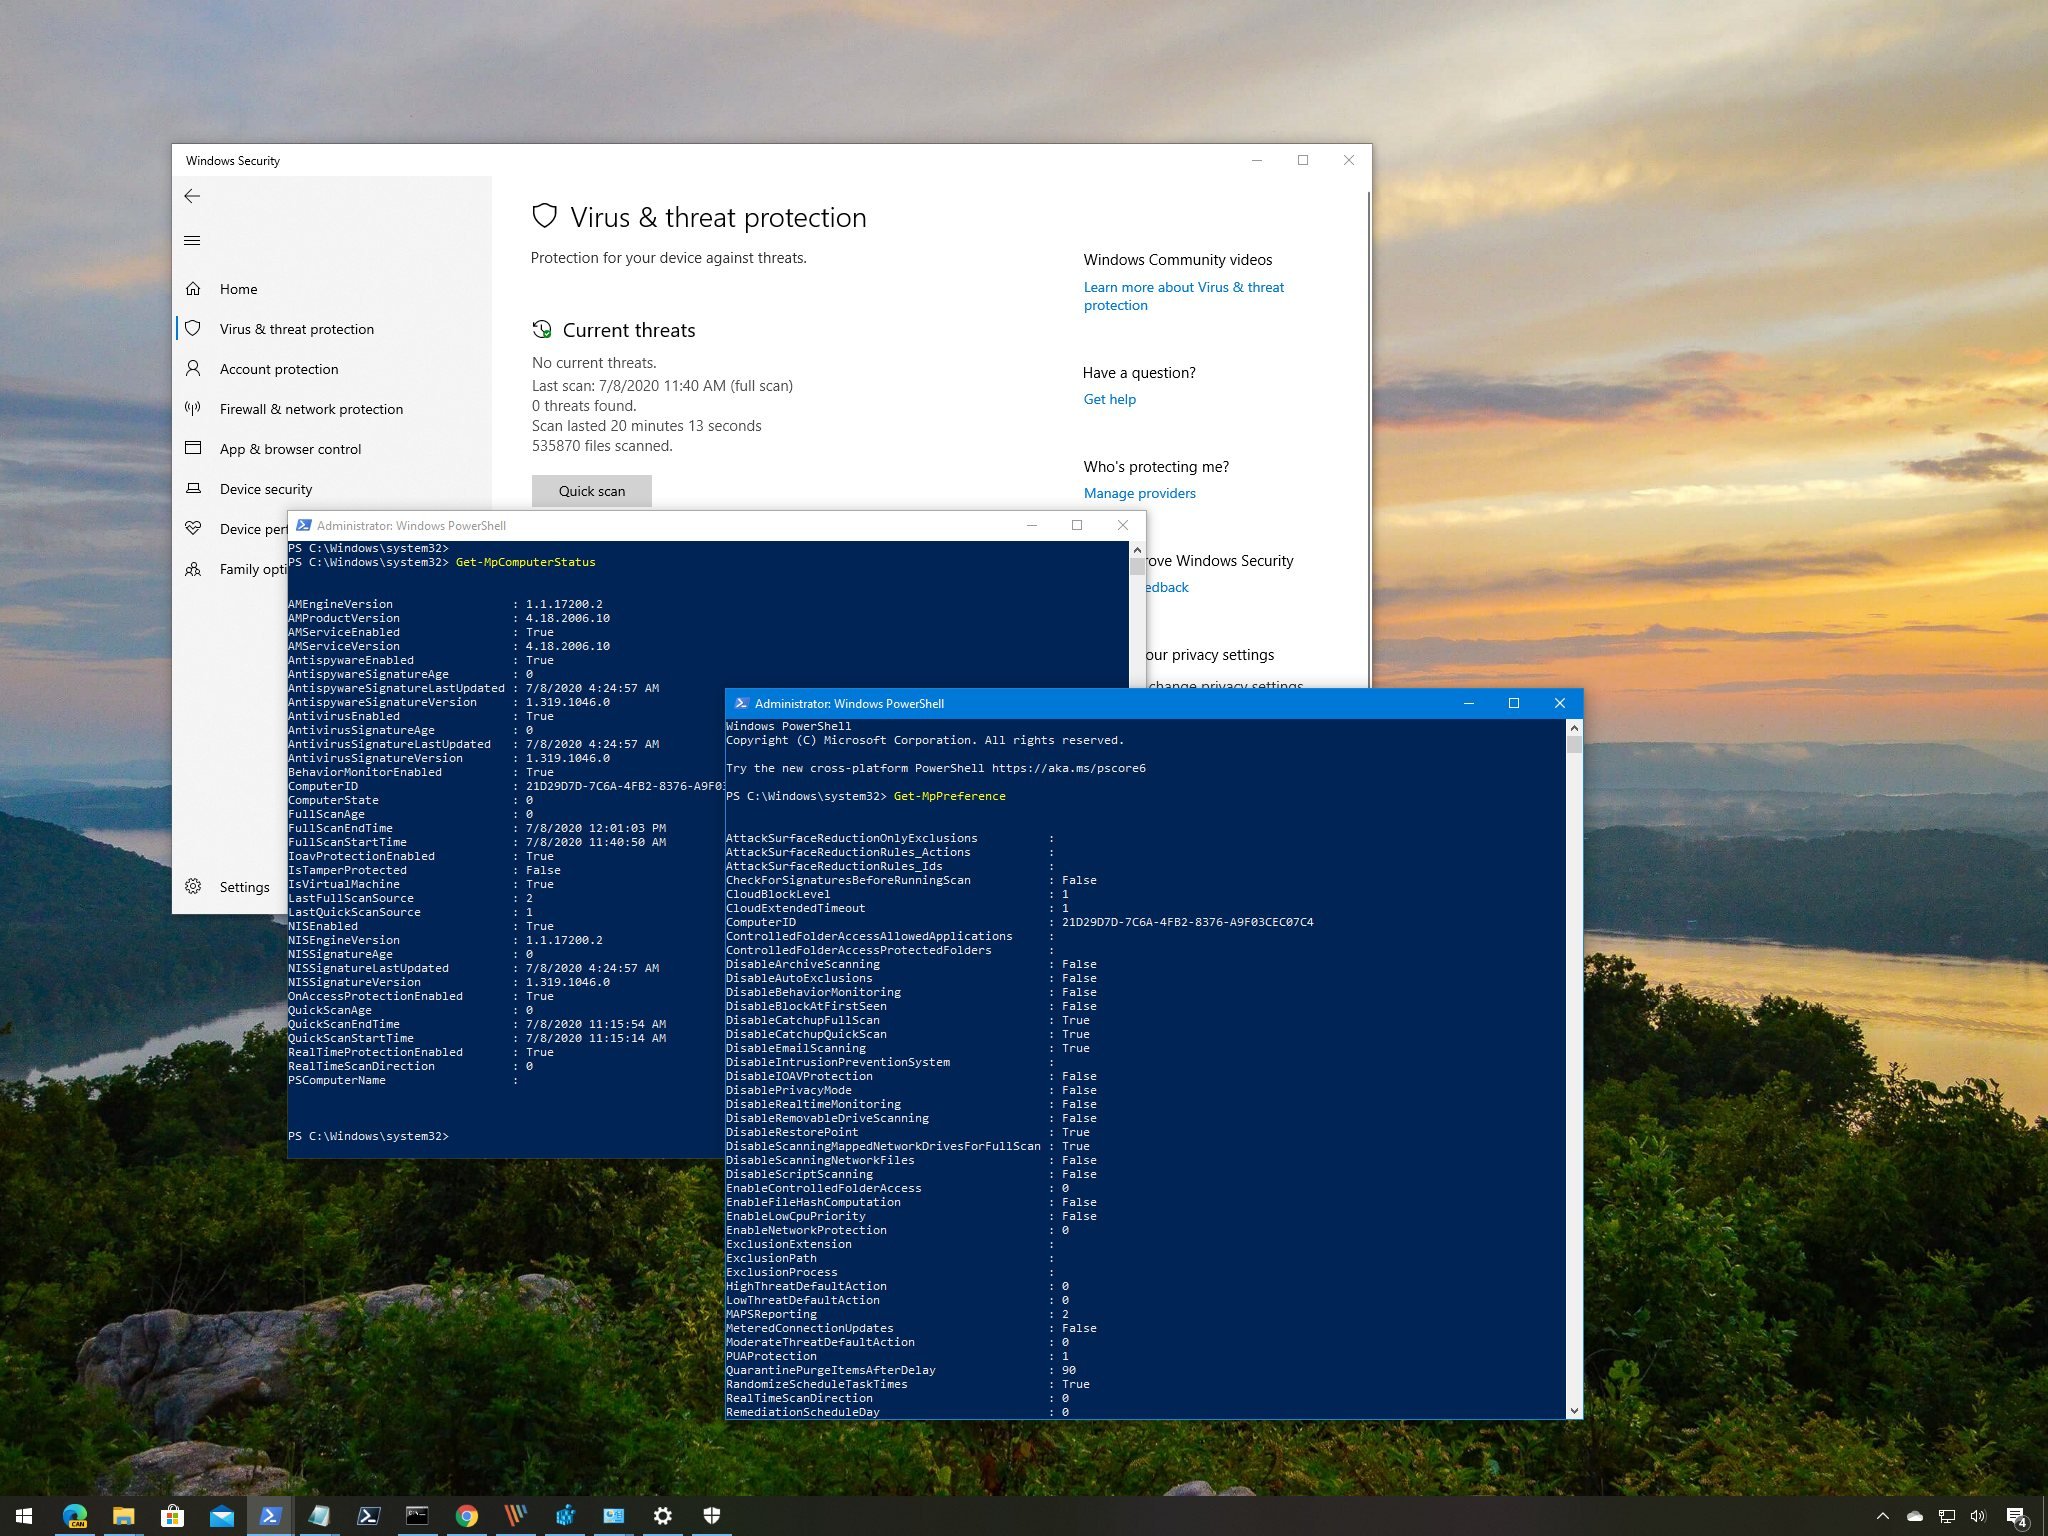
You can manage settings and control virtually any aspect of the Microsoft Defender Antivirus using PowerShell commands, and in this guide, we'll help you get started.
On Windows 10, Microsoft Defender Antivirus (formerly Windows Defender Antivirus) is part of the Windows Security experience, and it provides a robust real-time protection against unwanted viruses, ransomware, spyware, rootkits, and many other forms of malware and hackers.
Although you can easily control everyday antivirus tasks through the Windows Security app, you can also manage the anti-malware solution using PowerShell commands, which can come in handy in many scenarios. For example, when you're trying to customize an option that happens not to be available via the graphical user interface (GUI), such as schedule a quick or full scan or signature update. You need to create scripts to automate some Microsoft Defender tasks. Or using commands instead of a GUI can also speed up the configuration process, especially when you need to apply the same settings on multiple installations of Windows 10.
In this Windows 10 guide, we'll walk you through the steps to get started managing Microsoft Defender Antivirus with PowerShell commands.
- How to check status of Microsoft Defender
- How to check for updates on Microsoft Defender
- How to perform quick virus scan with Microsoft Defender
- How to perform full virus scan with Microsoft Defender
- How to perform custom virus scan with Microsoft Defender
- How to perform offline virus scan with Microsoft Defender
- How to delete active threat on Microsoft Defender
- How to change preferences on Microsoft Defender
How to check status of Microsoft Defender
To check the current status of Microsoft Defender using PowerShell, use these steps:
- Open Start.
- Search for PowerShell, right-click the top result, and select the Run as administrator option.
-
Type the following command to see the Microsoft Defender Antivirus status and press Enter:
Get-MpComputerStatus -
Confirm the AntivirusEnabled is reads True to know if the security solution is running.
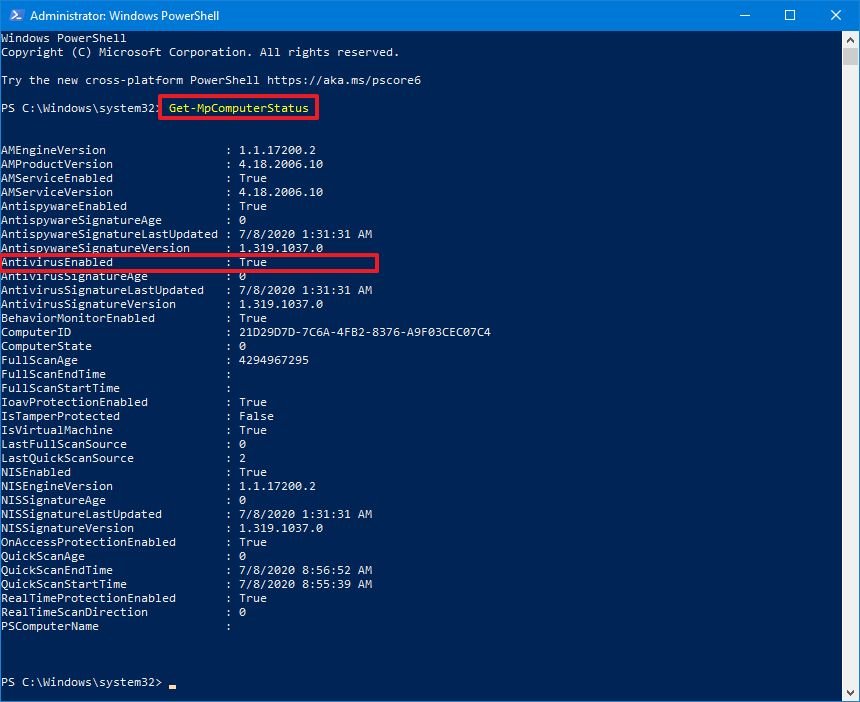
In addition to checking whether the antivirus is running, the command output also displays other important information, such as the version of the engine and product version, real-time protection status, last time updated, and more.
How to check for updates on Microsoft Defender
To use PowerShell to update Microsoft Defender Antivirus with the latest definition, use these steps:
- Open Start.
- Search for PowerShell, right-click the top result, and select the Run as administrator option.
-
Type the following command to check to update Microsoft Defender Antivirus and press Enter:
Update-MpSignature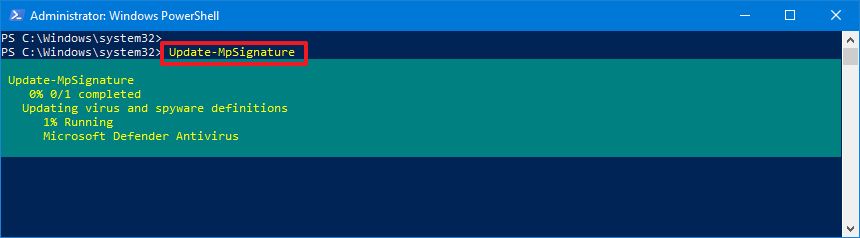
Once you complete the steps, if new updates are available, they will download and install on your device.
How to perform quick virus scan with Microsoft Defender
To complete a quick scan using PowerShell, use these steps:
- Open Start.
- Search for PowerShell, right-click the top result, and select the Run as administrator option.
-
Type the following command to start a quick virus scan and press Enter:
Start-MpScan -ScanType QuickScan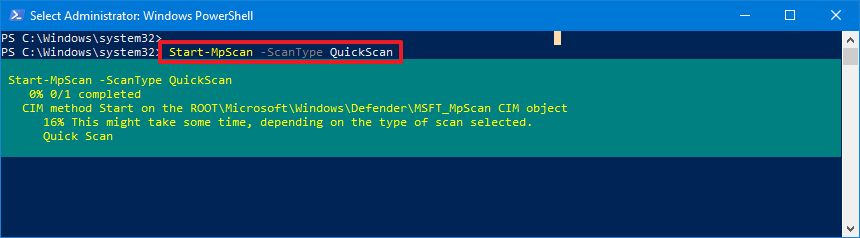
After you complete the steps, Microsoft Defender Antivirus will perform a quick virus scan on your device.
How to perform full virus scan with Microsoft Defender
To complete a full scan using commands on Windows 10, use these steps:
- Open Start.
- Search for PowerShell, right-click the top result, and select the Run as administrator option.
-
Type the following command to start a full virus scan and press Enter:
Start-MpScan -ScanType FullScan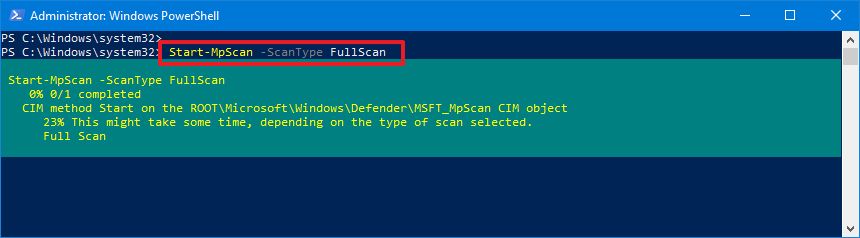
Once you complete the steps, the antivirus for Windows 10 will scan the entire system for any malware and malicious code.
How to perform custom virus scan with Microsoft Defender
To set up a custom scan using PowerShell, use these steps:
- Open Start.
- Search for PowerShell, right-click the top result, and select the Run as administrator option.
-
Type the following command to perform a custom Microsoft Defender Antivirus scan and press Enter:
Start-MpScan -ScanType CustomScan -ScanPath PATH\TO\FOLDER-FILESIn the command, make sure to update the path with the folder location you want to scan.
For example, this command scans the Downloads folder:
Start-MpScan -ScanType CustomScan -ScanPath "C:\Users\user\Downloads"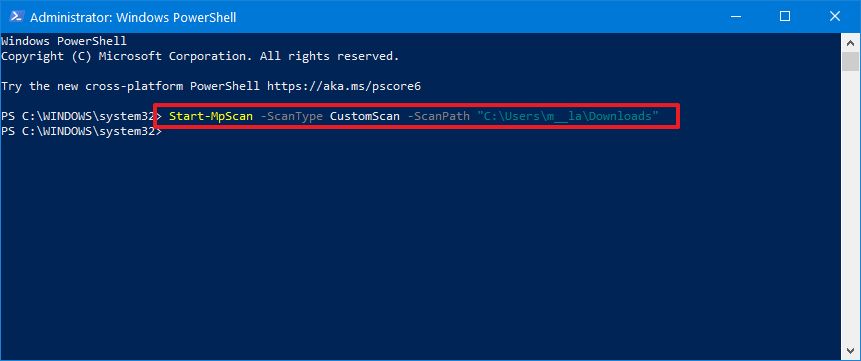
After you complete the steps, Microsoft Defender will only scan for viruses in the location you specified.
How to perform offline virus scan with Microsoft Defender
Microsoft Defender Antivirus also provides an offline scan option, which will come in handy when an unwanted malware infects the device which the antivirus isn't able to remove while Windows 10 is fully loaded.
To start an offline scan, use these steps:
Quick note: Before proceeding, make sure to save any work you may have open, as the command will immediately restart the device to perform an offline scan.
- Open Start.
- Search for PowerShell, right-click the top result, and select the Run as administrator option.
-
Type the following command to start an offline virus scan and press Enter:
Start-MpWDOScan
Once you complete the steps, the device will restart automatically. It'll boot into the recovery environment, and it'll perform a full scan to remove viruses that otherwise wouldn't be possible to detect during the normal operation of Windows 10. After the scan, the device will restart automatically, and then you can view the scan report on Windows Security > Virus & thread protection > Protection history.
See this comprehensive guide to learn about offline scanning with Microsoft Defender Antivirus.
How to delete active threat on Microsoft Defender
To remove all active threats from your computer, use these steps:
- Open Start.
- Search for PowerShell, right-click the top result, and select the Run as administrator option.
-
Type the following command to eliminate active threat using Microsoft Defender and press Enter:
Remove-MpThreat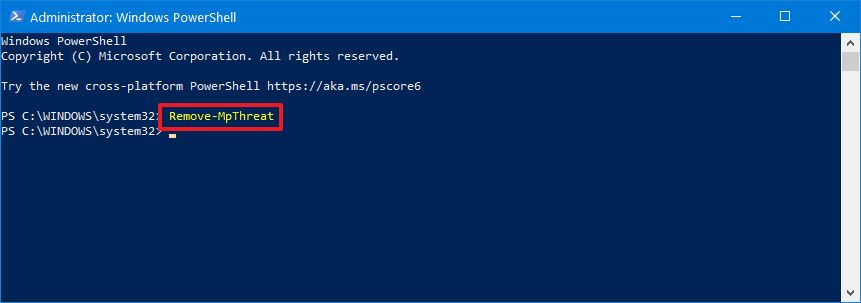
After you complete the steps, the anti-malware solution will eliminate any active threats on the computer. Although this is an interesting command, it'll only work for threats that the antivirus hasn't already mitigated.
How to change preferences on Microsoft Defender
Using PowerShell commands, it's also possible to configure various features of the Microsoft Defender Antivirus. For example, you can exclude locations and files, specify quarantine retention period, run different scans, schedule virus scans, change scan preferences, and much more.
List preferences
To list all the available preferences for Microsoft Defender with PowerShell, use these steps:
- Open Start.
- Search for PowerShell, right-click the top result, and select the Run as administrator option.
-
Type the following command to get a full list of the current configurations for the Microsoft Defender Antivirus and press Enter:
Get-MpPreference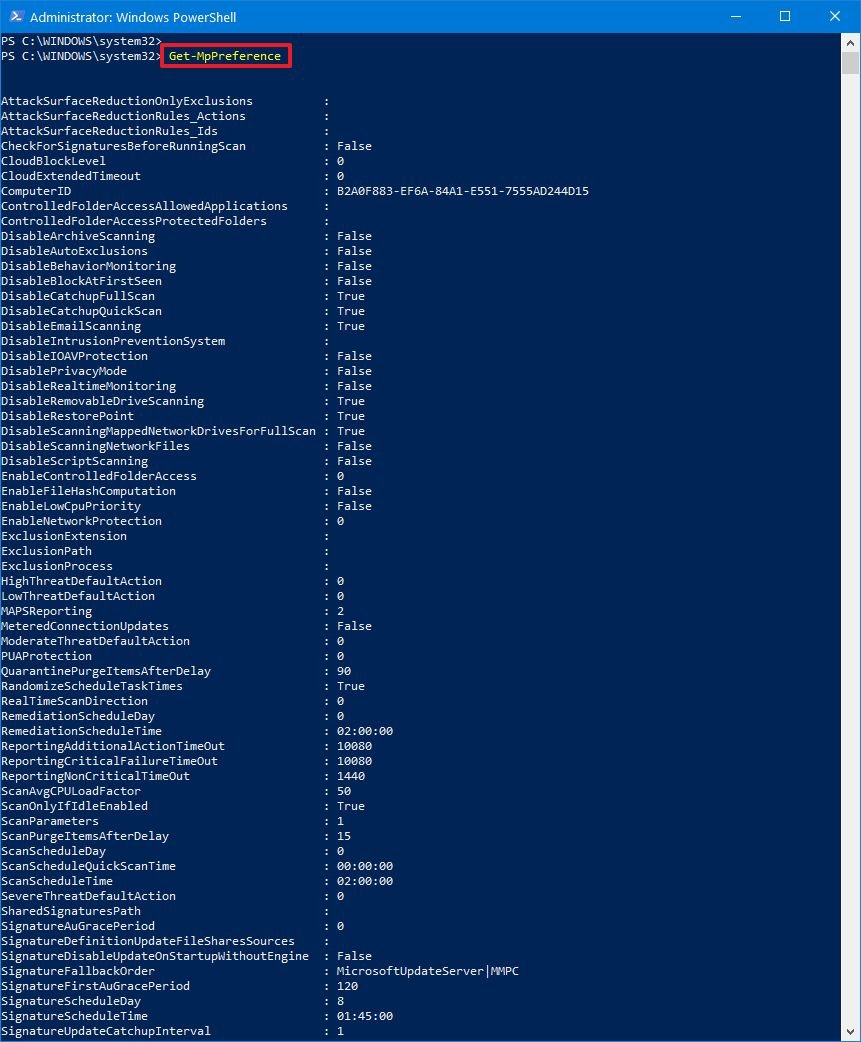
Once you complete the steps, you'll understand all the settings that you can configure with the built-in antivirus.
The following commands are some examples of the preferences that you can customize using PowerShell.
Exclude locations
Microsoft Defender Antivirus includes an option to exclude folder locations from real-time and scheduled scanning.
To exclude a folder path with PowerShell, use these steps:
- Open Start.
- Search for PowerShell, right-click the top result, and select the Run as administrator option.
-
Type the following command to exclude a folder and press Enter:
Set-MpPreference -ExclusionPath PATH\TO\FOLDERIn the command, make sure to replace "PATH\TO\FOLDER" with the path you want to exclude.
For example, this command excludes the Users folder from being scanned:
Set-MpPreference -ExclusionPath C:\Users
After you complete the steps, Microsoft Defender will ignore the folders you specified during real-time and scheduled scanning.
If you want to remove a folder from the exclusion list, you can use this command: Remove-MpPreference -ExclusionPath "PATH\TO\FOLDER-FILES", and don't forget to update the command with the path you wish to remove.
Exclude file type
Also, to exclude locations, you can prevent certain file types from being scan with Microsoft Defender.
To exclude a file type with PowerShell, use these steps:
- Open Start.
- Search for PowerShell, right-click the top result, and select the Run as administrator option.
-
Type the following command to exclude a file type and press Enter:
Set-MpPreference -ExclusionExtension EXTENSIONIn the command, make sure to replace "EXTENSION" with the extension you want to exclude.
For example, this command excludes the Microsoft Word files from being scanned:
Set-MpPreference -ExclusionExtension docx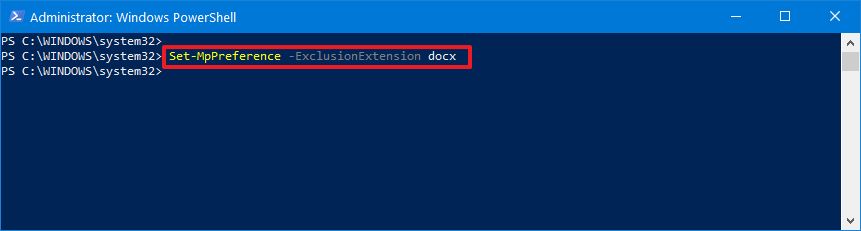
Once you complete the steps, the file extension will be added to the database of formats that need to be ignored during malware real-time, custom, or scheduled scanning.
If you need to remove an extension from the exclusion list, then you can use this command: Remove-MpPreference -ExclusionExtension EXTENSION and don't forget to update the command with the extension you wish to remove.
Quarantine time before deletion
You can also specify the number of days to keep threats in quarantine with these steps:
- Open Start.
- Search for PowerShell, right-click the top result, and select the Run as administrator option.
-
Type the following command to specify the days to keep items in quarantine and press Enter:
Set-MpPreference -QuarantinePurgeItemsAfterDelay DAYSIn the command, make sure to replace "DAYS" for the number of days you want to keep items.
For example, this command keeps items for 30 days before being deleted:
Set-MpPreference -QuarantinePurgeItemsAfterDelay 30
Quick tip: You can use the value of "0" (zero) or no value to set keep items indefinitely.
After you complete the steps, items in the Quarantine folder will be deleted automatically after the period you specified.
Schedule quick scan
To schedule a daily quick malware scan with a PowerShell command, use these steps:
- Open Start.
- Search for PowerShell, right-click the top result, and select the Run as administrator option.
-
Type the following command to schedule a daily quick scan and press Enter:
Set-MpPreference -ScanScheduleQuickScanTime SCAN-TIMEIn the command, make sure to replace "SCAN-TIME" with the time in 24-hour format you want to run the scan.
For example, this command schedules a quick scan every day at 6:00 am, local time:
Set-MpPreference -ScanScheduleQuickScanTime 06:00:00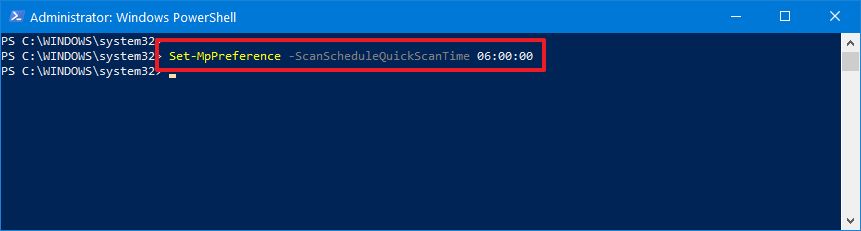
Quick tip: You can specify no time value or set the time to two hours after midnight to reset the settings to their defaults.
Once you complete the steps, Microsoft Defender will perform a quick scan during the time you specified.
Schedule full scan
Using PowerShell commands, you can also specify the day and time to perform a full malware scan.
To schedule a full malware scan on Windows 10, use these steps:
- Open Start.
- Search for PowerShell, right-click the top result, and select the Run as administrator option.
-
Type the following command to schedule a full scan and press Enter:
Set-MpPreference -ScanParameters 2Quick note: The number "2" in the parameter is what specifies Microsoft Defender a full scan.
-
Type the following command to set a scan day and press Enter:
Set-MpPreference -RemediationScheduleDay SCAN-DAYIn the command, change the "SCAN-DAY" for the day (number) you wan to run the scan. Here are the available options:
- 0 – Everyday
- 1 – Sunday
- 2 – Monday
- 3 – Tuesday
- 4 – Wednesday
- 5 – Thursday
- 6 – Friday
- 7 – Saturday
- 8 – Never
For example, this command schedule the full scan for Sundays:
Set-MpPreference -RemediationScheduleDay 1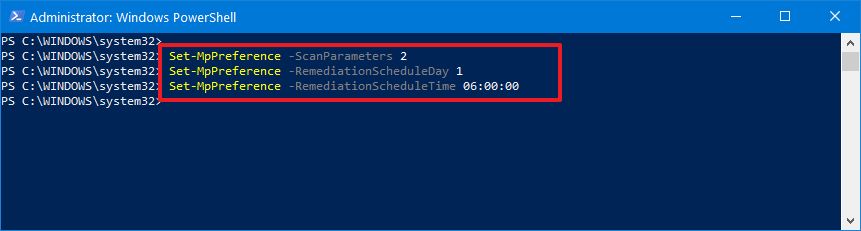
Quick tip: You can revert to the default scanning schedule using option number
8. -
Type the following command to specify a time for the scan and press Enter:
Set-MpPreference -RemediationScheduleTime SCAN-TIMEIn the command, change "SCAN-TIME" with the time in 24-hour format you want to run the scan.
For example, this command schedules a full scan at 6:00 am, local time:
Set-MpPreference -RemediationScheduleTime 06:00:00
After you complete the steps, Microsoft Defender Antivirus will run a full scan on the day and time you specified in the preferences.
Disable antivirus
Although Microsoft Defender offers a command to disable the antivirus, it's guarded by the Tamper Protection feature, which you can only disable through the Virus & threat protection settings available in the Windows Security app.
To disable the antivirus, turn off Tamper Protection, and then use these steps:
- Open Start.
- Search for PowerShell, right-click the top result, and select the Run as administrator option.
-
Type the following command to temporarily disable Microsoft Defender Antivirus and press Enter:
Set-MpPreference -DisableRealtimeMonitoring $true
Once you complete the steps, the real-time antivirus protection will be disabled until the next reboot. Or you can run this command: Set-MpPreference -DisableRealtimeMonitoring $false turn on real-time immediately via PowerShell.
If you want to disable the Microsoft Defender Antivirus permanently, you have to follow these instructions.
Enable external drive scanning
By default, the antivirus built-in to Windows 10 doesn't scan for malicious and unwanted programs inside removable storage, but you can change this behavior with these steps:
- Open Start.
- Search for PowerShell, right-click the top result, and select the Run as administrator option.
-
Type the following command to allow scanning for removable drives during a quick or full scan and press Enter:
Set-MpPreference -DisableRemovableDriveScanning $false
After you complete the steps, the anti-malware feature will scan external storage devices during a full scan.
If you want to revert the changes, use the same instructions, but on step No. 3, use this command: Set-MpPreference -DisableRemovableDriveScanning $true.
Disable archive scanning
By default, the antivirus scans .zip, .cab, and other archive files, but if you have a reason not to scan archives, you can disable the option with these steps:
- Open Start.
- Search for PowerShell, right-click the top result, and select the Run as administrator option.
-
Type the following command to allow scanning for archives files during a quick or full scan and press Enter:
Set-MpPreference -DisableArchiveScanning $true
Once you complete the steps, Microsoft Defender won't scan archive files.
If you want to undo the settings, you can use the same instructions, but on step No. 3, use this command: Set-MpPreference -DisableArchiveScanning $false.
Enable network drive scanning
To allow Microsoft Defender Antivirus to scan network drives, use these steps:
- Open Start.
- Search for PowerShell, right-click the top result, and select the Run as administrator option.
-
Type the following command to enable network drive scan during a quick or full scan and press Enter:
Set-MpPreference -DisableScanningMappedNetworkDrivesForFullScan $false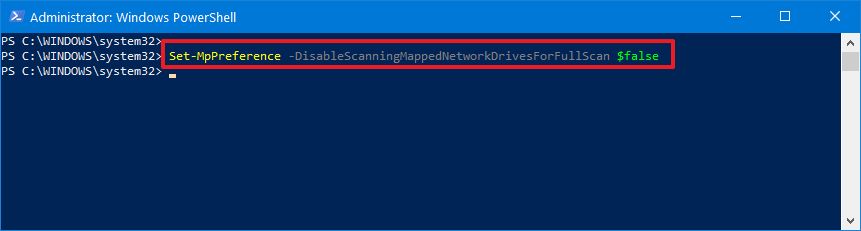
After your complete the steps, network drives will be scanned for malicious and unwanted programs during a full scan.
If you want to roll back the original settings, you can use the same instructions, but on step No. 3, use this command: Set-MpPreference -DisableScanningMappedNetworkDrivesForFullScan $true.
You can always check this Microsoft support page to learn about the settings you can configure for the antivirus.
More Windows 10 resources
For more helpful articles, coverage, and answers to common questions about Windows 10, visit the following resources:


0 comments:
Post a Comment