Wednesday 31 January 2024

https://ift.tt/5QgZWo8

This tutorial will help you upgrade the Linux kernel on Ubuntu. The benefit of upgrading kernel is, among many others, to get faster and better hardware performance. In this article, we picked up Kubuntu 22.04 "Jammy Jellyfish" as example to upgrade the kernel version from its default 5.15 into 6.5. It should be simple and easy to do. Now let's do it. 

(Kubuntu 22.04 with the latest Linux kernel version )


Subscribe to UbuntuBuzz Telegram Channel to get article updates.


1. Check Kernel Versions


$ uname -a 
$ apt-cache search linux-image-generic
$ apt-cache policy linux-image-generic
$ dpkg -l | grep -i linux-image-generic
$ lsb_release -a

Meanings:

First command will show installed kernel version. For example, on Kubuntu 22.04, before upgrade it shows 5.15. After upgrade, it will show 6.5.

Second command will search for packages related to the Linux kernel available on Ubuntu. To upgrade our kernel, we will install the package named linux-image-header-hwe-22.04.


Third command will show a listing of available versions of the Linux kernel package linux-image-generic-hwe-22.04, in newer higher order, with triple stars (***) --if any-- pointing to the installed one.


Third command will show a listing of installed packages in the system related to, and including, linux-image-generic, the kernel package with versions and more information.

Fourth command will show information regarding distro version and codename. This is important to determine which kernel versions available to use. For example, for our system it shows "ubuntu" and "22.04 LTS" and "jammy". This is why we select linux-image-generic-hwe-22.04 package for upgrading our kernel.


2. Install New Kernel Version


$ sudo apt-get install linux-image-generic-hwe-22.04

Meaning:

This command will download and update new Linux kernel by installing linux-image-generic-hwe-22.04. Note that this does not remove the old kernels at all.


3. Reboot


$ sudo reboot 

Meaning:

This command will restart your computer. After this step, repeat step 1 and you should find your Ubuntu now runs with the new kernel i.e. the 6.5 version. If this works, then it is successfully installed and you do not need to do optional steps number 4-5 below. Congratulations!


****


4. Update Bootloader (Optional)


Only if you encountered any errors, do the following:

$ lsblk
$ sudo grub-install /dev/sdb3 # see notes (*)
$ sudo update-grub

Meanings:

First command will show a listing of existing hard disk partitions as well as any other storage (cdrom, sdcard, external drives) currently attached. In this output, you should find your EFI partition. For example, ours is /dev/sdb3.

Second command will install the bootloader GNU GRUB if you do not have it installed yet. On most cases, this is not required. However, in this example, ours is /dev/sdb3.

Third command will actually update your bootloader to recognize and use by default the new kernel you installed.

(*) Notes: only do this command if the bootloader itself has not been installed.


5. Revert Back to Older Kernel Temporarily (Optional)

Under the GNU GRUB Bootloader when booting, under Ubuntu, select Advanced Options

A listing of kernel versions will show. 

With keyboard arrow keys up and down, select an older kernel version, for example 5.15, then press Enter.

System will boot and run with older kernel.


 ****


See Also

Relationship between Linux and GNU by The GNU Project


References

Kernel Upgrade  by Ubuntu Community Wiki

How do I update my kernel to the latest one? by Askubuntu

Upgrading Linux Kernel by Learn Ubuntu Blog


Originally posted here: https://ift.tt/xqsQJIB

Friday 26 January 2024

https://ift.tt/PUpV4Yx

This tutorial will help you install all requirements for C++/OpenGL programming and immediately start learning by reading opengl-tutorial.org. You will be able to build all the source codes both ways manually using commands as well as using Qt Creator. We dedicate this to all Computer Science & Informatics students everywhere especially those who are currently learning OpenGL lectures. Now let's exercise!


Subscribe to UbuntuBuzz Telegram Channel to get article updates.


Setup Code Editor

The tutorial advises us to use Qt Creator so we do it:

$ sudo apt-get install qtcreator

Once installed, Qt Creator (green) will be available on applications menu.  


Setup Compiler

To install C++ compiler we use this command:

$ sudo apt-get install g++

Once installed, it will be usable from command lines in the Terminal.


Setup OpenGL Library

To install the required libraries and tools, according to the tutorial we use this command:

$ sudo apt-get install cmake make g++ libx11-dev libxi-dev libgl1-mesa-dev libglu1-mesa-dev
Picture:
 
However, on Ubuntu 23.10 "Mantic Minotaur", we encountered errors and we found that we need to add more packages as the following:

$ sudo apt-get install xorg-dev libglu1-mesa-dev
 
Picture:

Once all requirements installed, you are ready to proceed to the next step.

Download Source Code and Setup Project Folder

You need the source code examples. The tutorial provides that in form of package. Thus, You need to extract the package into the right folder and know where to put another folder for the Qt Creator project. 

(1) Create a new folder "Projects" in your Home.

(2) Visit Part 1 of OpenGL Tutorial (see References section below) -> see Building on GNU/Linux section -> click Download the source code from step number 3 -> click Tutorials source code on GitHub, .zip -> you downloaded a package file named "ogl-master.zip" by 12 MB. See picture below.

(3) Put ogl-master.zip into Projects. 

(4) Extract it.

(5) You got a folder "ogl-master" containing all the source code files organized in a lot of folders, one of them are tutorial01_first_window, and one CMakelists.txt.

(6) Remember this folder for Qt Creator will put its project folder "build-ogl-master-x-y" also in this folder. The path is ~/Projects following the tutorial.


Compile, Build and Execute Manually

You need to test whether you can compile, build and execute the whole of the source code samples. This is reached using CMake automatic build tool.

(1) Right-click -> Open in Terminal inside the folder "ogl-master".

(2) Create a new folder named "build".

(3) Run this command line and please wait for compilation will take place:

$ cmake ..


(4) Compilation process finished. 


(4) Visit the folder "build".

(5) The "build" folder now contains a lot of files required for the next compilation process. Among those files are "Makefile" and a bunch of "*.sh" files.


(6) Run this command and wait for the process it will take much longer to finish:

$ make all

 (7) Compilation finished by 100%.


(8) Leave the "build" folder.

(9) Visit back "ogl-master" folder. 

(10) Visit "tutorial01..." folder.

(12) Now, this folder contains an executable file named the same as the folder produced by compilation process above. On Ubuntu, it looks like a grey icon with gear.

(13) Execute the executable file and use TAB key to automate typing the name:

$ ./tutorial01...


(14) Program runs. A window with black or blue color should appear on screen.

 Program 01 First Window


(15) Repeat step number 9-14 for other folders from tutorial02 to tutorial18 and from misc01 to misc05. For example, below are sample codes triangle, matrices, and cube:


Program 02 Red Triangle

Program 03 Matrices 

Program 04 Colored Cube

(16) To this point, you are able to compile, build and execute the programs manually. Continue next step to do it automatically with Qt Creator.


Compile, Build and Execute Automatically

You need to configure Qt Creator to use CMake and point to the source code directory to be able to compile, build and run by clicks. Essentially, when you choose a tutorial and press Run, Qt Creator will automatically compile and build and run the program for you.

(1) Run Qt Creator.

(2) File -> Open File or Project -> navigate to "ogl-master" -> select CMakeLists.txt -> Open.


(3) A new project "Tutorials" will open consisting of all source code files from ogl-master in form of folders with hammer logo. Notice CMakeLists.txt file is listed at top.


(4) Click Hammer (Build) to bottom-left. This is equal to 'make all' step above. Please wait for the process takes several minutes. Once finished, it will show 100% message like before under Compile Output at bottom.


(5) In the project listing, open tutorial01 -> Source -> tutorial01.cpp -> source code will open. 


(6) Projects -> Build & Run -> Run -> Working directory: -> change it to corresponding tutorial directory and in this case tutorial01_first_window -> go back to Edit. Essentially, every tutorial should point to its own directory under Working directory option.


(7) Right-click tutorial01 -> Run -> it compiles -> it runs.


(8) To compile, build and execute other programs, repeat step number 5 to 7.


Start Learning

Finally, you can start learning by trying out the source code samples one by one using Qt Creator.  Edit the code, Run, see what changes, and repeat. All in all, read the tutorial as your reference. Happy hacking! 


See Also

Visual Basic Alternatives

Compilation of Various Programming Languages Setup on Ubuntu


References


http://www.opengl-tutorial.org/beginners-tutorials/tutorial-1-opening-a-window/


https://github.com/openMVG/openMVG/issues/85


https://medium.com/geekculture/a-beginners-guide-to-setup-opengl-in-linux-debian-2bfe02ccd1e


https://programminggems.wordpress.com/2019/11/27/getting-started-with-opengl-from-c-c/


http://www.codebind.com/linux-tutorials/install-opengl-ubuntu-linux/


Thank you to the authors of OpenGL Tutorial!


****


This article is licensed under CC BY-SA 3.0.

Originally posted here: https://ift.tt/NHbyDS6

Monday 22 January 2024

https://ift.tt/euO6ywI

This tutorial will help you to get LibreOffice 7.6 on Ubuntu side-by-side with and without removing the preinstalled version. We offer several ways you may choose to do so. It can be practiced to any one of Official Flavors like Kubuntu and Lubuntu, as well as derivatives like Elementary and Zorin. Now let's practice that.


Subscribe to UbuntuBuzz Telegram Channel to get article updates.


Checking Your Ubuntu Version

First, you should make sure what version is your Ubuntu system:

Command:

$ lsb_release -a 


Sample output:

Distributor ID:    Ubuntu
Description:    Ubuntu 23.10
Release:    23.10
Codename:    mantic


Sample meaning:

Output above means Ubuntu version is 23.10 also known as Mantic Minotaur. You should do the installation commands according to your Ubuntu version and codename.


Method A. Use Ubuntu 23.10 or Later

Since version 23.10 Mantic Minotaur, Ubuntu is bundled with LO 7.6 already. If you want a quick way to use a computer system with LO 7.6, you should consider using Mantic Minotaur or later. 


Method B. Upgrade LO

If the latest versions of LO is available in the official repository of your current Ubuntu version, then you can upgrade directly to LO 7.6 today (otherwise you should find another way).


1. Checking available package versions:

$ apt-cache policy libreoffice


Sample output:

libreoffice:
  Installed: 4:7.6.4-0ubuntu0.23.10.1
  Candidate: 4:7.6.4-0ubuntu0.23.10.1
  Version table:
 *** 4:7.6.4-0ubuntu0.23.10.1 500
        500 https://ift.tt/8gjQlSX mantic-updates/universe amd64 Packages
        500 https://ift.tt/QYhRxOt mantic-security/universe amd64 Packages
        100 /var/lib/dpkg/status
     4:7.6.2-0ubuntu1 500
        500 https://ift.tt/8gjQlSX mantic/universe amd64 Packages


Sample meaning: 

Installed version is LO 7.6 shown by the triple stars (***) sign. 


2. Upgrading package normally (if failed, see next step):

$ sudo apt-get install libreoffice

Wait for the process until its completely finished.


3. Upgrading package via backports repository if normal way failed:

$ sudo apt-get install -t jammy-backports libreoffice # for Ubuntu 22.04

$ sudo apt-get install -t focal-backports libreoffice # for Ubuntu 20.04

$ sudo apt-get install -t bionic-backports libreoffice # for Ubuntu 18.04


Wait for the process until it's completely finished.


Method C. Install LO 7.6

1. Visit https://www.libreoffice.org. 

2. Pick Download -> Download LibreOffice from the top menu.

3. On Download LibreOffice page, see the section version 7.6 (or later).


4. On Select operating system, select GNU/Linux (64-bit) (deb). Normally, this is automatic.

5. Click Download.

6. You will be redirected to Donation page. Wait for a while for the download will start automatically.

7. You downloaded LibreOffice 7.6 in .tar.gz package file format.

8. Extract the package file. 

9. Enter the folder.

10. Right-click in an empty space -> Open in Terminal.

11. Type this command and press Enter:

$ sudo dpkg -i *.deb

12. LibreOffice 7.6 is installed. 

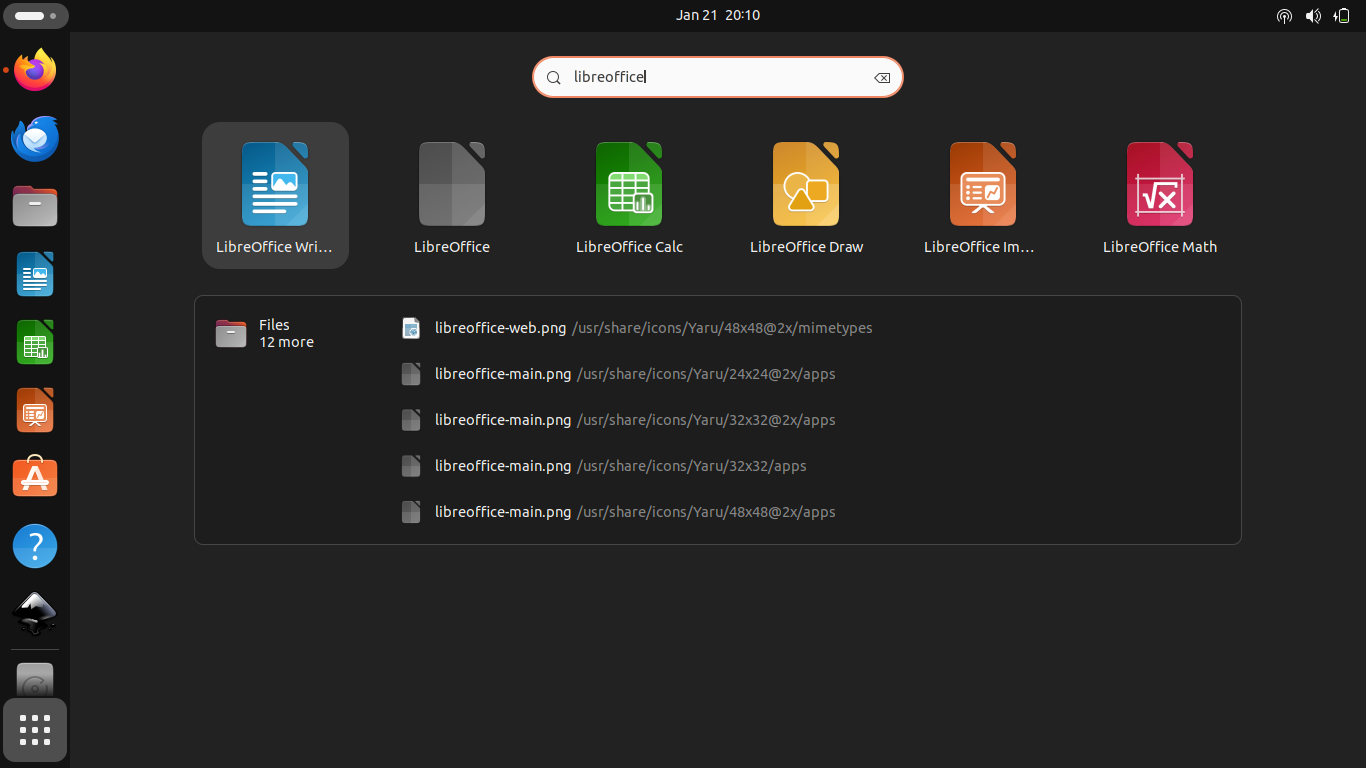
13. Find LibreOffice 7.6 on applications menu. You will be able to distinguish it with the old version as their icons are very different.


Method D. Alternative Install LO via PPA

Open Terminal and type this command followed by Enter:

$ sudo apt-add-repository ppa:libreoffice/ppa # press Enter to accept it

$ sudo apt-get update

$ apt-cache policy libreoffice # this should show a new version from launchpad source

$ sudo apt-get install libreoffice 

This will replace preinstalled one with LibreOffice 7.6 from the PPA. 


References 

Ubuntu Mantic Minotaur Release Notes

How To Install LibreOffice on Ubuntu or Mint

How To Install LO 7.6 PPA on Ubuntu

****


This article is licensed under CC BY-SA 3.0.
Originally posted here: https://ift.tt/Q6Foi4l

Monday 15 January 2024

https://ift.tt/rIA58b4

This tutorial will help you create PDF documents on Ubuntu computer with default applications. You can do so using LibreOffice (full set consisted of Writer, Calc and Impress) and Firefox. You can do this quickly without adding any new application. Now let's try it out! 


Subscribe to UbuntuBuzz Telegram Channel to get article updates.

Reading PDF


Firstly, to read a PDF document, double click it and it will open in Document Viewer (Evince) on Ubuntu. Alternatively, PDF can be viewed using Mozilla Firefox by going to menu Open or simply drag-and-dropping it into.


(PDF being read using Document Viewer, notice the left sidebar)


(PDF being read using Firefox, with left sidebar showing table of contents)


Make PDF using LibreOffice


1. Write or open a document in Writer.

Note: any document format that can be opened with LibreOffice can be exported to PDF.

2. Save document.

3. Click PDF button next to Printer on the toolbar. (See choice number 1)

You can also do it from menu File -> Export As -> Export as PDF.  (See choice number 2 in picture below)

4. A window will open and navigate the location to save the PDF.

5. Export/Save and PDF created.

6. Do steps number 1-5 for other documents in Calc, Impress, Draw and Math. 


Make PDF using Firefox Web Browser


1. Visit a website in Firefox.

2. Go to menu -> Print (Ctrl+P) -> Printing dialog will show.

3. Select Save to PDF to the printer option on top.

4. Save. 

5. A dialog will show and navigate the location to save the PDF. 

6. PDF created.


****

See Also 

Collection of Calc (Excel Alternative) Tutorials with Exercises

Collection of Writer (Word Alternative) Tutorials with Exercises

Quick Exercises to Learn Writer

Quick Exercises to Learn Calc

Quick Exercise to Learn Impress

****


This article is licensed under CC BY-SA 3.0.
Originally posted here: https://ift.tt/Vml1qCx

Saturday 13 January 2024

https://ift.tt/RNixX4Y

This tutorial will help you place copies of fonts inside document with LibreOffice. This helps digital document compatibility and interoperability with other software users especially when they use different systems. This can help solve missing fonts issue which often hinders people adopting free software and GNU/Linux. Now let's try it out!


Subscribe to UbuntuBuzz Telegram Channel to get article updates.

Advantages and Disadvantages 

One among the advantages is it guarantees your document you write on Ubuntu with LibreOffice to be read normally without missing fonts for readers reading it on different computers (and vice versa) especially those with different system (Windows and MacOS) and thus different set of fonts. For example, if you use Liberation Sans fonts on your document, when you send it to your friends at the company, they may complain for missing fonts because they don't have Liberation Sans fonts (likewise case with you receive from them document with Times New Roman). And among the disadvantages is the file size is bigger than normal.


Procedures

1. Write a document using Writer, Calc or Impress

2. Go to menu File -> Properties -> Font.

3. Check mark to "Embed fonts in the document."

4. Check mark to "Only embed fonts that are used in documents."

5. OK.

6. Save document. 

7. Optionally, export document as PDF.


(LibreOffice Writer's configuration for document font embedding)

To check the result is easy: view the document file using your file manager and you should be able to tell that the resulting file size (.odt .ods .odp .pdf) should be larger than normal document file produced without font embedding. Especially, the pdf document will tell in its Properties what fonts included within the file.


(Comparison of file size between normal and edited document with embedded-font)

Another way to check it up: open the document file on another computer especially one that does not have the fonts used in the document. You should be able to tell that the document is read normally without any problem with missing fonts. 


(Properties of the exported pdf document showing list of fonts embedded inside it)


****

See Also


****


This article is licensed under CC BY-SA 3.0.


Originally posted here: https://ift.tt/Fz9rOtI
https://ift.tt/eIxRq5X

This tutorial will show a basic method to resize and shrink hard disk drive partitions and filesystems that can be practiced for any computer as well as laptop. You will need an Ubuntu Livecd which GParted software is available built-in either in form of a DVD or USB flash drive to do so. Our way to explain this is by using examples of C, D, and E drives and comic pictures with the hope of you can follow it easily. Now let's learn and practice.


Subscribe to UbuntuBuzz Telegram Channel to get article updates.


Enlarging [C] Disk Drive


To make the capacity larger to C partition, it requires an unallocated space next to it. This means there are two choices to do partition enlargement:

First choice is when there is an enough unallocated space next to C partition:


1. Select C Disk Drive.
2. Right-click > Resize/Move.
3. A dialog will show.
4. Enter new bigger size in number to New Size box. For example, if current C is 5000 MiB, and you want to enlarge it to 10000 MiB (twice its size), then delete 5000 and fill in 10000, as long as the new size is not larger than the what the unallocated can provide.
5. Click Resize/Move.
6. The dialog will close and a new job of Grow will show on main window with a new unallocated will show under the selected partition. This is not yet applied.
7. Click Apply button.
8. Click Apply/OK.
9. GParted will show Applying pending operations for a while. Wait for it to finish.
11. Click Close.

First choice finished. 


Second choice is when there is no unallocated space next to the C partition. In this case, you must either delete neighboring partition or shrinking it to make an unallocated space.

1. Select a neighboring partition next to C.
2. Shrink it to make enough unallocated space. See Shrinking section below.
3. Unallocated space created next to C.
4. Enlarge C using explained method above.
5. The C partition enlarged.

Second choice finished.


Shrinking [C] Disk Drive


To make the capacity smaller to C partition:

1. Select C partition (/dev/sda1)
2. Right-click > Resize/Move.
3. A dialog will show.
4. Enter new size to New Size (MiB) box. For example, from 10000 MiB to 5000 MiB (half the size).
5. Click Free space following (MiB) box in order to see the changes preview. The slider will move to illustrate the new capacity. In this example, it is now half the size.
6. Click Resize/Move.
7. The dialog will close and a new job of Shrink will show on main window with a new unallocated will show under the selected partition.
8. Click Apply button.
9. Click Apply/OK.
10. GParted will show Applying penting operations for a while. Wait for it to finish.
11. Click Close.
12. Main window will show 0 operations pending status to the bottom and the result of shrinking as now the partition list changed. Notice the unallocated item.


Enlarging and Shrinking Other Partitions


To enlarge or shrink D, E, and other disk partitions including partitions in USB flash drive as well as NVME SSD is the same as what explained above. You can do that.


**** 


See Also

GParted Basic Guide

****


This article is licensed under CC BY-SA 3.0.


Originally posted here: https://ift.tt/ZC8XmM2

Thursday 11 January 2024

https://ift.tt/uvGIRZJ

This tutorial is a simple story of how we revive our old phone from 2014 Lenovo S390 which by now it is kind of "expired" e.g. no longer be able to access the internet anymore and awfully limited of features. We managed to enable this phone for daily work purposes including to browse the web, read ebooks, watch YouTube, playback audio/video, download anything, Telegram messaging, even transfer files with Ubuntu laptop and beyond thanks to free software


(Ubuntu laptop to the left showing Nautilus accessing phone filesystem via wifi and a very old Lenovo phone to the right showing full featured Telegram FOSS. Thank you brother Andi owner of Kedai Wali for lending his camera.)


Limitations

  • Not officially supported anymore. 
  • No longer be able to browse the internet (unless with tricks).
  • Small memory.
  • Slow processor.
  • Old built-in software.
  • Unable to install latest versions of some software.
  • Unable to use KDE Connect. Alternatives needed.
  • Unable to transfer files via USB cable. Alternatives needed.
  • Requires a computer to download some first applications.
  • Broken physical power button.
  • Difficult to access volume buttons.
  • Sometimes requires reboot and shutdown.


--------

Essential programs: 


Conscrypt Provider


This is the first application we installed. This solves the problem of old phone and apps no longer be able to browse the internet because of its older TLS/SSL version no longer supported anymore. It says: "Conscrypt Provider provides TLS 1.3 to apps supporting older Android devices." Get it from F-Droid.  [Version: 3]


Kiss Launcher


The whole of your phone user interface follows your positioning of the phone by both ways portrait and landscape and you are able to find apps by text search like in the desktop. The developer says "93% of users that try KISS for a week are still active users after 3 years." and now we are part of them. [Version: 3.2.1.0]


F-Droid Classic


Because of the old phone limitations, we can only install F-Droid the Classic version not the regular one. Apparently, it works and still provides many useful applications. [Version: 1.2]


Open Explorer Beta


This is our file manager on Android. We have the best experience with it. It supports both thumbnails and detailed list views, sortings, image/video previews, writing to SD Card, being small and fast etc. [Version: 0.212]


Firefox for Android


This is our main web browser. Surfing modern websites, blocking ads, playing audio and video, save as PDF work very well. Important to note that it also works with DNS over HTTPS (DoH) enabled. Get it from Mozilla. [Version: 68.0]
 

Fennec F-Droid


This is our secondary web browser. We need two browsers or more because if one failed, one might worked. Surfing modern websites, blocking ads, playing audio and video, save as PDF work very well. Important to note that it also works with DNS over HTTPS (DoH) enabled. [Version: 68.12]


End of essential programs.

--------

Beginning of daily life programs:


Amaze File Manager


To transfer files from phone to Ubuntu laptop via wifi, we use this. To do the otherwise, see Primitive FTPd section. This is an alternative to KDE Connect. It can be used as powerful file manager, too. [Version: 3.8]


Download Navi


This is a very fast multitreaded download manager similar to IDM for Android. [Version: 1.6.2]


DiskUsage


This is our Baobab (GNOME Disk Usage Analyzer) on Android. We need it to tell us which folders occupy disk capacity the most. This helps us to remove folders to keep free disk space. [Version: 3.8]


Document Viewer 


This is our PDF reader. We read PDF a lot. To us, this is the smallest, fastest yet comfortable to use PDF reader with bookshelf user interface to show recent books. [Version: 2.7]


File Manager by Tibor Kaputa


This orange logo with three white folders is our alternative file manager. Our main one is Open Explorer. [Version: 4.3.1]


Music


This is our audio player. It plays MP3 recordings just fine with playlist and repeat features. [Version: 6.0.1r63]


My Notes


When we need to digitally write some poems, some notes, some drafts, we use it. [Version: 1.5.1]


Newpipe Legacy


This is our YouTube application, but better. Usually, we use the regular version but because of limitations mentioned we can only use the legacy one instead. All in all, we can still play any video, create any playlist we want, and download videos as many as we want using Newpipe Legacy. [Version: 0.20.8]


Primitive FTPd


To transfer files from Ubuntu laptop to phone via wifi, we use this. To do the otherwise, see Amaze File Manager section. This is an alternative to KDE Connect. [Version: 7.0]


Simple Keyboard


We replace built-in Google keyboard with Simple Keyboard and it is very comfortable. [Version: 5.16]


Telegram FOSS


We use Telegram FOSS daily. We need it for teaching work at our computer course and it works very well* as well as normal communication with family and commercial activities such as dealing with payments etc. [Version: 10.2.6]

*) At the time we write this article, it supports latest Telegram features already such as video conferences, recordings, group topics, folders, stories etc.


VLC


To play musics and movies. 

[Version: 3.5.2]


Volume Control by Andrea Mancini


Because the physical buttons are difficult to access, we use this to adjust volume via top menu by swiping it down and tapping its own [+] or [-] button. [Version: 1.0]


****


This article is licensed under CC BY-SA 3.0.

Originally posted here: https://ift.tt/nK4DzNa

ShortNewsWeb

Blog Archive

Recent Comments

Popular Posts

Translate

System Admin Share

Popular

Total Pageviews